Connecting to the World
| I think you can still have a computer and not be connected to the Internet. Wait, let me check on thatumm, yes, you can, but it's like cutting off your computer's head in today's world. Without the Internet, you and your computer are just going to play Solitaire in your underwear all day. Of course, maybe that is what you like to do anyway. I'm not insulting your chosen path in life, but don't you know what else is out there on the Internet? At the very least, you could order more underwear (see http://www.freshpair.com/). Dial-upWhile most of the Internet world is speaking in terms of broadband, many people are still using dial-up connections. If you need to connect to the Internet with a dial-up modem, pull up a chair because we need to have a talk. Support for many modems in Linux is not so good. The culprit is a type of modem called a Winmodem. A few years back, hardware makers tried to cut costs by manufacturing cheaper modems that used lesser hardware and instead, relied on some bundled Windows software to run the modem. The result is that we now have what are called hardware modems and software modems. Hardware modems, such as those made by U.S. Robotics, are mostly supported in Linux. Software modems, which usually include the cheapest choices, are sparsely supported in Linux. Even the few software modems that can claim Linux support (sometimes dubbed Linmodems) often require a lot of configuration that is extremely complex. You might as well go out and buy a hardware modem instead of wasting lots of time futzing with all the necessary configuration to get a software modem running in Linux. How do you tell whether you have a Winmodem or a hardware modem? The best way to find out whether something works is to actually try it. You can also look online to see what type of modem you have. Open the hardware browser in your distro to get the brand and model of your modem.
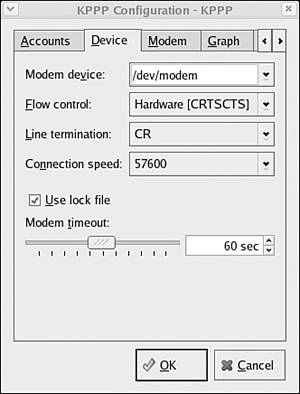
Hardware Browser in FedoraMain menu > System Tools > Hardware Browser Hardware Browser in MandrakeMain menu > System > Configuration > Configure Your Computer (from inside the Mandrakelinux Control Center) Hardware > Hardware Find your modem in the list of hardware, and write down the brand and model of the modem. Next, go to an online listing of Winmodems at http://www.devidal.tv/~chris/winmodems/ to see which list your modem is in. There is also a Linux Documentation Project page on Winmodems at http://tldp.org/HOWTO/Winmodems-and-Linux-HOWTO-1.html#ss1.3. If you do have a Winmodem and want to try to make it work, check out http://www.linmodems.org/. KPPP
KPPP is the KDE program for Internet dialing. The program is included with both Mandrake and Fedora if you chose to install KDE. If you don't have KPPP, you can install the program from your installation disks. (See "Installing New Software," later in this topic, for more information.) Even though KPPP is a KDE program, it is really the best choice for both GNOME and KDE users. There isn't a GNOME substitute at this time that is easier than KPPP.
Now you should be ready to try to connect. You will hear all the creepy noises that modems make. When the connection is successful, the KPPP window minimizes to an icon on your panel.
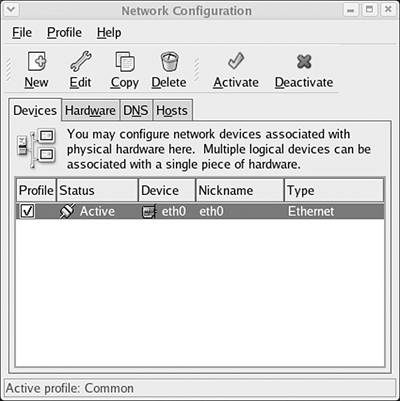
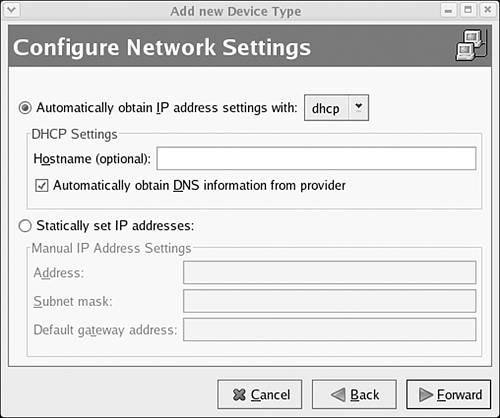
Broadband and Local Area NetworksLinux likes you. Broadband connections, such as cable or DSL, and local area networks (LAN), such as those found in offices and some homes, are the easiest kind of connections to work with in Linux. In an office environment, you need to find out from your network administrator whether your office uses Dynamic Host Configuration Protocol (DHCP) or whether you need specific IP information. In your home, using a cable or DSL connection, you need to find out from your ISP whether it automatically assigns addresses using DHCP or whether you need IP and other network configuration information. Some cable Internet providers also require you to give your computer a specific name in the network settings, so make sure you get all the necessary information. As noted earlier for dial-up modem users, you might run into some attitude from your ISP. Many ISPs say they do not support Linux. If you end up having to ask your ISP for network configuration information, be firm. You are not asking them to support Linux; you are just asking for the network information. Insist that you get the help and information you need: You are paying them. Setting Up Your Connection in FedoraThe Network Configuration window (see Figure 3.8) is the place to enter any IP or other network information. You can get to the Network Configuration window by going to your main menu and selecting System Settings > Network. You will be prompted for your root password before you can enter any information. Figure 3.8. The Network Configuration tool in Fedora.
The Network Configuration tool has a menu, a toolbar, and a series of four tabs. In the menu options, you can save your changes, work with multiple profiles, and access the help documentation. The toolbar choices change, depending on which tab you are in. Devices TabThe first tab lists the network devices that are configured on your computer. These are not the physical devices, but they refer to virtual connections. For each piece of physical network hardware in your system, you usually have a device listed. You can also associate multiple devices with one piece of hardware. Hardware TabOn this tab, you can configure your network card. Most likely, the settings that were put in place during installation will be fine. DNS TabIf you are using DNS on your network, you can enter a hostname and DNS addresses. Hosts TabYou can enter specific IP addresses and hostnames for computers on your network. If your network is using DNS, these settings override that.
Setting Up Your Connection in MandrakeRemember the Mandrakelinux Control Center? We're going back to it. Open the Control Center and choose Network & Internet. Now you have a lot more choices to look at here. Most of the icons in this category are task oriented, so if you want to add a new connection, choose New Connection. Here is a look at what all those icons are for. New ConnectionThis opens a wizard with which you can add any of the available Internet connections that Mandrake knows about, including modem, LAN, and wireless. Internet AccessMany of the fields on this tab are for information that you should enter when you add a new connection. This module gives you a shortcut to edit or enter DNS and hostname information. Manage ConnectionsAt the top is a drop-down menu where you can choose a connection to edit the settings. Below that are a few tabs where you can edit IP and other network information. Monitor ConnectionsHere you can view the activity on your configured connections. Information displayed includes the volume of data sent and received and the speed. Remove a ConnectionThis module lists your connections in a drop-down choice so that you can choose one to delete, if you need to. ProxyIf you are behind a proxy server, you can enter the address information for the proxy here. Internet Connection SharingIf you are on a small or home network that does not have a computer acting as a dedicated server for the Internet connection to the rest of the computers on the network, some computer has to step up and volunteer for the job. If yours is the computer on your network that is directly connected to the Internet, this module walks you through a wizard of choices so that you can share that connection with other computers on your network.
WirelessMany homes and businesses are now using wireless networks. You can go to many public wireless "hot spots," from libraries, to baseball stadiums, to coffee shops, and be able to get online. Some prominent ISPs are giving wireless routers to new customers with broadband service. Wireless support in Linux is new, so it can be shaky still. There is a little extra work to setting up a wireless connection and getting it to work in Linux. If you are undecided about whether to go wireless, make sure you consider all the reasons. Wireless may make sense for you if . . .
Think twice about wireless if . . .
What to GetA basic wireless network consists of an Internet connection, a wireless router or wireless access point, and a computer with a wireless network card.
The wireless access point or router you get does not matter in relation to your Linux system. The two will never meet. Buy the access point or router that you deem best for your needs. The wireless network interface card (NIC) you buy matters a lot in relation to your Linux system. Right now Linux support for wireless NICs is best for PC cards. Although there are wireless NICs that can connect to your computer via a PCI slot or USB port, there are not easily available drivers for those types of cards. Determined types can try searching out and installing drivers for other network card types, but most users should stick with PC cards. You can find the latest information online and buying advice on wireless hardware for your Linux system. One good site is http://www.hpl.hp.com/personal/Jean_Tourrilhes/Linux/. New hardware comes out all the time, so search online to find up-to-date information. Configuring Your Wireless Network Access Point or RouterTo set up your access point or router, you need the manual that came with it. The setup disks and instructions probably were written for Windows users. If you have a Windows computer in your home or office as well as your Linux system, keep that software aside. Follow the instructions in the manual to hook up the device on your network. This usually involves hooking up the access point or router on the network somewhere between your broadband connection and your computer. When the device is hooked up on the network and plugged into power, you can usually go to the IP address that is listed in your manual in a Web browser. From the configuration screen in your browser, you can change the settings on the device.
If you have a lot of trouble and there is a Windows computer in the house, don't be afraid to cheat: Use the Windows software that came with the device on a Windows computer to do the initial configuration for your access point or router. It's not your fault or Linux's fault that wireless hardware makers skew everything toward Windows. You can always jump over to your Linux computer after the initial configuration and change more settings through the Web browser administration page. Configuring Your Wireless Network CardThe first thing you need to do is get your NIC connected to your computer and detected by Linux. With a PC card, the most common wireless NIC, pop it into the PCMCIA slot on your computer. The easiest way to see that the card was detected is to look in your hardware browser to see if it is listed. Hardware Browser in FedoraMain menu > System Tools > Hardware Browser Hardware Browser in MandrakeMain menu > System > Configuration > Configure Your Computer (from inside the Mandrakelinux Control Center) Hardware > Hardware
Next, you need to set up the wireless connection in Linux. It's a good idea to do this configuration within range of your wireless access point or router so you will know whether you are successful. In both Fedora and Mandrake, you can set up your wireless connection by following the same steps used to set up a LAN connection. Just choose Wireless as your connection type and step through the wizard. Most problems people encounter when setting up wireless connections in Linux are the result of hardware incompatibility, so make sure you are certain that your wireless network card will work in Linux. |
EAN: 2147483647
Pages: 141


