Windows Journal Basics
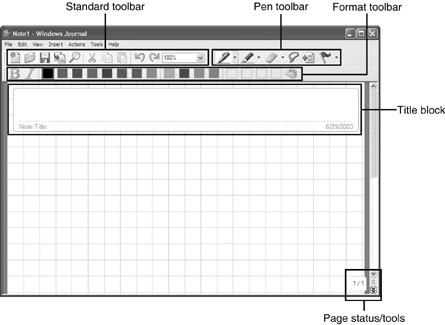
| The rest of this chapter is devoted to the basics of Windows Journal, which you'll want to absorb before moving on to Chapter 7, "Advanced Windows Journal." This chapter discusses the Windows Journal interface, as well as working with your handwritten notes and sharing your notes with others. The InterfaceFigure 6.2 shows the different sections of the Windows Journal interface. Figure 6.2. These are the main components of the Windows Journal interface. These sections include the following:
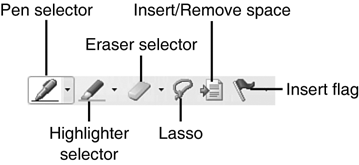
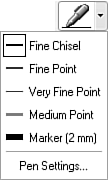
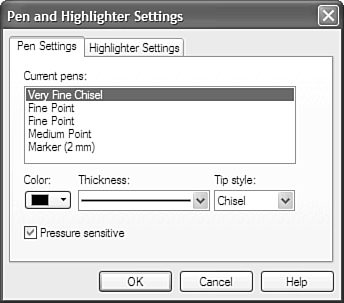
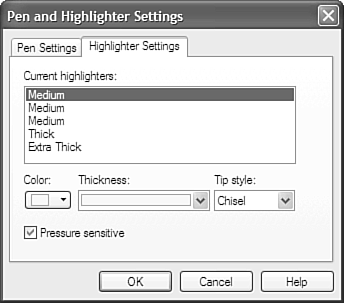
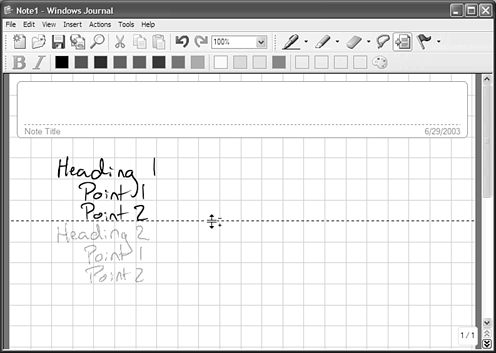
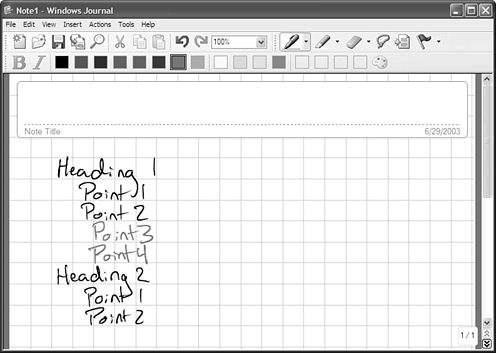
Figure 6.3 identifies the different parts of the Pen toolbar, which is where you select most of your tools in Windows Journal. Figure 6.3. The tools available on the Pen toolbar. Take Note: Note-TakingNote-taking is now natural on the Tablet PC. You can use your pen to write, draw, scribble, highlight, and erase notes. You can change the color of your pen by just tapping on the pen color you want. You change your pen style by opening the Pen drop-down list on the Pen toolbar (see Figure 6.4). If you want to further customize the pen settings, select the Pen Settings option; this opens the Pen and Highlighter Settings dialog box with the Pen Settings tab displayed. There, you can change various pen settings to meet your needs, as shown in Figure 6.5. Figure 6.4. The options available from the Pen drop-down list. Figure 6.5. The Pen and Highlighter Settings dialog box lets you select the characteristics of your pen. In the Pen and Highlighter Settings dialog box, you can change the color, thickness, and tip style of the pen, as well as whether it is pressure sensitive. Pressure sensitivity makes notes look more natural, because the harder you press, the thicker the line is (up to the pen's maximum thickness as set in this dialog box). Note that some Tablet PCs do not have pressure-sensitive pens, so this may not be an option for you. After you've written some notes, you can highlight them using Journal's Highlighter tool. You can customize the Highlighter tool by opening the Highlighter drop-down list and either choosing the style you want to use or selecting the Highlighter Settings option. Performing the latter again opens the Pen and Highlighter Settings dialog box, but this time with the Highlighter Settings tab revealed, as shown in Figure 6.6. Figure 6.6. The Pen and Highlighter Settings dialog box lets you change the Highlighter tool's qualities. As you use Windows Journal, realize that you can do anything you want with the pen write, draw, change pen color and type, select text, and so on. Adding "Paper"With paper notebooks, if you didn't leave enough space for notes on a particular topic, you need to start a new page. Not so with Windows Journal. With Windows Journal, you simply insert space as needed. To do so, you use the Insert/Remove Space tool; Figure 6.7 shows the Insert/Remove Space tool as it appears when you start to insert a space. Figure 6.7. Use the Insert/Remove Space tool to add more space between items. Look at the differences between the screens in Figures 6.7 and 6.8. Notice the additional space and text below Heading 1, Point 2. I made room for the addition of Point 3 and Point 4 by using the Insert/Remove Space tool. Figure 6.8. Notice the additional points in this figure. To insert space in your note, do the following:
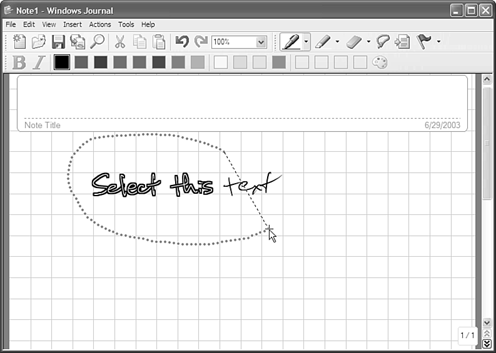
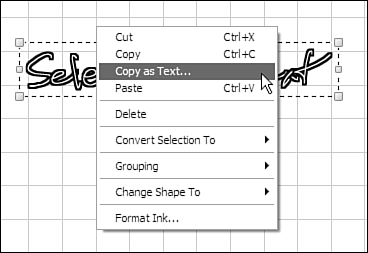
If you insert enough space, some elements on your page will move to the next page. You can get to those elements by tapping the Next button below the vertical scrollbar in the bottom-right corner of the Windows Journal window. You can also remove space in your note by dragging up instead of down in step 3. When you remove space, the space to be removed as you drag your pen becomes darker. Windows Journal will not let you remove space other than blank space, which protects you from accidentally (or purposefully) deleting items. Formatting InkOnce you write or draw on the page, you have several options for formatting the ink. To select the ink you want to format, use the right-tap capability of your pen (either pressing and holding, or using the barrel button on your pen), then drag around the ink you want to select, as shown in Figure 6.9. Figure 6.9. Right-tap and drag around the ink you want to select. Once you have selected the ink, you can change its color by selecting any of the color swatches on the toolbar. If you want more color options, select the More Colors button on the toolbar (the one that looks like a painter's palette to the right of the color swatches) to define custom colors. With the ink selected, you can also tap the Bold and Italic buttons on the toolbar. This does exactly what you would expect. Notice in Figure 6.10 that after you select the ink, you see a context-sensitive menu that lets you choose additional options to perform on the ink. If you choose the Format Ink menu item, you can choose stroke thickness, color, bold and italic formatting, and pen style, just as you can from the Format toolbar. Figure 6.10. A context sensitive menu opens when you select ink. The one here may show more than yours, as I have the Show extended shortcut menus option enabled (Tools, Options, View). |
EAN: 2147483647
Pages: 172
