The Importance of Proper Exposure
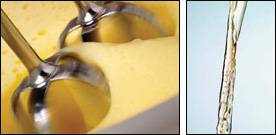
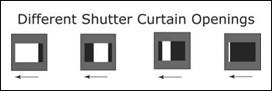
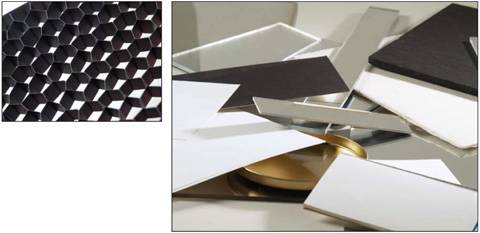
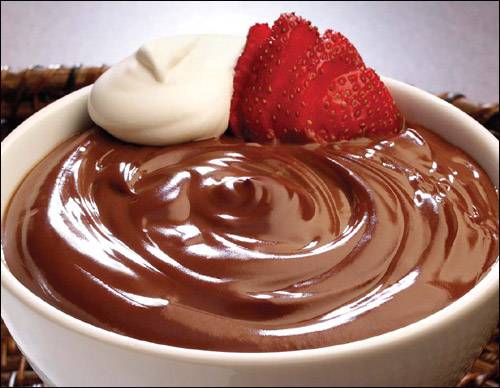
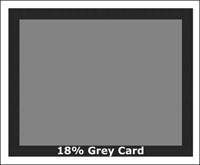
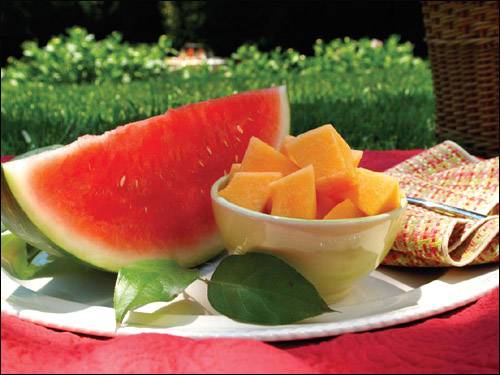
| Before I get into various lighting techniques for digital food photography, I want to impress upon you the importance of using the proper exposure. Indeed, using the proper exposure is critical to great photography. Having enough detailespecially in the highlightsis a key challenge you'll face in digital photography. Similar to shooting photographs with slide film, shooting digitally requires that you be more precise in your exposure than with negative film. If you don't expose the photo properly, you won't be able to put detail back into the image without devoting an enormous amount of time and energy to retouching. Even then, the image might still not look great. ISO Settings, f-Stops, and Shutter SpeedsThe image sensor in a digital camera is what captures the light in your photograph. Adjusting the ISO (International Standardization Organization) setting can change the sensor's sensitivity. Most cameras default to 100 ISO, which is equivalent to ISO 100 film in a film camera. With the proper exposure, the chip is exposed properly, and a photograph with the proper detail is achieved. A combination of f-stop and shutter speed is used to allow the chip to "see" the amount of light that it requires to render a proper exposure. To understand how the f-stop setting works with regard to proper exposure, think of the chip in your camera as the eyes of a person waking up in a darkened room. When the person opens the window shade, light is allowed in. If it's really bright and sunny out, the person squints his eyes and his pupils contract so that he can see properly. This is the same as closing down the lens opening in your camerathat is, using a higher f-stop numberto compensate for the brightness of available light or flash. On the other hand, if that same person were to close the shade after his eyes had adjusted to the bright light, returning the room to its darkened state, he might need to wait a moment for his pupils to dilate in order to again see details of the darkened room. This is the same as enlarging the lens opening in your camerathat is, using a lower f-stop settingto accommodate for low-light conditions. Note The old textbook analogy to a faucet is another way for you to think about the reciprocal relationship of shutter speed and f-stop. The right exposure is like a bucket full of water. If you run water through a big faucet, you need less time to fill the bucket. With a small faucet, you have to run the water for a long timethe time is the shutter speed, the size of the faucet is the opening of the f-stop. The smaller the f-stop number, the larger the opening and the more light falls on the digital sensor. For example, f4 lets in 4 times more light than f8. The size of the lens opening and the speed at which the shutter opens are reciprocal factors that affect proper exposure. More light reaches the camera's sensor when the lens opening is wider (a smaller number), so to balance the equation, you must open the shutter for a shorter amount of time to expose the chip properly. As it turns out, the term "shutter speed," which refers to the amount of time that light hits the sensor, is something of a misnomer in cameras. That's because in cameras, the shutter acts like a slit in a curtain that passes in front of the sensor. No matter what the setting is, the slit passes in front of the sensor at the same rate of speed. When the camera is set to a "fast" shutter speed, the slit is very small, so light hits the sensor for only a short period of time. When the camera is set to a "slow" shutter speed, the slit is wide. Because it takes more time for the wider slit to complete its pass, light hits the sensor for a longer period of time. This graphic illustrates that the difference in shutter speed is the size of the opening in the shutter curtain as it moves at the same speed past the sensor. Let me try to explain this delicate balance of proper exposure again. While shutter speed refers to the amount of time the sensor is exposed to light, the lens aperture, or f-stop, is the size of the lens opening. Achieving correct exposure means finding the correct settings between shutter speed and aperture. If you change one side of the equation, you must make a corresponding adjustment to the other. For example, all other things being equal with regard to light conditions and shutter speed, using a higher f-stop number ("stopping down," for example, from f5.6 to f8) will reduce the aperture size to allow less light to hit the sensor, resulting in a darker picture. There is no effect on action, but depth of field will be increased because the light is being funneled through a smaller opening and is more focused. Using a smaller f-stop number ("opening up," for example, from f8 to f5.6) opens the aperture to allow more light to hit the sensor, resulting in a lighter picture. There is no effect on action, but the depth of field will be decreased because the light flows through a larger opening and is less focused. Conversely, increasing the shutter speed (for example, from 1/60th to 1/125th of a second), with all other things being equal, will shorten the time that light hits the sensor. Action can be stopped, but the picture will be darker. Decreasing the shutter speed (for example, from 1/125th to 1/60th of a second), on the other hand, increases the time the light hits the sensor; in this case, action will be blurred and the picture will be lighter. Tip The smaller the aperture opening (for example, f22), the higher the f-stop number, and the more the depth of field, which means more of the background and foreground is in focus. The larger the aperture opening (for example, f2.8), the smaller the f-stop number, and the smaller or more shallow the depth of field, which means less of the background and foreground is in focus. Remembering this will help you understand depth of field and how to get that soft-focus look. FlashIlluminating a subject with a strobe flash brings out and enhances the object's colors and textures. The very bright light that the flash provides reveals details that cannot be seen in normal light. I have always preferred this light source when shooting food. A huge benefit is that flash illumination doesn't give off as much heat as quartz halogen lights. Tip Using mirrors and backlights helps to add dimension, gives more shadow detail, and creates specular highlights on the food or setting. In addition, using grid spots and mirrors to add pinpoints of lightalso known as specular highlights can be instrumental in creating a mouth-watering photo. Without those highlights, food photographs lack life and dimension. With them, food can sparkle like jewels. Specular highlights attract attention to the food's freshness, color, and texture, giving it appetite appeal. In flash photography, you control the brightness of the light by varying the amount of time that the light is emitted by the flash unit. This is called flash duration, and is measured in fractions of a second. Using the previous examples, with all other things being the same and assuming you do not change the aperture, a longer flash duration results in a brighter picture. If you use a flash unit, you must make sure your camera's shutter speed is set correctly for flash photographytypically 1/60th of a second, depending on the manufacturer's specifications for that make and model. Tip You can shoot at a slower shutter speed than the manufacturer recommends, but never at a higher speed. If you do so, the shutter will close before the flash fully exposes the sensor. This will result in a picture that is partially black. Because you cannot always shoot food pictures in a darkened room, you must account for the effect of a room's ambient light during a flash exposure. For example, in addition to accounting for the light emitted by your flash unit, you may also have to account for any daylight coming in through a window. Depending on what type of ambient light you're dealing with, it can have positive or negative effects on a photo. In particular, fluorescent lights, which are present in most commercial kitchens, often cast an unwanted green effect on the subject. To counter this, set your shutter speed to the highest flash synchronization speed your camera allows. This will ensure that the green cast of the ambient light will not affect the final photograph because it is overpowered by flash for the entire exposure. Other types of ambient light, such as candlelight or light from a burning log in a fireplace, can help set a mood. In these situations, a slower shutter speed is essential. This ensures that the sensor is exposed to the lower light level of the candles after the flash burst illuminates the entire scene to give the photograph detail. MeteringAll camera exposure meters measure reflective light. They look at what you're photographing and assume that it is an average scene. It is a machine, after all, and expects to see a photograph that has white, gray, and black, as well as other colors and brightness values that balance out to an overall middle gray value. A reflective light meter measures the light as it bounces off of the subject, so this reading is influenced by its color and brightness. To address this, place a gray card in the photo scene, meter the light that is reflected from it, and set your f-stop and shutter speed to those settings. Alternatively, use an incident light meter. An incident light meter measures the light falling onto a subject and simulates a gray card being placed in front of the subject, making it a very useful tool for achieving an accurate exposure. Note I feel that using an incident light meter is more versatile than using a reflective light meter and a gray card. It allows me to measure the light falling on the subject from all different angles and gives me a better understanding of how the final photo will look. Using an incident light meter, I get a much better understanding of what detail I will get in the highlights and shadows. This makes a very big difference in the final output of the photograph. Example If you shoot vanilla ice cream in a white bowl with a white background and set the camera on automatic, the ice cream will look gray on a gray background. That's because the reflective light meter in a camera is seeking the proper exposure for middle gray. Thanks to Photoshop, you can correct this wrong exposure, but it is much better to start with the proper one. Even if you are a PHD (Push Here Dummy) photographer, try to think about the tonal range of your subject and compensate for it before you press that button and compensate for it. This is an example of a gray card. Tip Did you forget your gray card? Simply hold the palm of your hand in front of the subject, facing the camera, and take a reading. On average, open up one f-stop depending on your skin tone, and you will have the right exposure. Color TemperatureThe color temperature of the light source influences the color that you see in the final photograph. Here's a rundown of the color temperatures of various light sources, measured in Kelvin (K):
Although our brains adjust automatically to the subtle differences in this color spectrum, film cameras do not. In the old days, we had to color-balance our film to the light source's color temperature or the photo would come out with a color shift. Now, however, we have digital sensors that can adjust themselves automatically to the light source, a feature called "auto white balance." This revolutionary development has made it very simple for every photograph to have a good color rendition. That said, I have found this setting to be a bit inconsistent depending on the lighting situation. As a professional, I feel that it is better to set your camera's white balance manually, just as you do the camera's exposure settings. Using a white card, set your camera's white balance so it can take into account all the different sources of light and give you the most accurate color. You don't want your food photograph to look green, do you? Tip If possible, it's best to manually set your white balance each time you shoot. Alternatively, if you shoot in the RAW file format, you have the opportunity to adjust the color temperature after you've taken the photo. Auto-white balance is a very good setting to use when shooting RAW in any continuous light source. For studio strobe, "daylight" or 5500K is closer. Lighting RatiosIn digital food photography, it's critically important to control lighting ratios, which refers to the ratio of highlights and shadows on different portions of your set. The higher the ratio, the greater the contrast. Here are some examples of lighting ratios:
|