Understanding and Using Your Digital Camera
| Each digital camera has a different design and controls, so features on your camera might be slightly different from those described here. For example, some cameras have a delete button, while other cameras have a menu item for deleting photographs. If you are unsure of a feature, refer to the manual that came with your camera. In fact, have your digital camera's manual on hand while going through this section. It's my experience that the "Quick Start" guide does not provide sufficient information about the advanced features of most cameras. ResolutionThe resolution of a digital camera is measured in pixels. A pixel is the smallest element of a digital image. Resolution is a combination of the relative size of each pixel and how many there are on the camera's sensor, or chip. The sensor captures red, green, and blue pixels, and then processes the information into a full-color photograph. As the pixel count increases, so does the amount of information in a picture. A 5-megapixel camera can capture 5,000,000 pixels. Today's professional digital cameras range from 5 megapixels to 24 megapixels. Note Pixels are also used to measure the resolution of computer screens and printers. The following pictures illustrate how the red, green, and blue pixels are combined to form a full-color image. Photograph of an apple on a white background taken with a 5-megapixel camera. Green pixel components. Red pixel components. Blue pixel components. Optical and Digital ZoomIf you plan to take lots of photos from a distance, it's important that you look at a camera's zooming capabilities. An optical zoom lens is a variable focal length lens. It actually changes its angles of view from a wide angle to a telephoto view. Zoom lenses are usually identified by their telephoto power2x, 3x, and so on. The power is determined by dividing the lens's maximum focal length by its minimum focal length. For example, a lens with focal lengths ranging from 20mm to 100mm would be a 5x zoom lens. Take the time to look through the lens of the camera you are purchasing to make sure the optical zooming capability is what you want. Also of particular importance with food photography is how close the lens focuses to the subject. If it does not focus very closefor example, at a distance of one footthen I recommend that you purchase a separate macro lens or macro attachment that will focus down to one inch. Most digital cameras also have a digital zoom feature. With digital zoom, the camera's software enlarges the center portion of the image and crops it digitally. This is nice in a pinch, but the image's quality goes down when you use this feature. I'd rather make cropping decisions later, when retouching photos on the computer. LCDs: The Digital ViewfinderOne of the most enjoyable features of digital photography is the ability to see immediately on the camera's LCD (liquid crystal display) the pictures you have taken. With some digital cameras, you can also preview your photo on the LCD while preparing to take the picture. This allows you to see what your image will look like without having to peer through the viewfinder. The LCD also lets you show your photos to your friends, family, or colleagues. Cameras typically offer various settings for the size and zooming capabilities of the image on the LCD. Some cameras even enable you to run a slideshow on the LCD. Tip When selecting a digital camera, make sure the LCD is big enough for your personal taste. Newer cameras have bigger screens that are brighter in sunlight and have a greater angle of view. Be aware, however, that this feature uses a lot of battery power. You can customize the LCD viewing options on all professional cameras. I prefer to have the image pop up on the screen for five seconds after taking a shot. I can bring the image back up instantly on my Olympus EVOLT E-300, which automatically rotates it if I've shot vertically. I also zoom in up to 10x to quickly check focus and image quality. This camera also has a VIDEO OUT jack, to connect the camera directly to my studio TV monitor. Tip There is a big difference between judging an image on the LCD and in the viewfinder. The LCD enables you to preview the image in two dimensions, and it gives you a good idea of what the final photo will look like by displaying the lighting and exposure on the screen. Battery OptionsAll digital cameras require a lot of power to operate, so it's always important to have extra batteries with you. There are many types of batteries for digital cameras, including the following:
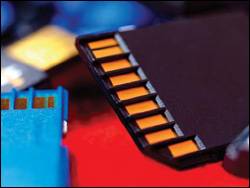
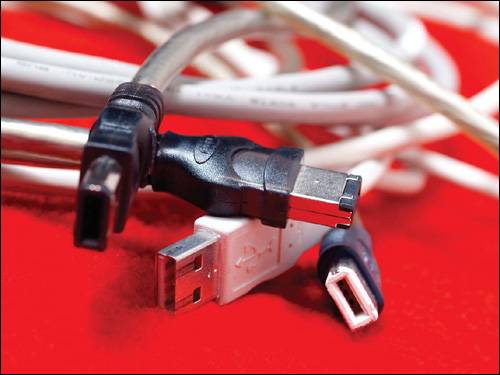
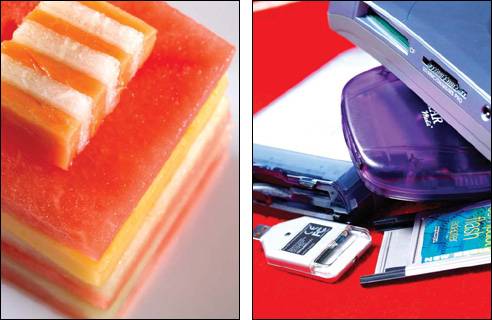
Digital Film: Storage MediaInstead of using film to store your photos, digital cameras use storage media. There are different types of media available for digital cameras. Some camerasespecially low-end cameras and super-compact camerasuse internal memory, which means the photos are stored in the camera itself. Others use removable memory cards, such as Compact Flash (CF) cards, SmartCards (SCs), and xD cards. Some cameras allow you to store images to more than one type of media. Note A storage card is included when you buy most digital cameras, but they tend to be slow, low-capacity models. Plan to buy additional ones with more memory. They quickly pay for themselves! The major physical difference between various types of digital storage media is that the electronic contacts on xDs and SCs are exposed and vulnerable to damage, while the contacts on CF cards are recessed and protected. In addition, there are differences in their size and ability to quickly write, read, and download data. The speed of digital media depends on the size of the pictures stored on it and the type of memory card used. When purchasing media, be aware of the card's capacity as well as its writing speed. For example, professional Compact Flash cards that are designed for specific camera models enable you to take pictures more quickly because they have a special buffer in the card to speed up shooting. Tip Smaller is not always better. For me, xDs are so small that they are inconvenient because they can get lost in a pocket or in the recesses of a camera bag. I think CF cards are just the right size to carry, store, and save my precious images. Compact Flash memory cards also are very durable. For all these reasons, I prefer to use them. Since we are talking digital technology and instant gratification, get the fastest card you can. Trust me, you will be happy you did! The card's speed directly influences the performance of your digital camera and the time it takes to download images to your computer. It is a simple fact that the superior performance of high-speed cards far outweighs minimal differences in price. Tip Make sure you have a good storage case for the media. Always put them in a plastic cover when they are not in the camera to protect them from dust and moisture. If you use storage media with exposed contacts, be careful not to touch them. The oils on your hands can be transferred to the contacts and corrupt the information on the cards. No matter what storage format you use, once you have purchased the media that you are shooting on, there is no additional cost. You can shoot freely without concern about spending money on wasted film or prints. After downloading the images to your computer, you simply erase the card and start over again. You can also make an unlimited number of backup copies of the images without any loss of detail or quality on hard drives, CDs, DVDs, tape, or other media. In contrast, copying film negatives results in increased contrast and grain, and loss of detail and resolution. Tip When placing your memory card in your camera, pay attention to the direction the card goes into the camera. Never force the card inbe gentle! Also, make sure the camera is turned off before you remove the card. There are two ways to transfer photos to your computer: by connecting a cable directly from your camera to your computer, or by inserting your memory card into a card reader that is installed in your computer or connected by a cable. There are many types of card readers available. The advantage of having a card reader is that you can keep shooting while the previous images are being downloaded to your computer. IEEE1394/FireWire readers are faster than USB 2.0 readers (one and a half times faster, according to my own experiments). If you have a laptop computer with a PC card slot (PCMCIA), you can use a PC card adapter to import your photos from your memory card. Tip When I download images to my computer's hard drive, I label the file folder with the date in Year-Month-Day format so that all my files stay in chronological order. For example, September 16, 2005 would be 050916. Tip Many problems are caused by trying to edit CF or xD in the computer. I prefer to erase and format storage media cards in the camera rather than use the computer to do so. Engineers have told me that this method does a better job of formatting the card to be compatible with the camera's software. This also helps you avoid damaging your cards. Many digital cameras have the capability to photograph in a "burst" mode, which enables you to take a series of photos very quickly. The camera will pause for a few moments after a burst to process the series of photographs. The number of photos you can take in this fast-shooting mode varies depending on the camera. If you need to take photos very quicklyfor example, to capture someone tossing pizza doughyou need a large image buffer. You can also increase the speed of shooting by using a larger, faster storage media card designed for professional cameras. Photo Quality SettingsMost digital cameras allow you to take pictures at different settings. Each setting determines the picture's pixel count and compression rate. When you choose a particular setting, you are making a tradeoff between photo quality, how many photos you can store in your memory card, and the speed at which you can shoot. Here are the most typical settings:
White BalanceWhite balance has long been a challenge for professional photographers. For example, have you ever taken photos with a film camera, only to find that when the prints came back from the developer, they looked green? Odds are, this was because you were shooting under fluorescent lights. Some lights are very blue (cool) in nature, while other lights are very yellow (warm) in nature. Fortunately, digital cameras can automatically balance color in different lighting environments. This built-in automatic white-balance feature, which is enabled by default, reads the color of the light. Automatic white balance works well in most lighting environments. Digital cameras also have manual controls to change the white-balance settings or to create a custom white balance (see your camera's manual). Use the manual feature when your pictures have a color cast to them, or if you want to create a special color effect. Tip I always set the white balance to manual mode. Often, I create a custom white balance to get better color rendition. Also, when you're using electronic flash, the white balance must sometimes be set manually because the light doesn't exist until the flash goes off. A setting for daylight is usually correct. Flash SettingsAlthough I do not recommend using built-in flash, most cameras default to having this feature turned on when there is not enough available light. Cameras have this feature because when photographers are just starting out, it can be hard to determine which environments need more light and which ones do not. Some cameras can be set to fire the flash all the time, which is useful when you want to balance light that is too bright. This is called fill flash. For example, if you were taking a photo of a picnic scene in bright sunlight, you could use the fill flash to increase the detail in shadows caused by the sun. Although built-in flash does have its uses, external flash is the preferred light source for professional food photography. External flashes are better because you can control the direction of the light and bounce the light onto different surfaces for a softer, more diffused look. (We'll talk more about lighting in Chapter 7.) I use professional lighting equipment such as studio strobes, soft boxes, umbrellas, and grid spots. Tip One thing to watch out for is the sync cord voltage of your studio strobe equipment. If the voltage is too high and the flash is connected directly to the camera, the voltage can fry the camera's delicate electronics. A simple solution is to use a device in the sync cord line that reduces the voltage, generally to 6 volts. FocusToday, auto-focus technology is highly advanced. When you take a photo with a digital SLR camera, you can see the image come into focus when you look through the viewfinder. There are different types of auto focusing available; in addition, most digital cameras with auto focus allow you to manually override this feature. Following are the most common types of auto focus:
As you can see, digital photography technology has come a long way, and it continues to advance quickly. We'll continue to see better resolution and higher megapixels. The early "professional" digital cameras yielded 1 or 2 megapixels and cost thousands of dollars. Now it is common to see point-and-shoot cameras with 5 megapixels. Depending on your needs and budget, you can take advantage of a wide range of automatic and manual features to achieve very good results. As you become more proficient, you will be able to push the envelope, using digital technology to fully realize your artistic vision. |