Working with Views
A view is a virtual table that represents data from one or more database tables. A view can also be a partial table. You can select data from a single table or multiple tables based on the sort and filter criteria (using WHERE and GROUP BY clauses) and save data as a view. You can also set permissions on views. For example, a manager, an accountant, and a clerk of a company share the same database. The manager can access all data from different tables of the database. The accountant can access partial data from multiple tables, and the clerk can access partial data from a single table. You can create three different views based on the user rights and let the user access these views based on their rights.
In brief, the views do the following:
-
Provide a security mechanism to hide certain parts of a database or database tables from certain users
-
Permit users to access data in a customized way so that different users can see the same data in different ways at the same time
Creating a View
Like stored procedures, you can create and manage views from the Server Explorer. To create a view, expand a database, right-click the Views leaf, and select the New View option. This action launches a wizard that helps you pick tables. Use the Add button adds tables to the view designer (see Figure 11-14).
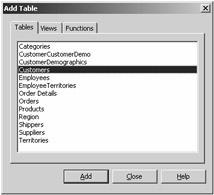
Figure 11-14: Adding tables to the view designer
For this example, add three tables to the designer: Customers, Orders, and Employees. Figure 11-15 shows a few columns selected from each table.
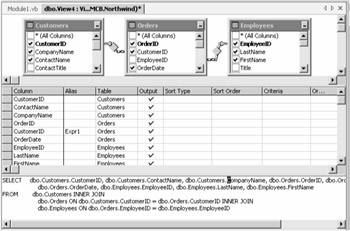
Figure 11-15: Creating a view after selecting columns from three tables
You can save a view by using the Save button, by using File Save, or by right-clicking on the view and selecting Save ViewName (see Figure 11-16).
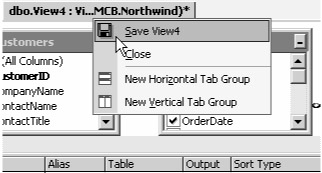
Figure 11-16: Saving a view
For this example, save the view as CustEmpView and click OK (see Figure 11-17).
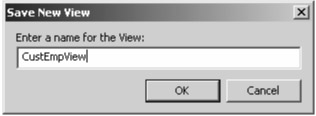
Figure 11-17: Entering a name for the view
When you now see the Server Explorer views, you'll see CustEmpView listed (see Figure 11-18).
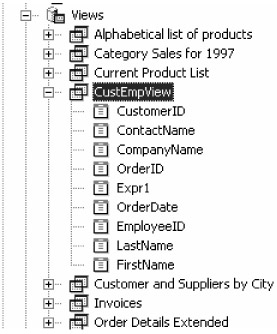
Figure 11-18: Available views in the Server Explorer
Executing a View from VS .NET
To execute a view, right-click it in the Server Explorer and select Retrieve Data from the View option. The output of CustEmpView looks like Figure 11-19.
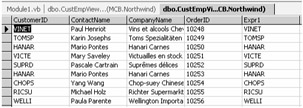
Figure 11-19: Results of the CustEmpView view after executing it from the Server Explorer
Retrieving Data from a View Programmatically
In the same way that you execute a stored proc, the Command object executes a view. You can retrieve data from a view programmatically by replacing the view name with the table name in a SQL statement. Listing 11-5 shows you how to use the CustEmpView view in an application. As you can see, the code uses the CustEmpView view as the table name in the SELECT statement:
SELECT * FROM CustEmpView
Listing 11-5: Executing a View Programmatically
Private Sub Form1_Load(ByVal sender As System.Object, _ ByVal e As System.EventArgs) Handles MyBase.Load ' Create a Connection Object Dim ConnectionString As String = "Integrated Security=SSPI;" & _ "Initial Catalog=Northwind;" & _ "Data Source=localhost;" Dim conn As SqlConnection = New SqlConnection(ConnectionString) Dim adapter As SqlDataAdapter = _ New SqlDataAdapter("SELECT * FROM CustEmpView", conn) Dim ds As DataSet = New DataSet("CustEmpView") adapter.Fill(ds, "CustEmpView") DataGrid1.DataSource = ds.DefaultViewManager End Sub To test this code, create a Windows application in VS .NET, add a DataGrid control to the form, and write the code in Listing 11-5 on the Form_Load event. Also, don't forget to import the System.Data.SqlClient namespace in the project.
The output of Listing 11-5 looks like Figure 11-20.

Figure 11-20: The output the CustEmpView view from a program
| Caution | The ORDER BY, COMPUTE, COMPUTE BY, and INTO SQL keywords don't work with views. |
Filling a DataSet from Multiple Views
If you want, you can fill a DataSet from multiple views. You just need to change the SQL statement you used in Listing 11-5. For example, say you want to fill a DataSet from the CustEmpView and Invoices views. Just replace the SQL statement in Listing 11-5 with the following:
Dim adapter As SqlDataAdapter = New SqlDataAdapter _ ("SELECT * FROM CustEmpView; SELECT * FROM Invoices", conn) EAN: 2147483647
Pages: 214