| For our most advanced exercise in this chapter, we're going to set up a forward/ reverse drum kit capable of simulating turntable effects and abstract techno beats. This will involve grouping the samples to edit one set of parameters, then changing the grouping to edit another set of parameters. Don't worrywe'll take it in easy stages. First we'll get the samples loaded and set up the key zones. To map samples for a reverse drum patch 1. | Load some kick, snare, hat, cymbal, and percussion samples into the NN-XT from the xclusive drums-sorted subdirectories in your Factory Sound Bank. For example, I loaded the following:
01_BassDrums / Bd1Dub.aif 02_SnareDrums / Sd2_Brat.wav 05_HiHats / Hh1_sht3.aif 06_Cymbals / CYM1V20HSH.aif 07_Percussion-Hi / Cb_Cheese.wav
| 2. | Click in the G column to select all your samples.
| 3. | Drag the left and right tab handles towards the center key until all the key zones are one key wide (Figure 6.117).
Figure 6.117. Drag tab handles to center all the key zones one key wide. 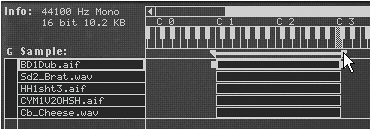
| 4. | Assign the samples to different keys by dragging them one at a time (Figure 6.118). The root key values will stay with the samples.
Figure 6.118. Drag individual notes to their own key zones. 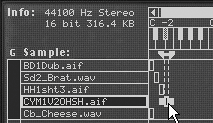
| 5. | Click in the G column and copy the key zones, using either the Edit menu or the context menu.
You're going to paste these into your NN-XT and set them to play backward.
| 6. | Deselect all samples, and execute the Paste Zones command or Ctrl+V (Win)/ Cmd+V (Mac). Reason automatically assigns the duplicate samples to their own group (Figure 6.119).
Figure 6.119. Duplicate the sample group. 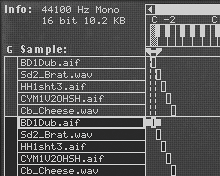
| 7. | Select the group of copied samples and set the Lo Vel knob to 120. These will be the reverse sounds, triggered at higher note velocity.
| 8. | Now select the group of original samples, and set the Hi Vel knob to 119. Both groups of samples now appear striped (Figure 6.120).
Figure 6.120. Alter the groups' velocity zones, and the samples become striped. 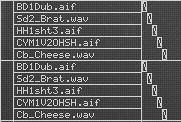
|
Now we'll set the sample parameters. We want all the copied samples to play backward and skip the tails. To set samples to play in reverse 1. | Select each copied sample and set its Play Mode knob to BW (Figure 6.121).
Figure 6.121. Set samples to play backward using the Play Mode knob. 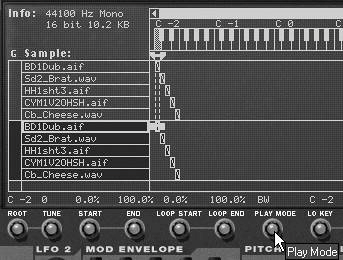
Since Play Mode is not a group parameter, you'll need to do this for each sample individually.
| 2. | To skip the sample tails, set the End knob for each sample to a small percentage, such as 12% for closed hi-hats and shakers, or 6% for kick drums, ambient snares, and open hi-hats (Figure 6.122).
Figure 6.122. Changing the End percentage makes forward samples end closer to the start, and reverse samples start closer to the end! 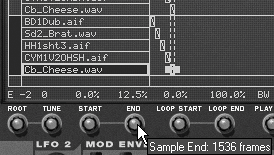
For faster tempos such as 150180 bpm, try lowering the percentages even more, to 410%.
|
Reverse Logic: Things to Keep in Mind With reverse drum samples, you want to stay close to the loud "suck" at the end of the sample. The NN-XT's End knob allows you to do this. In BW (backward) play mode, the End knob controls the attack. Unfortunately, End is not a group knob, so you'll have to set it once for every reverse sample in your kit. End settings are based on percentages of the total sample length. The shorter the sound, the larger the percentage you're likely to use. For fast tempos you'll need to lower the End percentage setting even more! |
Now it's time to regroup the samples and make final edits so you can use this patch in your own tracks. To set up groups of key pairs 1. | Select all samples with Ctrl+A (Win) / Cmd+A (Mac) and go to Edit > Group Selected Zones. This puts all the samples back in one big group, so we can sort them more easily.
| 2. | With all samples selected, right-click the sample map and choose Sort Zones By Note. This arranges sample key zone pairs together (Figure 6.123).
Figure 6.123. Arrange key zone pairs together using the Sort Zones By Note command. 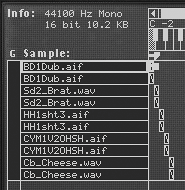
| 3. | Select the bottom two samples (Cb_Cheese in my example), and make the sample pair a new group using Edit > Group Selected Zones (Figure 6.124).
Figure 6.124. If you want to retain the order in which the samples are displayed in the sample map, start grouping them at the bottom. 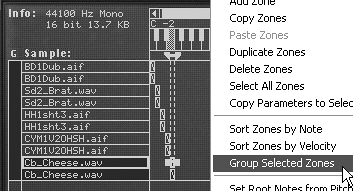
Starting at the bottom keeps your samples in their current display order.
| 4. | Continue up the sample map, grouping each sample pair (Figure 6.125).
Figure 6.125. The key zone pairs are now grouped. 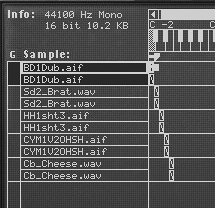
|
To set up and tune group articulation 1. | Select all samples and adjust the Key Poly counter to 1 (Figure 6.126). This keeps the velocity zone pairs from overlapping, which is important for the backward effect to sound tight.
Figure 6.126. Use a Key Poly setting of 1 to keep samples from overlapping other samples in the same group. 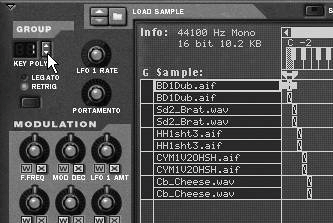
| 2. | Alt-click to audition each BW sample and fine-tune its End knob settings.
| 3. | Create a Sequencer track that includes notes with high enough velocity (at least 111) to trigger the reverse samples (Figure 6.127).
Figure 6.127. You can use a very simple Sequencer track to test the strong and weak velocity zones in the current patch. 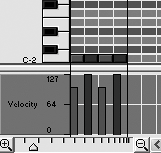
| 4. | Play the loop and adjust the reverse sample's End knob as necessary.
| 5. | Drag the notes up so that they play the next BW and FW pair, and adjust the End setting; repeat for each pair.
| 6. | To make harder notes play louder, select all the samples and set the Level knob in the Velocity section to a positive value.
|
 Tips Tips
You can set up a "reverse" velocity range for the backwards notes by selecting them and setting the Velocity section Level knob to the left (Figure 6.128). This is more effective when the samples have a wide velocity range. Figure 6.128. To give the reverse samples an inverse velocity response, you can set the Velocity Level switch to a negative number. 
Velocity settings will vary based on the samples you are using.
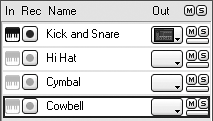
Let's take a moment to set up a Sequencer track for each drum we're going to use. Manipulating this velocity-sensitive reverse kit will be tricky enough without having them all in the same track. With separate tracks for each drum, we can use the Mute and Solo buttons to better focus on each drum. To set up separate tracks for drums 1. | In your Sequencer, use the Edit > Create Sequencer Track command once for each drum pair in your patch.
| 2. | Double-click the track name, and rename it for the sound you'll write in it (Figure 6.129).
Figure 6.129. Create separate Sequencer tracks for different drum sounds to help you focus on one at a time. 
I created one track for the kick and snare together, since it's harder to write them separately.
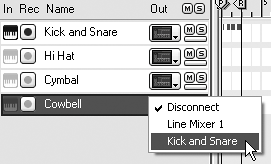
| 3. | Use each name's Out column pull-down menu to assign each track to the same NN-XT device (Figure 6.130).
Figure 6.130. Assign all new tracks to the NN-XT. 
The NN-XT will already be listed for the original track created at the same time as the device. Go ahead and select it for each new trackit won't affect the other track names.
|
To write a reverse part 1. | In the Sequencer, drag the separator up so that your Velocity lane stretches to a resolution at which the reverse velocity zone is visible (Figure 6.131).
Figure 6.131. Drag the separator bar to resize the Velocity lane. 
| 2. | Write a kick-and-snare pattern, using one or two hits at high velocity to trigger reverse samples (Figure 6.132).
Figure 6.132. A kick-and-snare part with high and medium velocity will trigger forward and reverse hits. 
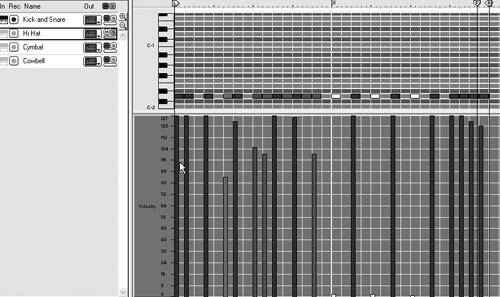
| 3. | Do the same for the hi-hat, cymbal, and cowbell tracks (Figure 6.133).
Figure 6.133. I used the Solo and Mute buttons to isolate the hi-hat part here. 
|
To tune a reverse part 1. | With your loop playing, go to the NN-XT Remote Editor.
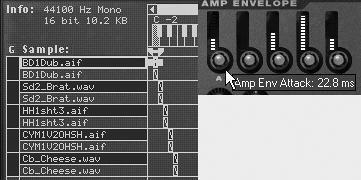
| 2. | Optimize the amp envelope for the backwards notes by pushing the attack stage slightly above zero and setting a short decay (Figure 6.134).
Figure 6.134. A slightly increased attack value in the amp envelope will help smooth out the first bytes of a sample. 
Since the backwards samples are set to start playing midway or farther into their fade-ins, this will smooth out any clicks and artifacts.
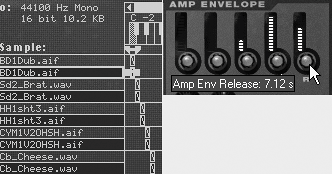
| 3. | Optimize the amp envelope for the forward notes by setting the decay and sustain stages higher (Figure 6.135).
Figure 6.135. With groups all set to one voice, there's no downside to using a long amp release for the forward samples. 
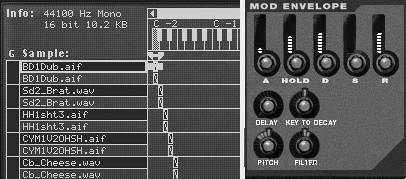
| 4. | Select the reverse samples and try a positive or negative Pitch and/or Filter value on the mod envelope to accentuate the reverse effect (Figure 6.136).
Figure 6.136. Use the mod envelope to pitch-shift the reverse samples down and increase brightness, for an exaggerated "reverse" effect. 
|
 Tip Tip
|


 Tips
Tips
