Layering Samples


You can get two samples to play together by assigning them to the same key. We'll start with a single-sampled instrument in this example and add another sound to it.

To create a layered instrument

1.

Initialize your NN-XT patch.

2.

Load your first sample using the Remote Editor's sample browser.

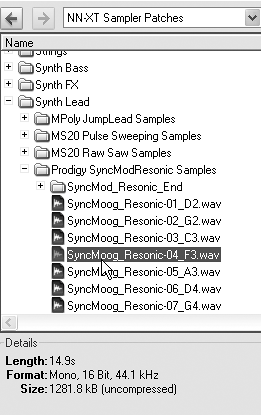
In this example, I loaded NN-XT Sampler Patches/Synth Lead/Prodigy SyncMod Resonic Samples/SyncMoog Resonic-04_ F3.wav (Figure 6.88).

Figure 6.88. Load a synth lead sample from the Factory Sound Bank.


By default, the NN-XT will give the sample a five-octave range.

3.

Set the root key of this sample to F3 using the Root Key knob (Figure 6.89). Without this step, you won't have a standard pitch reference when you add another sample!

Figure 6.89. Set the root key to match the sample's recorded pitch.


4.

Click on the sample map display to deselect the sample; then load a second sample, for example /Synth Lead/MPoly Jump Lead Samples/JumpLeadSync-03_E3.wav.

5.

Select the new sample and set its root key to E3 (Figure 6.90). Now both samples should be playing the same pitch.

Figure 6.90. Set the second sample's root key.


6.

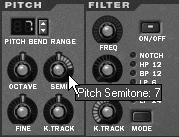
Tune the second sample to another interval using the Pitch/Semi knob (Figure 6.91).

Figure 6.91. Transpose the second sample using the Pitch/Semi knob.


7.

Activate the Solo Sample button (Figure 6.92). This allows you to select a sample and use the keyboard ruler to hear it by itself.

Figure 6.92. Activate the Solo Sample button.


8.

Set the relative levels of the samples one at a time by selecting them and adjusting the Amp Envelope/Level knob (Figure 6.93).

Figure 6.93. Set sample volume by selecting the sample and then using the Amp Envelope level knob.


9.

Save your patch for the next exercise.

Velocity range

The NN-XT can switch or fade between two samples with different velocity ranges.

To velocity-switch between samples

1.

With the layered patch from the last exercise still loaded, select the first sample and set the Lo Vel knob to 1 and the Hi Vel knob to 64 (Figure 6.94).

Figure 6.94. Set up a first velocity layer.


The sample with partial velocity range will look striped in the NN-XT display.

2.

Select the second sample and set its Lo Vel to 65 and Hi Vel to 127.

If you set the Lo Vel of the second sample lower than the Hi Vel of the first, there will be overlap on shared velocities.

If you set the Hi Vel of the second sample below 127, notes above that value will not sound!

3.

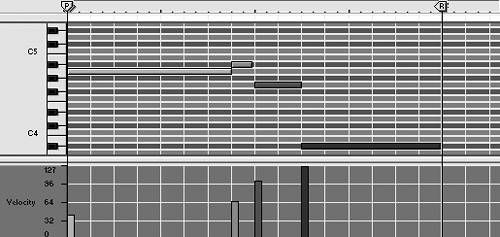
Test your patch with hard and soft attacks on your external keyboard, or input some notes in your NN-XT track with velocity variations (Figure 6.95).

Figure 6.95. Use a track with velocity variations to test velocity layers.


Tip

  • If you want, you can set up a track for testing switches and crossfades, and save it so you can use it on any instrument.


You can also use velocity to crossfade between samples in a layered patchone sample fades in at a certain velocity as the other fades out.

To crossfade between two samples

1.

With your layered patch loaded, set the first sample's Lo Vel to 1 and its Hi Vel to 80.

2.

Set the second sample's Lo Vel to 60 and the Hi Vel to 127 (Figure 6.96).

Figure 6.96. For a crossfade, set up the two velocity layers to overlap slightly.


The crossfade will occur where the velocity ranges overlap, between 60 and 80.

3.

Once again, test with soft and hard attacks on your external keyboard or in your NN-XT Sequencer track.

4.

To tune this effect, you may want to adjust the velocity overlap or the relative volumes of the samples.


Reason 3 For Windows and Mac
ISBN: 321269179
EAN: N/A
Year: 2003
Pages: 180

flylib.com © 2008-2017.
If you may any questions please contact us: flylib@qtcs.net