Section 8.11. Reusable GUI Components with Classes
8.11. Reusable GUI Components with ClassesLarger GUI interfaces are often built up as subclasses of Frame, with callback handlers implemented as methods. This structure gives us a natural place to store information between events: instance attributes record state. It also allows us to both specialize GUIs by overriding their methods in new subclasses, and attach them to larger GUI structures to reuse them as general components. For instance, a GUI text editor implemented as a Frame subclass can be attached to and configured by any number of other GUIs; if done well, we can plug such a text editor into any user interface that needs text editing tools. We'll meet such a text editor component in Chapter 12. For now, Example 8-20 illustrates the concept in a simple way. The script gui6.py produces the window in Figure 8-22. Figure 8-22. A custom Frame in action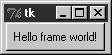 Example 8-20. PP3E\Gui\Intro\gui6.py
This example pops up a single-button window. When pressed, the button triggers the self.message bound method to print to stdout again. Here is the output after pressing this button four times; notice how self.data (a simple counter here) retains its state between presses: C:\...\PP3E\Gui\Intro>python gui6.py Hello frame world 43! Hello frame world 44! Hello frame world 45! Hello frame world 46! This may seem like a roundabout way to show a Button (we did it in fewer lines in Examples 8-10, 8-11, and 8-12). But the Hello class provides an enclosing organizational structure for building GUIs. In the examples prior to the last section, we made GUIs using a function-like approach: we called widget constructors as though they were functions and hooked widgets together manually by passing in parents to widget construction calls. There was no notion of an enclosing context, apart from the global scope of the module file containing the widget calls. This works for simple GUIs but can make for brittle code when building up larger GUI structures. But by subclassing Frame as we've done here, the class becomes an enclosing context for the GUI:
In a sense, entire GUIs become specialized Frame objects with extensions for an application. Classes can also provide protocols for building widgets (e.g., the make_widgets method here), handle standard configuration chores (like setting window manager options), and so on. In short, Frame subclasses provide a simple way to organize collections of other widget-class objects. 8.11.1. Attaching Class ComponentsPerhaps more importantly, subclasses of Frame are true widgets: they can be further extended and customized by subclassing and can be attached to enclosing widgets. For instance, to attach the entire package of widgets that a class builds to something else, simply create an instance of the class with a real parent widget passed in. To illustrate, running the script in Example 8-21 creates the window shown in Figure 8-23. Figure 8-23. An attached class component on the right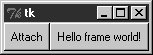 Example 8-21. PP3E\Gui\Intro\gui6b.py
This script just adds Hello's button to the right side of parenta container Frame. In fact, the button on the right in this window represents an embedded component: its button really represents an attached Python class object. Pressing the embedded class's button on the right prints a message as before; pressing the new button exits the GUI by a sys.exit call: C:\...\PP3E\Gui\Intro>python gui6b.py Hello frame world 43! Hello frame world 44! Hello frame world 45! Hello frame world 46! In more complex GUIs, we might instead attach large Frame subclasses to other container components and develop each independently. For instance, Example 8-22 is yet another specialized Frame itself, but attaches an instance of the original Hello class in a more object-oriented fashion. When run as a top-level program, it creates a window identical to the one shown in Figure 8-23. Example 8-22. PP3E\Gui\Intro\gui6c.py
This looks and works exactly like gui6b but registers the added button's callback handler as self.quit, which is just the standard quit widget method this class inherits from Frame. The window this time represents two Python classes at workthe embedded component's widgets on the right (the original Hello button) and the container's widgets on the left. Naturally, this is a simple example (we attached only a single button here, after all). But in more practical user interfaces, the set of widget class objects attached in this way can be much larger. If you imagine replacing the Hello call in this script with a call to attach an already coded and fully debugged calculator object, you'll begin to better understand the power of this paradigm. If we code all of our GUI components as classes, they automatically become a library of reusable widgets, which we can combine in other applications as often as we like. 8.11.2. Extending Class ComponentsWhen GUIs are built with classes, there are a variety of ways to reuse their code in other displays. To extend Hello instead of attaching it, we just override some of its methods in a new subclass (which itself becomes a specialized Frame widget). This technique is shown in Example 8-23. Example 8-23. PP3E\Gui\Intro\gui6d.py
This subclass's make_widgets method here first builds the superclass's widgets and then adds a second Extend button on the right, as shown in Figure 8-24. Figure 8-24. A customized class's widgets, on the left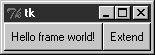 Because it redefines the message method, pressing the original superclass's button on the left now prints a different string to stdout (when searching up from self, the message attribute is found first in this subclass, not in the superclass): C:\...\PP3E\Gui\Intro>python gui6d.py hello 42 hello 42 hello 42 hello 42 But pressing the new Extend button on the right, which is added by this subclass, exits immediately, since the quit method (inherited from Hello, which inherits it from Frame) is the added button's callback handler. The net effect is that this class customizes the original to add a new button and change message's behavior. Although this example is simple, it demonstrates a technique that can be powerful in practice: to change a GUI's behavior, we can write a new class that customizes its parts rather than changing the existing GUI code in place. The main code need be debugged only once and customized with subclasses as unique needs arise. The moral of this story is that Tkinter GUIs can be coded without ever writing a single new class, but using classes to structure your GUI code makes it much more reusable in the long run. If done well, you can both attach already debugged components to new interfaces, and specialize their behavior in new external subclasses as needed for custom requirements. Either way, the initial upfront investment to use classes is bound to save coding time in the end. 8.11.3. Standalone Container ClassesBefore we move on, I want to point out that it's possible to reap most of the benefits previously mentioned by creating standalone classes not derived from Tkinter Frames or other widgets. For instance, the class in Example 8-24 generates the window shown in Figure 8-25. Figure 8-25. A standalone class package in action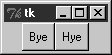 Example 8-24. PP3E\Gui\Intro\gui7.py
When run, the Bye button here prints to stdout and Bye closes and exits the GUI, much as before: C:\...\PP3E\Gui\Intro>python gui7.py Hello number 1 Hello number 2 Hello number 3 Hello number 4 Also as before, self.data retains state between events, and callbacks are routed to the self.message method within this class. Unlike before, the HelloPackage class is not itself a kind of Frame widget. In fact, it's not a kind of anythingit serves only as a generator of namespaces for storing away real widget objects and state. Because of that, widgets are attached to a self.top (an embedded Frame), not to self. Moreover, all references to the object as a widget must descend to the embedded frame, as in the top.mainloop call to start the GUI. This makes for a bit more coding within the class, but it avoids potential name clashes with both attributes added to self by the Tkinter framework and existing Tkinter widget methods. For instance, if you define a config method in your class, it will hide the config call exported by Tkinter. With the standalone class package in this example, you get only the methods and instance attributes that your class defines. In practice, Tkinter doesn't use very many names, so this is not generally a big concern.[*] It can happen, of course; but frankly, I've never seen a real Tkinter name clash in widget subclasses in some 13 years of Python coding. Moreover, using standalone classes is not without other downsides. Although they can generally be attached and subclassed as before, they are not quite plug-and-play compatible with real widget objects. For instance, the configuration calls made in Example 8-21 for the Frame subclass fail in Example 8-25.
Example 8-25. PP3E\Gui\Intro\gui7b.py
This won't quite work, because part isn't really a widget. To treat it as such, you must descend to part.top before making GUI configurations and hope that the name top is never changed by the class's developer. In other words, it exposes some of the class's internals. The class could make this better by defining a method that always routes unknown attribute fetches to the embedded Frame, as in Example 8-26. Example 8-26. PP3E\Gui\Intro\gui7c.py
But that then requires even more extra coding in standalone package classes. As usual, though, the significance of all these trade-offs varies per application. |