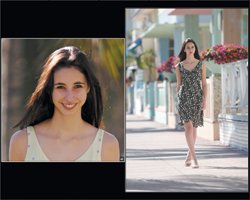
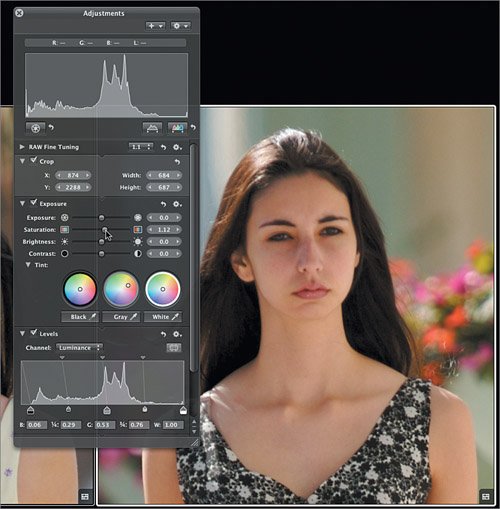
| There are many differences between the tropical image and the sidewalk imagelocation and outfit, to name two obvious ones. However, the model is a consistent element in both images. When matching color between images, the best aid is a known color. That color, in this case, is skin tone. We will use the model's skin tones from the adjusted tropical image as our guide. 1. | Press the C key to select the Crop tool and crop the tropical image so only the model's head and shoulders are in view. (Make sure the "Constrain cropping tool to" checkbox is deselected.) Press Return to accept the crop.
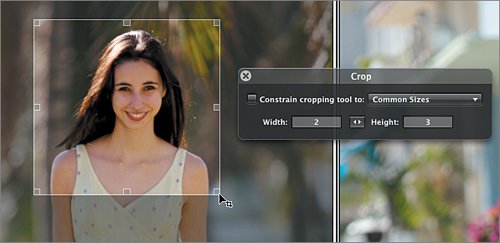 This isn't a permanent change. Temporarily cropping out the background will help us focus on the similar characteristics within the two images. This isn't a permanent change. Temporarily cropping out the background will help us focus on the similar characteristics within the two images.
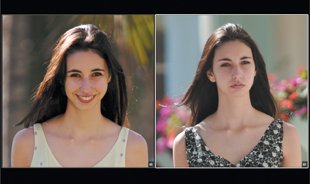
 | | | 2. | Crop the sidewalk image so that only the model's head and shoulders appear in that image.
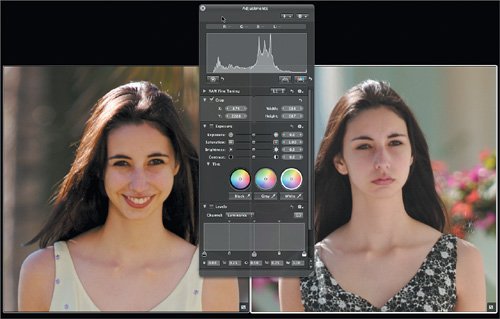
 | | | 3. | Press H to open the Adjustments HUD and drag it so that it's between the two images.
 You are now ready to adjust the sidewalk image, using the tropical image next to it for comparison. You are now ready to adjust the sidewalk image, using the tropical image next to it for comparison.
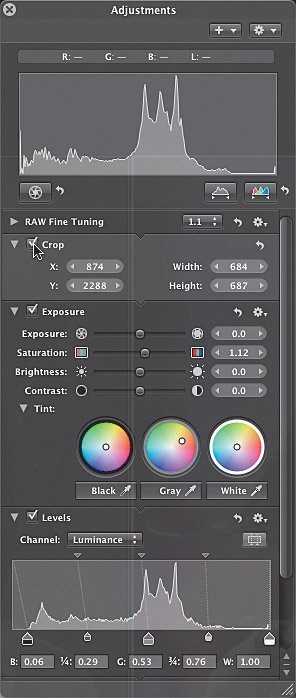
| 4. | With the sidewalk image selected, drag the black-point control under the Levels histogram to the right until its value is 0.06.
The luminance for two images becomes closer. The idea isn't to match the values exactly, but to get the values of the two images in close range of each other.
| 5. | Drag the control in the center of the Gray color wheel toward 2 o'clock as you did for the tropical image, stopping when it is about halfway between the center and the edge of the wheel.
| | | 6. | Drag the Saturation slider to 1.12.
 The color, contrast, and brightness of the images now seem much closer. The color, contrast, and brightness of the images now seem much closer.
| 7. | Deselect the Crop checkbox in the Adjustments HUD to turn off the crop on the sidewalk image. Resize the Adjustments HUD if the Crop HUD is hidden.
 | 8. | Click the tropical image to select it and then repeat step 7 to remove the crop.
| | | 9. | Press H to hide the Adjustments HUD.
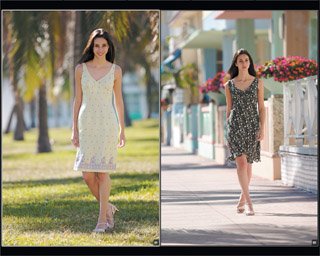 |
The two images now have similar contrast and coloring. The images could definitely be placed next to each other for an ad or in a store display. Since you don't know where or how the image will be printed, this is as far as you take the image processing. The agency can tweak the image a bit further depending on the intended use. And since other adjustments may be made down the line, it's not appropriate to perform, say, sharpening. Tip If you know how the images will be printed, you can use Aperture's soft-proofing feature. For more on soft proofing, see Lesson 10, "Advanced Output."
|