| After the user selects his criteria on the search page, a list of resulting names appears on the Mailing List page. The Mailing List page allows the user to confirm the results and, if it is as expected, forward the list to the Send Mail page for emailing. Alternatively, the user can return to the Search Users page to modify the search. The page is fairly straightforward and consists primarily of a table to hold the recordset data. A Repeat Region server behavior is used to display all the returned records. The recordset is constructed from a somewhat complex SQL statement based on the various session variables constructed in the Search Users page. Note This application does not include special handling should the search criteria return no results. You might consider such error handling as described in earlier recipes, such as Recipe 2: Employee Lookup.
Step 1: Implement Mailing List Design Here's a straightforward page where a table-based layout for holding repeating rows of data is ideal: Create a page for the Mailing List recipe, either from a template or from the File > New dialog.  In the MailMerge folder, locate the folder for your server model and open the mailing_list page there. In the MailMerge folder, locate the folder for your server model and open the mailing_list page there.
In the content area of your page, create a header for the page and an area to hold both the returned search results. From the Snippets panel, drag the Recipes > MailMerge > Wireframes > Mailing List - Wireframe snippet into the Content editable region. Add labels and table cells to hold the mailing list information (name, email address, and access group) and links to the pages for sending email and searching again. Place your cursor in the row below the words MAILING LIST and insert the Recipes > MailMerge > ContentTables > Mailing List - Content Table snippet [r8-3].
Figure r8-3. 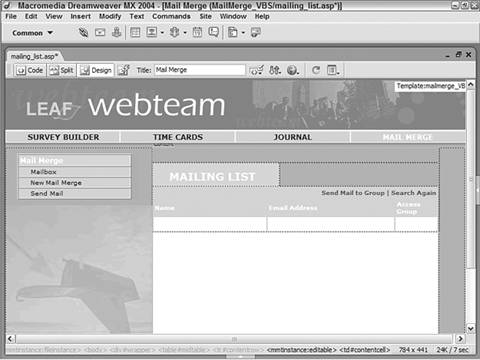
Save the page.
Step 2: Add Database Components You've seen how the search criteria are placed into session variables for easy access in the Search Users page. Now we're ready to use those session variables to build a recordset of search results. The SQL statement used in the recordset combines two tables Users and AccessGroups to accommodate searches either by individual or group. The session variables are incorporated into the SQL statement in different ways, depending on the server model. ASP and PHP users must establish SQL variables for each of the session variables addressed; ColdFusion users can access the session variables directly. However, in all versions, the SQL statement is constructed so that it filters results based on information entered in either of the search forms or both. Note To accommodate the different dialogs for the various server models, the steps are presented separately here and when necessary throughout this recipe.
For ASP | | If you're following our recipe, before you begin this step, copy the SQL code from the provided snippet. Right-click (Ctrl-click) on Recipes > MailMerge > SQL > Search Results ASP and select Copy Snippet from the context menu. |
From the Bindings panel, choose Add (+) and select Recordset (Query) from the list. In the Recordset dialog, choose Advanced. Enter an appropriate name for the recordset. Enter SearchResults in the Name field. Select the desired data source. Choose Recipes from the Connections list. In the SQL area, enter the following code:  SELECT * FROM Users Inner Join AccessGroups ON Users.UserAccess = AccessGroups.AccessGroupID WHERE UserFirstName LIKE 'FirstParam%' AND UserLastName LIKE 'LastParam%' AND UserEmail LIKE 'EmailParam%' OR UserAccess = AccessParam SELECT * FROM Users Inner Join AccessGroups ON Users.UserAccess = AccessGroups.AccessGroupID WHERE UserFirstName LIKE 'FirstParam%' AND UserLastName LIKE 'LastParam%' AND UserEmail LIKE 'EmailParam%' OR UserAccess = AccessParam Paste the copied code in the SQL area by pressing Ctrl-V (Command-V).
Now we'll add four separate variables, one for each of the session variables. In the Variables section, choose Add (+) to create a new variable. Enter the name for the variable. In the Name column, enter FirstParam. Enter a default value for the variable. In the Default Value column, enter %. The percent sign acts as a wildcard allowing matches with any value if no other value is available. Wildcards are used for three of the four parameters in this recordset to match the three form fields. Enter a run-time value for the variable. In the Run-Time Value column, enter Session("Search_First"). In the Variables section, choose Add (+) to create a new variable. Enter the name for the variable. In the Name column, enter LastParam. Enter a default value for the variable. In the Default Value column, enter %. Enter a run-time value for the variable. In the Run-Time Value column, enter Session("Search_Last"). In the Variables section, choose Add (+) to create a new variable. Enter the name for the variable. In the Name column, enter EmailParam. Enter a default value for the variable. In the Default Value column, enter %. Enter a run-time value for the variable. In the Run-Time Value column, enter Session("Search_Email). In the Variables section, choose Add (+) to create a new variable. Enter the name for the variable. In the Name column, enter AccessParam. Enter a default value for the variable. In the Default Value column, enter 0. Enter a run-time value for the variable. In the Run-Time Value column, enter Session("Search_Access"). Click OK to close the dialog and insert the recordset.
For ColdFusion | | If you're following our recipe, before you begin this step, copy the SQL code from the provided snippet. Right-click (Ctrl-click) on Recipes > MailMerge > SQL > Search Results CFML and select Copy Snippet from the context menu. |
From the Bindings panel, choose Add (+) and select Recordset (Query). Switch to the advanced view of the dialog and enter an appropriate name for the recordset. Enter SearchResults in the Name field. Choose your data source. Select Recipes from the Data Source list. Enter a username and password if necessary. In the SQL area, enter the following code: SELECT * FROM Users Inner Join AccessGroups ON Users.UserAccess = AccessGroups.AccessGroupID WHERE UserFirstName LIKE '#Session.Search_First#%' AND UserLastName LIKE '#Session.Search_Last#%' AND UserEmail LIKE '#Session.Search_Email#%' OR UserAccess = #Session.Search_Access# Paste the copied code into the SQL area by pressing Ctrl-V (Command-V). Verify your SQL in the Recordset dialog and click OK to close that dialog.
For PHP | | If you're following our recipe, before you begin this step, copy the SQL code from the provided snippet. Right-click (Ctrl-click) on Recipes > MailMerge > SQL > Search Results PHP and select Copy Snippet from the context menu. |
From the Bindings panel, choose Add (+) and select Recordset (Query) from the list. In the Recordset dialog, choose Advanced. Enter an appropriate name for the recordset. Enter SearchResults in the Name field. Select the desired data source. Choose Recipes from the Connections list. In the SQL area, enter the following code:
| [View full width] SELECT * FROM users Inner Join accessgroups ON users.UserAccess =  accessgroups.AccessGroupID WHERE UserFirstName LIKE 'FirstParam%' AND UserLastName LIKE 'LastParam%' AND UserEmail LIKE 'EmailParam%' OR UserAccess = AccessParam accessgroups.AccessGroupID WHERE UserFirstName LIKE 'FirstParam%' AND UserLastName LIKE 'LastParam%' AND UserEmail LIKE 'EmailParam%' OR UserAccess = AccessParam |
Paste the copied code in the SQL area by pressing Ctrl-V (Command-V).
Now we'll add four separate variables, one for each of the session variables. In the Variables section, choose Add (+) and enter the following details in the Add Parameter dialog:  The percent sign acts as a wildcard allowing matches with any value if no other value is available. Wildcards are used for all the parameters in this recordset corresponding to the text fields in the search form. Click OK to close the Add Parameter dialog and then choose Add (+) and enter the following details for the second variable:  Click OK to close the Add Parameter dialog and then choose Add (+) and enter the following details for the third variable:  Click OK to close the Add Parameter dialog and then choose Add (+) and enter the following details for the last variable:  Click OK once to close the Add Parameter dialog and then again to close Recordset dialog. Be sure to save your page.
Step 3: Data Binding Process With our recordset built, we're ready to bind the data fields to specific areas of the page. In this page, four data fields are used, representing the email recipient's first name, last name, email address, and access group. From the Bindings panel, expand the SearchResults recordset. Place the desired data source fields onto the page: Drag the UserFirstName field under the Name column. Drag the UserLastName field after the UserFirstName field and add a space between the two dynamic text elements. Drag the UserEmail field under the Email Address column. Drag the AccessGroupName field under the Access Group column.
Save your page [r8-4].
Figure r8-4. 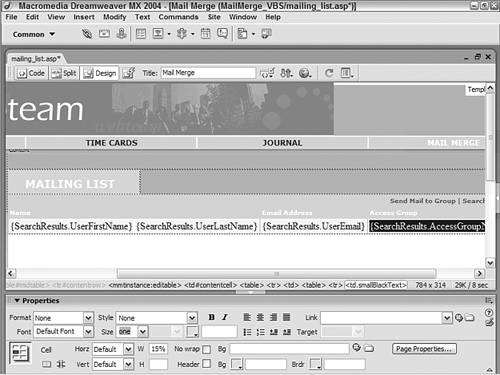
Step 4: Add Links After the user has checked the search results, there are two possible options: Accept the results or perform the search again. The Mailing List page provides links for both possibilities. If the results are accepted, the user would select the link to the Send Mail page to process the email. If the user decides to run the search again, a link to the Search Users page is available. The link to the Send Mail page requires a bit of special attention. Because we want the link to be available independent of the current page, we need to pass a parameter that indicates that the recordset culled from the search results should be used. Without the parameter, the Send Mail page will open and allow individual email addresses to be entered by hand. Let's create the link to the Send Mail page first: Select the text or image you want to link to the page that actually sends the email. Select the Send Mail to Group text. In the Property inspector, select the folder icon next to the Link field to open the Select File dialog. In the Select File dialog, select Parameters to begin the process of attaching a name/value pair to the URL. In the Parameters dialog, choose Add (+) and enter the name of the variable you want to pass. Enter UseRS in the Name column. Insert the value you want to attach to the link. Enter 1 in the Value column. Click OK to close the Parameters dialog. Select the file you want to link to. Select send_mail.asp.  Select send_mail.asp. Select send_mail.asp.
 Select send_mail.cfm. Select send_mail.cfm.
 Select send_mail.php. Select send_mail.php.
Click OK to close the Select File dialog.
Now let's create a simple link to the Search Users page. This link effectively replicates the browser's Back button action, but including it indicates the second of the two possible actions the user can choose. Select the text or image you want to serve as a link to the search page. Select the Search Again text. In the Property inspector, select the folder icon to open the Select File dialog. Choose the search page for your server model. Select search_users.asp. Select search_users.asp. Select search_users.cfm. Select search_users.php.
Step 5: Add Repeat Region Our final step in the Mailing List recipe is to wrap a Repeat Region server behavior around the embedded data fields. Select any of the dynamic data fields inserted into the mailing list content area. From the Tag Selector, choose the table row tag. Select the <tr> tag from the Tag Selector. From the Server Behaviors panel, choose Add (+) and select Repeat Region. In the Repeat Region dialog, choose the desired recordset. Choose SearchResults from the Recordset list. Set the Show option to display the number of records you would like. Choose Show All Records. Click OK when you're done and save your page.
|