Managing User Accounts
One of the most common network administration tasks is adding a user account. The Setup program may create a single user account for you when you first install Linux. But you'll probably need to create more Linux user accounts.
Each Linux user account has the following information associated with it:
-
Username: The name the user types to log on to the Linux system.
-
Full name: The user's full name.
-
Home directory: The directory in which the user will be placed when he or she logs in. In Fedora Linux, the default home directory is /home/ username. For example, if the username is blowe, the home directory is /home/blowe.
-
Shell: The program used to process Linux commands. Several shell programs are available. In most distributions, the default shell is /bin/bash.
-
Group: You can create group accounts, which make it easy to apply identical access rights to groups of users.
-
User ID: The internal identifier for the user.
You can add a new user by using the useradd command. For example, to create a user account named slowe and use default values for the other account information, open a Terminal window (or switch to a virtual console) and type this command:
# useradd slowe
The useradd command has many optional parameters you can use to set account information, such as the user's home directory and shell.
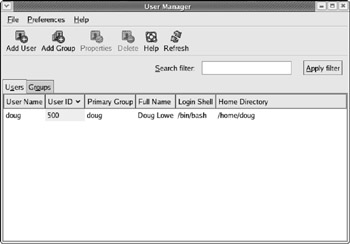
Fortunately, most Linux distributions come with special programs that simplify routine system-management tasks. Fedora is no exception. It comes with a program called User Manager, as shown in Figure 24-4. To start this program, choose Applications ![]() System Settings
System Settings ![]() User and Groups.
User and Groups.

Figure 24-4: The User Manager.
To create a user account with User Manager, click the Add User button. This brings up a dialog box that asks for the username, password, and other information. Fill out this dialog box and then click OK.
The User Manager also lets you create groups. You can simplify the task of administering users by applying access rights to groups rather than individual users. Then, when a user needs access to a resource, you can add the user to the group that has the needed access.
To create a group, click the Add Group button. A dialog box appears, asking for the name of the new group. Type the name you want and then click OK.
To add a user to a group, click the Groups tab in the User Manager. Then, double-click the name of the group you want to add users to. This brings up the Group Properties dialog box. Click the Group Users tab and then check off the users you want to belong to the group.