Creating Books
| Aperture provides a built-in book-making facility that provides layout tools for designing professional-looking picture books. After building your book in Aperture, you can upload it to Apple's book-printing service, where it will be printed and bound and then shipped to you via regular mail. While the print quality is not as good as what you get from a high-quality desktop photo printer (or as good as the quality delivered by the Order Prints option, which we'll look at later), it's still very good, and the overall look of the books is polished and professional. The Aperture book-making facility is ideal for making courtesy books for clients, delivering mock-ups of a layout or book design, or creating gifts. Creating a BookAn Aperture book is just like an album or Web gallery in that it simply contains pointers to images in your project. To create a book, follow these steps:
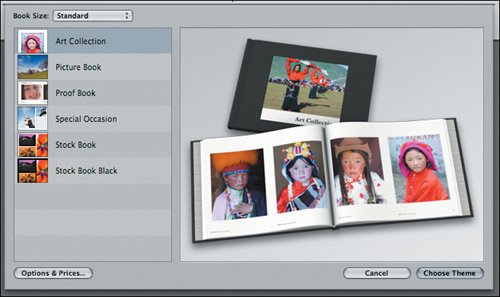
Creating a Book LayoutAs with Web galleries, when you select a book in the Projects pane, Aperture displays its book editing interface (Figure 8.18). Figure 8.18. When you select a book in the Projects pane, Aperture displays its book editor in the Viewer pane.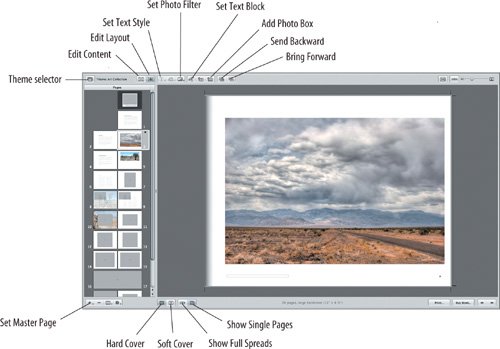 By default, all books begin with 20 pages, each of which holds placeholder text blocks and empty image boxes. You can add or delete pages (additional pages cost more, but if you have fewer than 20 pages, you'll still pay the same base price) as well as change the layout and contents of the pages. Navigating your book is simple: in the Pages panel, just click the page that you want to view. By default, Aperture displays two-page spreads. If you're working with a small screen, you may want to switch to single-page view by clicking the Show Single Pages button below the page display. Choosing a New Master Page DesignAperture provides a choice of page layouts, called master pages, and you can select new layouts on a page-by-page basis. Each book theme provides a different set of layouts appropriate to that theme's design. To change a page's master page, follow these steps:
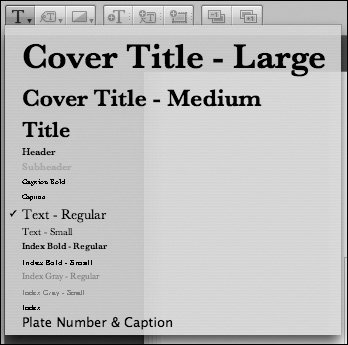
Editing TextYou can edit the text in any text box by double-clicking it. To change the style of the text, select a new style from the Set Text Style menu (Figure 8.19). The options in this menu will vary depending on the theme you have selected. A text block can have only one style applied to it, and you cannot change the style of individual words within a text block. Figure 8.19. In a book layout, you have several choices for the style of your text blocks.
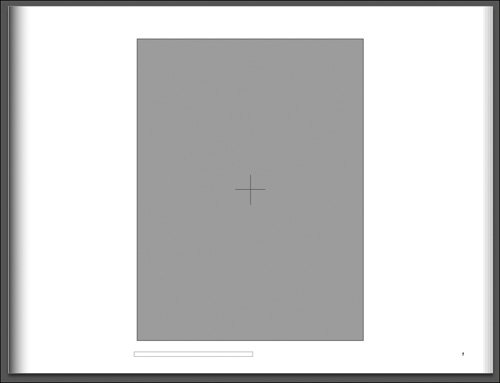
Adding ImagesYou can add an image to any photo boxthe large shaded boxes with the + signs in the middleby dragging an image from the Browser pane into the box (Figure 8.20). The image will be scaled to fit the box. After you've added an image to a book, Aperture adds a small number badge to its thumbnail in the Browser pane, to indicate the number of times that the image has been used in the book. Figure 8.20. You can place images in any photo box by dragging them from the Browser pane.
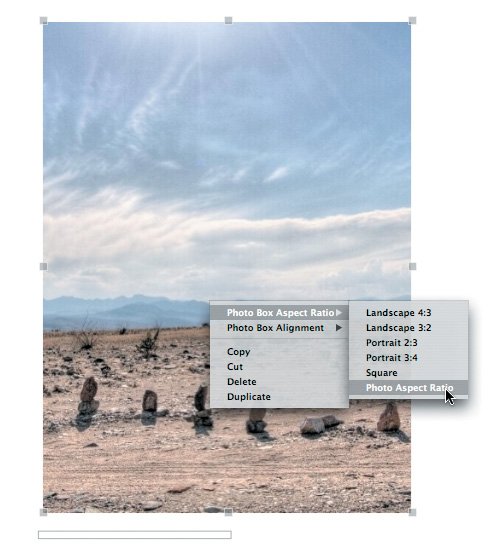
Zooming and cropping an image: You can zoom into and pan around an image in a photo box by double-clicking the image to invoke the Image Scale HUD. Drag the slider to the right to zoom in on the image. Click in the gray area surrounding the book layout to dismiss the HUD. If you've zoomed in on an image, you can pan around it by clicking and dragging the image. Changing the aspect ratio of a photo box: If your image does not have the same aspect ratio as the photo box that you've placed it in, it will be cropped. You can automatically resize the photo box to match your image by clicking the Edit Layout button and then Control-clicking (or right-clicking, if you have a two-button mouse) the image. From the pop-up menu, choose Photo Box Aspect Ratio > Photo Aspect Ratio (Figure 8.21). The box will be resized to match your image. Figure 8.21. By Control-clicking an image, you can ask Aperture to automatically change the aspect ratio of a photo box to match the aspect ratio of the image that's been placed inside it.
Changing the size of a photo box: In Edit Layout mode, you can resize a photo box, even one that already contains an image, by dragging the control handles along the edges of the box. Hold down the Shift key while dragging to maintain the aspect ratio. Rotating an image You can rotate an image within its photo box by double-clicking the image to make it editable and then using the rotation tools to rotate it in 90-degree increments. You cannot arbitrarily rotate a photo box. Adding a Photo FilterAperture provides some built-in filter effects that can be applied to any image in a book layout. You can use these filters to perform black-and-white conversions and sepia conversions and apply a wash to an image to make it appear lightly screened (Figure 8.22). Figure 8.22. Using the Set Photo Filter menu, we applied a Light Wash filter to this image to screen it back, making the text box on top of it more readable.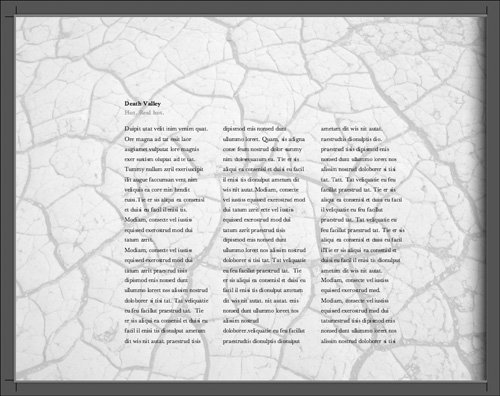 Filter effects that you apply in a book layout are visible only in the book; they do not appear on the images in your library. To apply a photo filter, select the image that you want to filter and then choose the filter you want to apply from the Set Photo Filter menu. Autofilling Book PagesAperture can automatically build pages for you using your remaining unused images. Select the page on which you want to begin autofilling and then choose Autofill Unplaced Images from the action menu below the Pages panel. Aperture will fill the remaining photo boxes in your book with your unused images. If you want to limit the images that Aperture uses, select the images that you want to use and then choose Autofill Selected Images from the action menu. Customizing Book PagesYou can freely edit Aperture's book layouts, to tweak them to meet the needs of your particular project. Aperture's book editing facilities are powerful enough that you can completely rebuild pages to your own design. Changing the Layout of Text BlocksYou can change the size of a text block or move the block on the page by clicking the Edit Layout button. Handles will appear on the text block, and you can use these to stretch and drag the block. As you drag, alignment guides appear to help you align blocks. In Edit Layout mode, you can also add text blocks by clicking the Add Text Box button or choosing Add > Text Box from the action menu below the Pages panel. When you're done editing, switch back to Book Layout mode by clicking the Edit Content button. Changing the number of columns in a text bock: You can give a text box a columnar layout by choosing Text Block Columns from the action menu below the Pages panel. Changing text box alignment: You can change the alignment of text within a block by choosing Text Box Alignment from the action menu below the Pages panel. Adding a Photo BoxYou can add as many photo boxes as you like to a page. To add a new one, select the page to which you want to add the box. Click the Edit Layout button and then click Add Photo Box to add a new box. You can then resize and position the box. Tip You can create overlapping text and photo boxes simply by layering the boxes on top of each other. You can change the stacking order of the currently selected item by using the Send Backward and Bring Forward buttons. Adding a Metadata BoxIf you want to automatically display the metadata for a particular image, you can add a metadata box. Click the Add Metadata Box button and then position and size the box. You must configure the text box to display the appropriate metadata:
Changing the Page BackgroundIn addition to adding images to photo boxes, you can drag images directly onto the page background. The image will fill the entire page, and all other elements on the page will sit on top of it. You can still zoom and pan the image, but you can't change its aspect ratio. To add an image to a page background, drag it from the Browser pane to the white part of the page (or the black part, if you're using a theme with black pages). The page will be highlighted in gray to indicate that the image will be added to the page background. Note You can apply the same filter effects to background images that you can apply to photo boxes. The ability to add images to the page backgrounds gives you lots of additional design and layout possibilities, because you can design page elementsor even entire pagessave them as images, and then import those images into Aperture and place them on a book page. For example, by default Aperture's themes have a white or black background. You can change the background color of a page using the following technique:
Using this technique, you can perform some additional layout functions that Aperture doesn't currently provide: Use additional typefaces: Aperture doesn't let you use any typefaces besides those included in the Set Text Style menu. However, you can use your image editor to create a background image that has the text that you want, styled and positioned to your liking, and then import that image into Aperture and place your images over it. Obviously, you will not be able to edit the text in Aperture. You can also use this technique to add graphic elements such as border lines. Create complex image layouts: While Aperture lets you design pages with multiple, overlapping text and image boxes, it doesn't let you arbitrarily rotate images or perform other more sophisticated layout tricks. However, you can lay out your page in your image editor, position your images as you like there, and save the entire layout as an image that you can then import and place on a page background (Figure 8.23). Figure 8.23. If you need to create more complex layouts than what Aperture's built-in tools are capable of, consider designing a page in an external application and then applying it to a page background in your Apple book.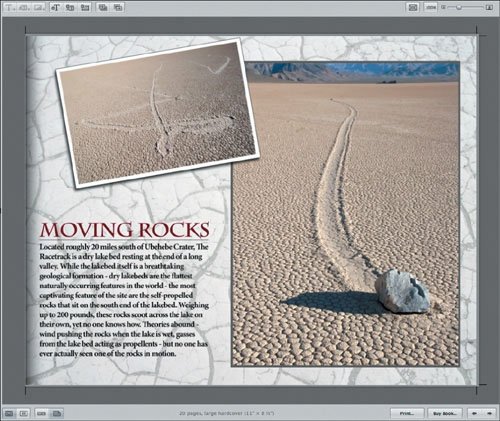 Saving Custom PagesIf you've customized the layout of a page and want to be able to easily apply that layout to other pages in your book, you can save the custom layout by choosing Save Page > As New Document Master from the action menu below the Pages panel. The new page layout will appear in the Master Page menu. Note that images added to page backgrounds are not saved in the master page definition. Outputting Your BookWhen you're ready to output your book, you have two options:
|