Exporting Images
| In the preceding chapter, you learned how to use Photoshop's round-trip feature, which lets you easily move images into another editor and back. If you need to create files to give to other people, though, or to use in another application such as a video editor or 3D modeler, you'll need to use Aperture's export functions. When you export an image, you have two options: you can export the original master file for that image, or you can export the current version. Exporting a MasterWhen you choose to export the master of the selected image, the original file that was imported into Aperture is exported. Remember that Aperture never alters a master image so this file will be an exact copy of whatever you imported. If you originally imported a JPEG file, then the exported master will be that same JPEG file. If you imported a raw file, then the original, unprocessed raw document will be exported. If you imported a Photoshop file, even one with multiple layers and effects, then that original file will be exported. If you want to work with your original document in another application, or if you want to give a copy of the original document to someone else, you should export it as a master. If you haven't made any adjustments to your original image, then exporting a master is a viable option for delivering a copy of the image to someone else. However, note that if you've applied any metadata to your image, that data won't be included with the exported master. For that, you'll need to export a version (discussed later in this chapter). To export a master, follow these steps:
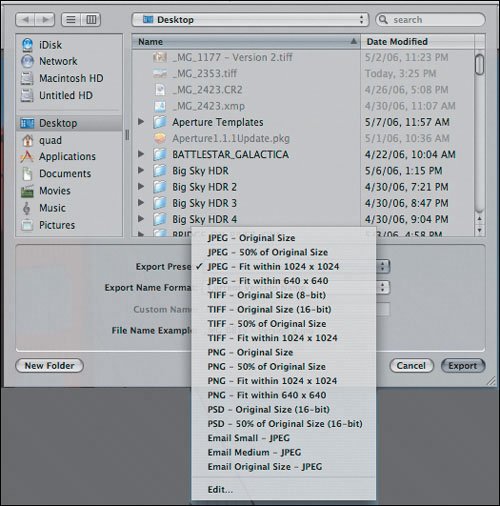
Exporting a VersionIf you've edited an image and want to export the results, then you'll need to use the Export Version command. Similarly, if you haven't made any adjustments but have added metadata to your image, then you'll need to use Export Version to produce an image that includes your metadata. If you need to export an image at a particular size, don't worry; you'll can specify an output size when you save the file. Because Aperture is a nondestructive editor, there's no need to keep separate versions for different image sizes. To export a version, follow these steps:
|
