Configuring Your Windows System
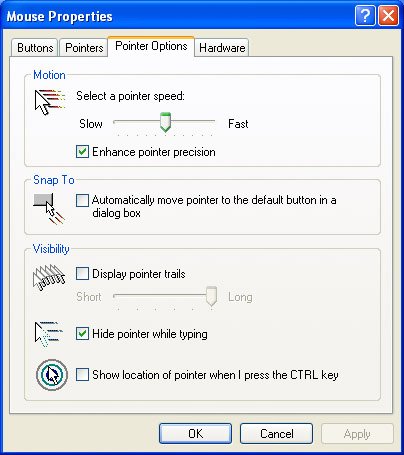
| Just as a new Mac needs to be tweaked and customized to your particular tastes, when you first install Windows, you'll probably want to perform some customizations on your Windows install. The following sections will help you get started. Setting mouse speedBy default, the Windows mouse driver uses a slower mouse speed than what you're probably used to on the Mac. You can reconfigure the mouse by using the Mouse control panel. Follow these steps:
Note If you're using a MacBook Pro, the acceleration, scrolling, and right-click features of the laptop's trackpad are not available. Installing a mouse driverIf you're using a non-Apple mouse or input device, you may need to install a special driver to take full advantage of any extra buttons or controls that it might have. Check your vendor's Web site for driver downloads, and install accordingly. Right-clicking with a one-button mouseIf you're using a MacBook Pro trackpad or a single-button mouse, you'll need to look into some alternative methods of right-clicking. In Windows XP, Shift-F10 is equivalent to a right-click. So if you need to right-click a file, click the file and then press Shift-F10. The context menu should appear just as though you had right-clicked. This technique won't work if you want to right-click a Web link, as there's no way to select a Web link without triggering it. The Apple Mouse Utility, a free download available at www.geocities.com/pronto4u/applemouse.html, will let you right-click with a one-button mouse by using the same technique that you use in Mac OS X. After installing, you can simply hold down the Control key while you click to execute a right-click. Configuring your keyboardMac and Windows keyboards aren't quite the same. One of the most critical differences is the Delete key. The Delete key on your Mac keyboard is considered by Windows XP to be the Backspace key. If you have a MacBook Pro, your keyboard doesn't have anything that Windows considers to be a Delete key. If you have an external keyboard, you probably have both a Backspace key and a Delete key. The Delete key usually is next to the End key on a Mac keyboard. The Delete key is especially important to Windows users, because it's necessary if you need to execute a Control-Alt-Delete key combination. Control-Alt-Delete is used to restart or log off the machine if it hangs. Windows keyboards also use the Num Lock key to toggle the numeric keypad between numbers and arrow keys. On a Mac keyboard, the Clear key in the top-left corner of the numeric keypad works as a Num Lock key when you're running Windows. For ultimate control of your keyboard, you might want to consider a keyboard remapping tool such as KeyTweak, available for free from http://webpages.charter.net/krumsick. 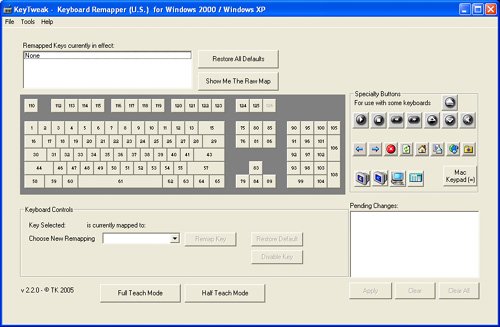 KeyTweak allows you to assign any key code to any key available on your Mac. With it, you can easily create a keyboard layout that's more Windows friendly. (Because this is Windows software, of course, it will have no effect on your keyboard when you boot back into Mac OS X.) Adding user accountsYou can add more user accounts with the User Accounts control panel. Follow these steps:
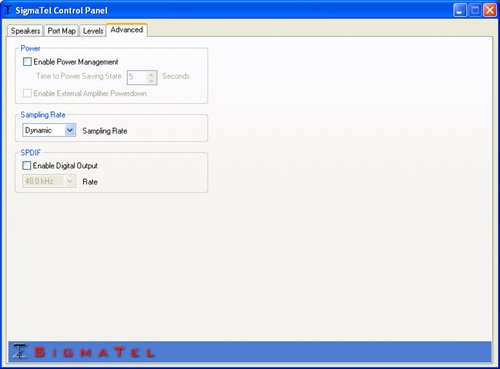
Turning off the light in the digital audio output port (MacBook Pro only)The headphone jack on the left side of your MacBook Pro is also a S/PIDF digital audio output port. Under Windows, you'll probably find a bright red light shining from the port. You can deactivate this light by using the Windows Control Panel. Follow these steps:
|