| Framesets rely on the target attribute to load pages into specific frames in a frameset. Each of the hyperlinks in the following exercise uses the target attribute to open a web page in a different browser window. The concepts you'll learn here will help you understand later how targeted hyperlinks work in a frameset. In this exercise, you'll create four separate HTML documents that use hyperlinks, including the target attribute. You'll use these hyperlinks to open two new windows called yellow_page and blue_page, as shown in Figure 14.2. The top window is the original web browser window (the red page), yellow_page is at the bottom left, and blue_page is at the bottom right. Figure 14.2. Using the target attribute indicates that links should open new windows. 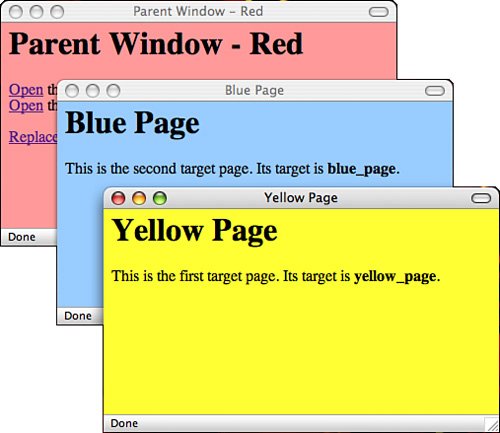
First, create the document to be displayed by the main web browser window, shown in Figure 14.3, by opening your text editor of choice and entering the following lines of code: Input <html> <head> <title>Parent Window - Red</title> </head> <body bgcolor="#ff9999"> <h1>Parent Window - Red</h1> <p><a href="yellow.html" target="yellow_page"> Open</a> the Yellow Page in a new window. <br /> <a href="blue.html" target="blue_page">Open</a> the Blue Page in a new window. </p> <p><a href="green.html" target="yellow_page">Replace</a> the yellow page with the Green Page.</p> </body> </html>
Output Figure 14.3. The parent window (the red page). 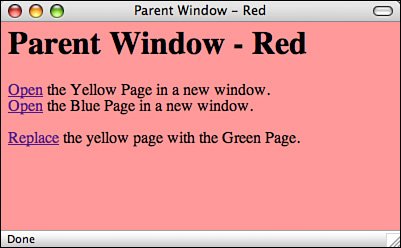
This creates a light-red page that links to the other three pages. Save this HTML source as parent.html. Next, create a document called yellow.html (see Figure 14.4) by entering the following code: Input <html> <head> <title>Yellow Page</title> </head> <body bgcolor="#ffffcc"> <h1>Yellow Page</h1> <p>This is the first target page. Its target is <b>yellow_page</b></p> </body> </html>
Output Figure 14.4. yellow.html web browser window named yellow_page. 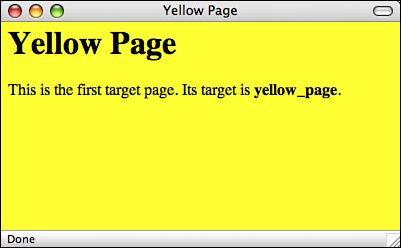
After saving yellow.html, create another document called blue.html (see Figure 14.5) by entering the following code: Input <html> <head> <title>Blue Page</title> </head> <body bgcolor="#99ccff"> <h1>Blue Page</h1> <p>This is the second target page. Its target is <b>blue_page</b>.</p> </body> </html>
Output Figure 14.5. blue.html displayed in the web browser window named blue_window. 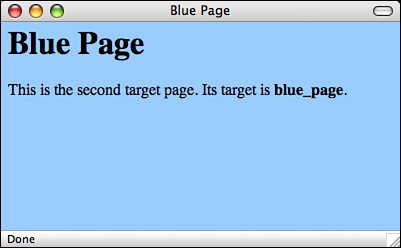
Next, create a fourth document called green.html, which looks like the following: <html> <head> <title>Green Page</title> </head> <body bgcolor="#ccffcc"> <h1>Green Page</h1> <p>This is the third target page. Its target is <b>yellow_page</b>. It should replace the yellow page in the browser.</p> </body> </html>
To complete the exercise, load parent.html (the red page) into your web browser. Click the first hyperlink to open the yellow page in a second browser window. This happens because the first hyperlink contains the attribute target="yellow_page", as the following code from parent.html demonstrates: <p><a href="yellow.html" target="yellow_page">Open</a> the Yellow Page in a new window.<br />
Now return to the red page and click the second link. The blue page opens in a third browser window. Note that the new windows probably won't be laid out like the ones shown in Figure 14.2; they usually overlap each other. The following target="blue_page" statement in the parent.html page is what causes the new window to open: <a href="blue.html" target="blue_page">Open</a> the Blue Page in a new window.</p>
The previous two examples opened each of the web pages in a new browser window. The third link, however, uses the target="yellow_page" statement to open the green page in the window named yellow_page. You accomplish this using the following code in parent.html: <p><a href="green.html" target="yellow_page">Replace</a> the yellow page with the Green Page.</p>
Because you already opened the yellow_page window when you clicked the link for the yellow page, the green page should replace the page that's already in it. To verify this, click the third hyperlink on the red page. This replaces the contents of the yellow page (with the yellow_page target name) with the green page (green.html), as shown in Figure 14.6. Figure 14.6. green.html displayed in the web browser window named green_page. 
The <base> Tag When you're using the target attribute with links, you'll sometimes find that all or most of the hyperlinks on a web page point to the same window. This is especially true when you're using frames, as you'll discover in the following section. In such cases, rather than including a target attribute for each <a> tag, you can use another tag, <base>, to define a global target for all the links on a web page. The <base> tag is used as follows: <base target="window_name">
If you include the <base> tag in the <head>...</head> block of a document, every <a> tag that doesn't have a target attribute will be directed to the window indicated by the base tag. For example, if you had included the tag <base target="yellow_page"> in the HTML source for parent.html, the three hyperlinks could have been written the following way: <html> <head> <title>Parent Window - Red</title> <base target="yellow_page"> <!-- add base target="value" here --> </head> <body bgcolor="#ff9999"> <h1>Parent Window - Red</h1> <p> <a href="yellow.html">Open</a> <!-- no need to include a target --> the Yellow Page in a new window.<br /> <a href="blue.html" target="blue_page">Open</a> the Blue Page in a new window. </p> <p><a href="green.html">Replace</a> <!-- no need to include a target --> the yellow page with the Green Page.</p> </body> </html>
In this case, yellow.html and green.html load into the default window assigned by the <base> tag (yellow_page); blue.html overrides the default by defining its own target window of blue_page. You also can override the window assigned with the <base> tag by using one of two special window names. If you use target="_blank" in a hyperlink, it opens a new browser window that doesn't have a name associated with it. Alternatively, if you use target="_self", the current window is used rather than the one defined by the <base> tag. |