Gather Your Sound Clips
| Just as there are many sources for finding images, there are probably even more for free sound clips, starting with the umpteen files Apple gives .Mac members on their iDisk. It's a great resource that can add a lot to your production, and if you're already a .Mac subscriber, it's free.
You access these iMac files through your iDisk. Choose iDisk from the Finder's Go menu, then you'll find the music in iDisk> Software > Extras > FreePlay Music.
You should see many sound clips that are yours for the taking, as shown in Figure 7.1. Figure 7.1. You'll have more files than you know what to do with after opening the FreePlay Music folder in your iDisk.
Drag the sound files you'd like to sample onto your hard drive. If you try to play them from within the FreePlay Music folder it won't work as well, because you'll have to wait as the music is sent over the Internet. Once they're on your hard drive, double-click the sound clips one at a time to listen to them.
It's a good idea to put the sound clips you want to use for your project in your iTunes Music folder, so they'll be available in iDVD's Audio pane.
Apple also supplies one sample audio clip with iDVD. It's called Slideshow audio.mp3 and it is in the Media folder (inside the iTunes Tutorial folder). It's a snappy little Latin number that's sure to make your DVD viewers want to dance. Another source of free music is your audio CD collection.
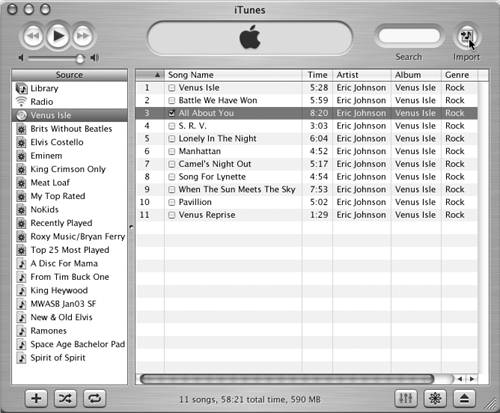
That precaution noted, it's perfectly OK to nab your favorite tune to use on the DVD you're making for the grand-folks. Here's how to grab music from any audio CD to use on your DVD: Although, you can import audio directly into iDVD from a CD (choose Import > Audio from the File menu) this doesn't do you any good, because iDVD doesn't import until you click the Burn button. And you can't put a blank DVD-R in the SuperDrive, because the program won't let you eject the audio CD, which is the source of some of the files it needs to burn the disk. It's a classic catch-22…. Therefore, you must extract the audio from the CD before you import it into iDVD. The easiest way is with iTunes. To extract a track with iTunes, launch iTunes and insert an audio CD. iTunes might connect to the Web to look for title information (you can tell it not to in Preferences). If the CD icon isn't highlighted in the Source list, click it to highlight. A list of the tracks on that CD will appear on the right. Click the checkbox for any track you want to import and then click the Import button in the upper-right corner of the iTunes window.
iTunes will now extract the track from the CD, create a sound file, and place that sound file on your hard drive in the iTunes folder inside the Music folder in your Home folder.
OK, now that you have the sound file on your Mac's hard drive (again, I'd recommend transferring it into your iTunes Music folder for ease of use later), you can import it into iDVD, along with any other sound files on your hard drive. |