| Mail (Figure 42) is an e-mail application. It enables you to send and receive e-mail messages using your Internet e-mail account. Figure 42. The Mail main window with an incoming message displayed. 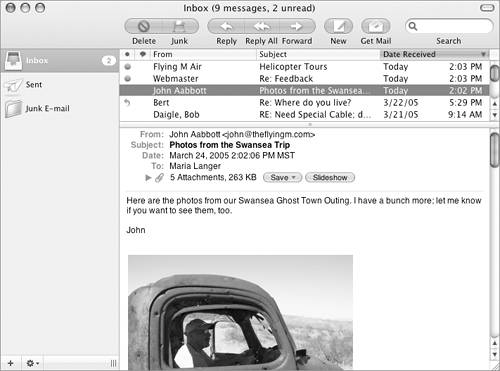
Here's how it works. Imagine having a mailbox at the post office. As mail comes in, the postmaster sorts it into the boxesincluding yours. To get your mail, you need to go to the post office to pick it up. While you're there, you're likely to drop off any letters you need to send. E-mail works the same way. Your e-mail is delivered to your e-mail serverlike the post office where your mailbox is. The server software (like the postmaster) sorts the mail into mailboxes. When your e-mail client software (Mail, in this case) connects to the server via the Internet, it picks up your incoming mail and sends any outgoing messages it has to send. If you set up your Internet connection and provided e-mail information when you first configured Mac OS X, that information is automatically stored in Mail so it's ready to use. Just open Mail and it automatically makes that virtual trip to the post office to get and send messages. In this part of the chapter, I explain how to set up an e-mail account with Mail, just in case you need to add an account. I also explain how to compose, send, read, and retrieve e-mail messages.  Tip Tip
The first time you open Mail, a dialog appears, asking if you want to import e'mail addresses from another e'mail program. If you do, click Yes and follow the instructions that appear onscreen to perform the import.
To set up an e-mail account 1. | Choose Mail > Preferences, or press  . .
| 2. | In the Mail Preferences window that appears, click the Accounts button to display its options (Figure 43).
Figure 43. The Accounts pane of Mail Preferences. 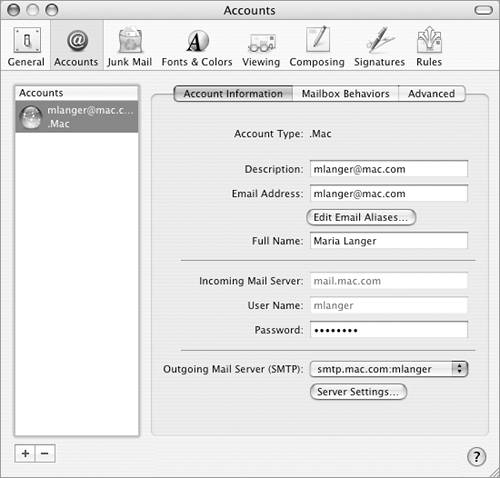
| 3. | Click the + button beneath the list of accounts.
| 4. | A dialog sheet like the one in Figure 44 appears. Enter information for the account:
Account Type is the type of e-mail account. Your options are .Mac, POP, IMAP, or Exchange. Account Description is a name to distinguish this account from other accounts. Full Name is your full name. User Name (for .Mac accounts only) is your .Mac user name. Email Address (for all account types other than .Mac) is your e-mail address. Password (for .Mac accounts only) is your Mac account password.
Figure 44. start by providing general information about the account. 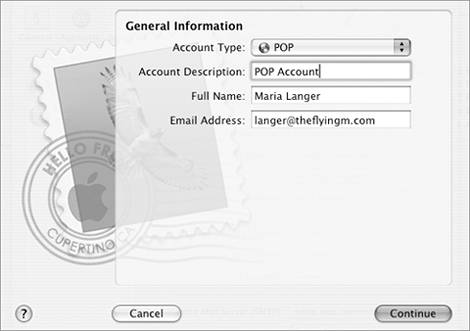
| 5. | Click Continue. If you created a .Mac account, skip ahead to step 8.
| 6. | In the Incoming Mail Server dialog (Figure 45), enter information for your incoming mail server and click Continue.
Incoming Mail Server is the domain name or IP address of your incoming mail server. User Name is your user ID on the mail server. Password is your password on the mail server. Outlook Web Access Server (for Exchange accounts only) is the domain name or IP address of the Outlook server for Web access to e-mail.
Figure 45. For most account types, you'll have to enter information about your incoming mail server. 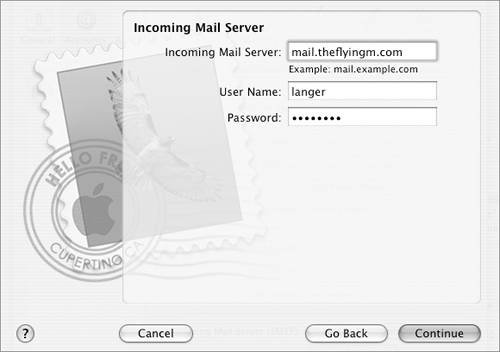
| 7. | In the Outgoing Mail Server dialog (Figure 46), enter information for your outgoing mail server and click Continue.
Outgoing Mail Server is the domain name or IP address of your outgoing mail server. You can choose a server from the drop-down list or enter information for a different server. Use Authentication tells Mail to send your user name and password when sending mail. This is required by most mail servers. If you turn on this check box, be sure to enter your account user name and password in the boxes below it.
Figure 46. For most types of e-mail accounts, you'll also have to provide outgoing mail server info. 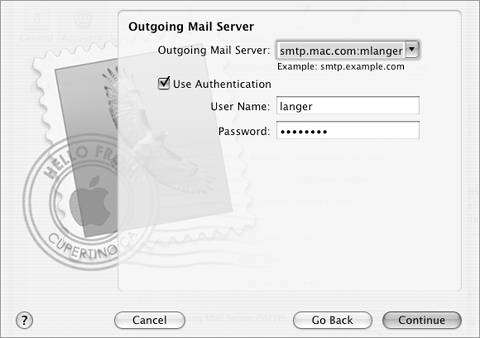
| 8. | When Mail has verified all information you entered, it displays the results in an Account Summary window (Figure 47). Click Continue.
Figure 47. Mail displays a summary of the account information it has confirmed. 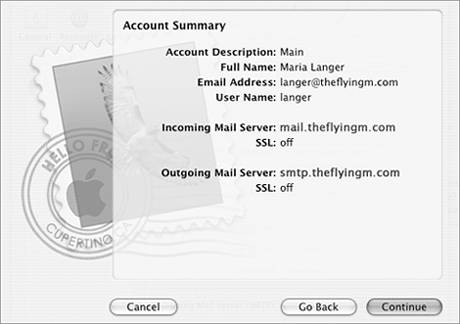
| 9. | The Conclusion window appears (Figure 48). You have two options:
Figure 48. When you're finished, you have two options: create another account or close the dialog and get back to work. 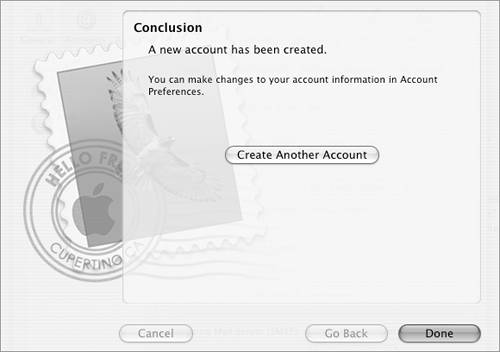
| 10. | The new account is added to the Accounts list (Figure 49). Click the window's close button to close the Accounts window.
Figure 49. The new account is added to the Accounts list. 
|
 Tips Tips
Another way to set up a new e-mail account is to choose File > Add Account. Then follow steps 4 through 9 on the previous two pages. You only have to set up an e-mail account once. Mail will remember all of your settings. Your ISP or network administrator can provide all of the important information you need to set up an e-mail account, including the account name, password, and mail servers. If you have a .Mac account and want to set up another account, you must enter a domain name or IP address for a different outgoing mail server (Figure 46) for that account. The .Mac outgoing mail server will only send e'mail messages for a .Mac account. Outgoing or SMTP server information should be provided by your ISP. You can set other options for an account by clicking the Mailbox Behaviors and Advanced buttons in the Accounts pane (Figure 43). Explore these options on your own.
To create & send a message 1. | Click the New button at the top of the main Mail window (Figure 42). The New Message window appears (Figure 50).
Figure 50. Clicking the New button opens a New Message window like this one. 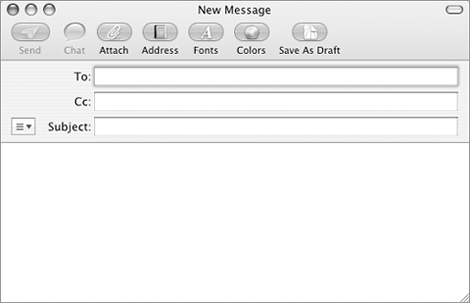
| 2. | Use one of the following techniques to enter the recipient's address in the To box:
Type the recipient's e-mail address. If the recipient is someone in your Address Book file or someone you have received an e-mail message from in the past, enter the person's name. As you type, Mail attempts to match the name (Figure 51). Click the correct entry. Figure 51. When you begin to type in a name, Mail tries to match it to entries in Address Book. 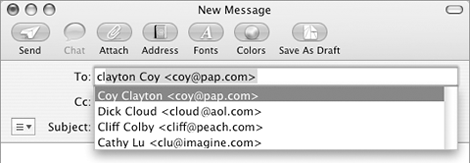
Click the Address button. Use the searchable Addresses window that appears (Figure 52) to locate the recipient's name and double-click it. Figure 52. You can also use an Addresses window to enter a recipient's e-mail address. 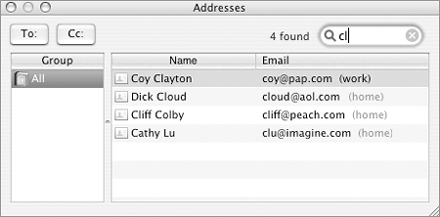
| 3. | Repeat step 2 to add additional names. When you are finished, click  twice. twice.
| 4. | Enter a subject for the message in the Subject field, and press  . .
| 5. | Type your message in the large box at the bottom of the window. When you are finished, the window might look like the one in Figure 53.
Figure 53. Here's a short message ready to be sent. 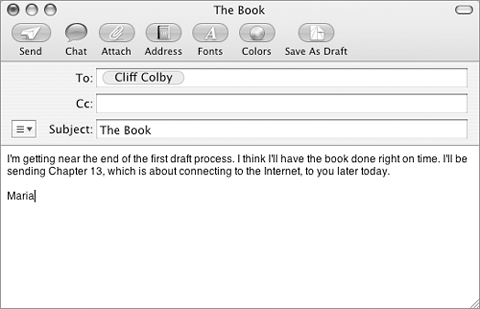
| 6. | Click the Send button. The message window closes and Mail sends the message.
|
 Tips Tips
Address Book is covered in Chapter 8. To add a file as an attachment to the message, drag the file's icon from a Finder window into the message body. If you have a modem connection to the Internet, you must connect before you can send a message.
To retrieve e-mail messages 1. | Click the Get Mail button at the top of the main window (Figure 42).
| 2. | Mail accesses the Internet, then connects to your e-mail server and downloads messages waiting for you. Incoming messages appear in a list when you select the Inbox in the Mailboxes column (Figure 42).
|
 Tips Tips
A blue bullet character appears beside each unread e-mail message (Figure 42). Messages that Mail thinks are junk mail are colored brown. You can set junk mail filtering options in the Junk Mail preferences window (Figure 54). Choose Mail > Preferences and click the Junk Mail button to get started. You'll find that Mail's junk mail filter can weed out at least 75% of the junk mail that you get. Figure 54. The Junk Mail preferences window enables you to set options that weed out junk mail messages. 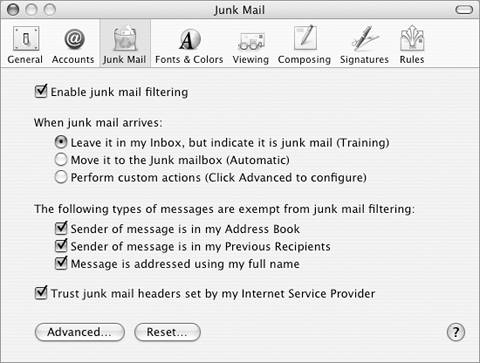
You can configure Mail to have multiple mailboxes to organize your incoming e-mail more effectively. Use commands under the Mailbox menu to create and customize mailboxes.
To read a message 1. | Click the message that you want to read. It appears in the bottom half of the main Mail window (Figure 42).
| 2. | Read the message.
|
 Tips Tips
You can also double-click a message to display it in its own message window (Figure 55). Figure 55. Double-click a message to open it in its own window. 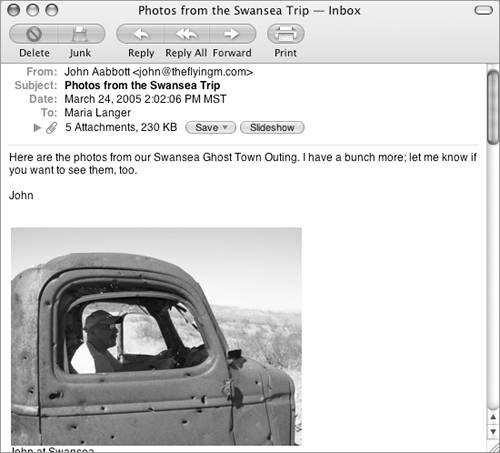
To view a list of message attachments (when present), click the triangle beside the paper clip icon in the message header. The header expands to show icons for each attachment (Figure 56). To save attachments, click the Save button to display a menu (Figure 57) and choose the desired option. A Save As dialog appears so you select a location to save the file(s). Figure 56. Clicking the Attachments triangle displays icons for attachments. In this example, five JPEG image files are attached.. 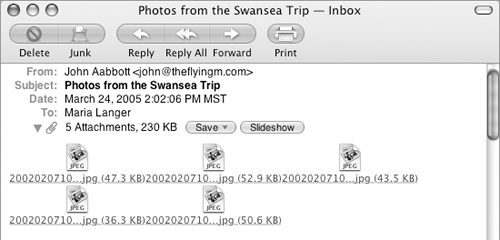
Figure 57. The Save menu enables you to save all attachments or a specific attachment. If the attachment is a photo, you can even save it directly to iPhoto (if installed). 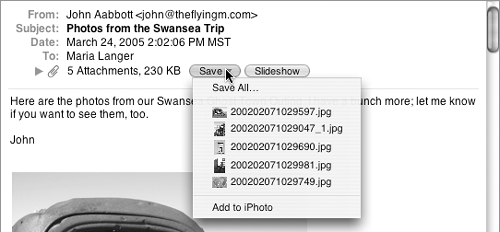
If a message includes photos, you can click the Slideshow button to display a slide show of all photos, one at a time (Figure 58). This is a new feature in Mac OS X 10.4. Figure 58. You can display photo attachments as a slide show, right from within Mail. 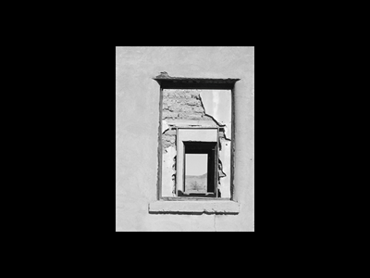
To reply to a message 1. | Click the Reply or Reply All button at the top of the window. A preaddressed message window with the entire message quoted appears (Figure 59).
Figure 59. When you click the Reply button, a pre-addressed message window appears. 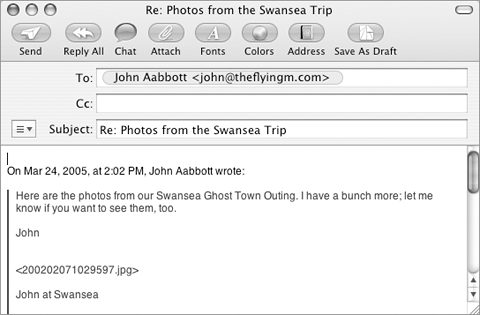
| 2. | Type your reply, in the message body.
| 3. | Click Send.
|
 Tip Tip
To forward a message 1. | Click the Forward button at the top of the window. A copy of the message appears in a new message form (Figure 60).
Figure 60. A forwarded message includes the entire message and any attachments. 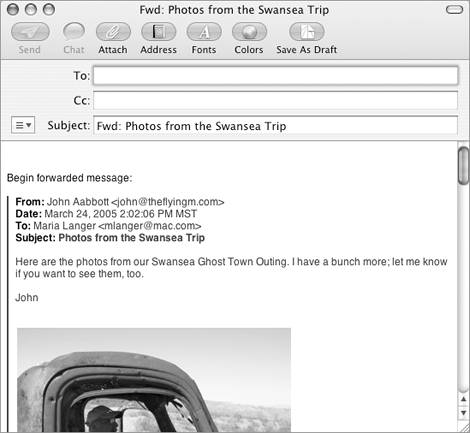
| 2. | Enter the e-mail address of the person you want to forward the message to in the To box.
| 3. | If desired, enter a message at the top of the message body.
| 4. | Click Send.
|
To add a message's sender to the Address Book 1. | Select (Figure 42) or open (Figure 55) the message sent by the sender you want to add.
| 2. | Choose Message > Add Sender to Address Book or press  . .
Mail automatically adds the person's name and e-mail address to Address Book's entries. You can open Address Book and add additional information for the record as desired.
|
|

 Tip
Tip


