| The Find and Replace dialog, which I discuss in Chapter 2, offers yet another way to change the formatting of a document. Although this dialog is used primarily to find and replace document text, it can also be used to find and replace document formatting, whether the formatting is directly applied or applied with styles. To change formatting with the Find and Replace dialog 1. | Choose Edit > Replace (Figure 32) or press  to display the Replace options of the Find and Replace dialog. to display the Replace options of the Find and Replace dialog.
Figure 32. The Edit menu. 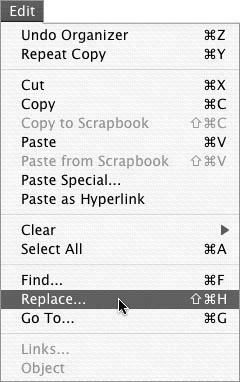
| 2. | If necessary, click the triangle button to expand the dialog so it looks like Figure 33.
Figure 33. The Replace options of the Find and Replace dialog, expanded to show all options. 
| 3. | To change the formatting of specific text, enter the text in both the Find what and Replace with boxes.
or
To change the formatting of any text, make sure the Find what and Replace with boxes are empty.
| 4. | Position the insertion point in the Find what box.
| 5. | Use the Format pop-up menu (Figure 34) to select the type of formatting you want to find. The appropriate dialog appears. Figure 35 shows an example of what the Find Font dialog might look like. Change settings as desired and click OK.
Figure 34. Use the Format pop-up menu to choose the type of formatting you want to find or apply. 
Figure 35. The Find Font dialog. When you first display this dialog, nothing is selected, indicating that Word will find any font formatting. 
| 6. | Repeat step 5 for each type of formatting that you expect to find. Remember, Word will find text with all the formatting settings you specify.
| 7. | Position the insertion point in the Replace with box.
| 8. | Use the Format pop-up menu (Figure 34) to select the type of formatting you want to apply to found text. The appropriate dialog appears. Change settings as desired and click OK.
| 9. | Repeat step 8 for each type of formatting that you want to apply to found text. Remember, Word will apply all of the formatting you specify. Figure 36 shows an example of how the Find and Replace dialog might look when you're finished.
Figure 36. In this example, Word will find any text that's underlined and has the Normal paragraph style applied and replace it with the same text formatted with bold, italic, Verdana font. 
| 10. | Use the Replace or Replace All buttons as discussed in Chapter 2 to replace formatting occurrences, thus reformatting text.
|
 Tips Tips
As shown in Figure 35, formatting dialog boxes that are accessed from the Find and Replace dialog do not indicate any formatting settingsnothing is selected and check boxes have dashes in them, indicating that an option is neither selected nor deselected. Your settings in these dialogs should indicate the type of formatting you expect to find. For example, to find any text that was underlined, no matter what font, size, or other formatting option is applied, you'd select just the Underline style option you expect to find. Making changes for other options includes those options in your settings. If you're not familiar with the Find and Replace dialog, read about it in Chapter 2 before following the instructions here. To clear formatting options, position the insertion point in the Find what or Replace with box and click the No Formatting button.
|