Customizing Word's Toolbars & Menus Word's toolbars and menus enable you to access commands by clicking a toolbar button or choosing a menu command. This is pretty standard stuff that's available in many applications. But what isn't standard is your ability to customize Word's menus and toolbars as follows: Create new toolbars with any combination of buttons. Display any combination of toolbars. Show or hide ScreenTips with or without shortcut keys on toolbars. Display font names in plain text or font typefaces on font menus. Add and remove toolbar buttons, menu commands, and menus.
You customize Word's toolbars and menus with its Customize Toolbars/Menus dialog. This part of the chapter explains howand how to restore toolbars and menus to default settings when you need to. To open the Customize Toolbars/Menus dialog Choose Tools > Customize > Customize Toolbars/Menus (Figure 51). Figure 51. The Customize submenu at the bottom of the Tools menu offers several options for customizing Word. 
To modify the appearance of toolbars & menus 1. | In the Customize Toolbars/Menus dialog, click the Toolbars button to display its options (Figure 52).
Figure 52. The Toolbars pane of the Customize Toolbars/Menus dialog. 
| 2. | Toggle check boxes as desired in the bottom-right corner of the dialog:
Show ScreenTips on toolbars displays the name of a button in a small box when you point to the button (Figure 53). Figure 53. A ScreenTip for a toolbar button. 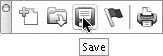
Show shortcut keys in ScreenTips displays a command's shortcut key in the ScreenTip box when you point to its button (Figure 54). Figure 54. A shortcut key displayed in a ScreenTip. 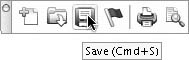
WYSIWYG font menus displays font menus and lists in their typeface (Figure 10).
| 3. | Click OK to save your settings.
|
To create a new toolbar 1. | In the Customize Toolbars/Menus dialog, click the Toolbars button to display its options (Figure 52).
| 2. | Choose a template or document name from the Save in pop-up menu to specify where the toolbar should be saved.
| 3. | Click the New button to display the New Toolbar dialog (Figure 55).
Figure 55. Use this dialog to set options and create a new toolbar. 
| 4. | Enter a name for the toolbar in the Toolbar name box and click OK.
A tiny empty toolbar appears onscreen (Figure 56) and the name of the toolbar you created appears at the bottom of the list in the Toolbars pane of the dialog (Figure 57).
Figure 56. An empty toolbar. As you can see, it isn't much to look at. 
Figure 57. A new toolbar's name appears at the bottom of the Toolbars list. 
|
 Tip Tip
To rename a toolbar 1. | In the Customize Toolbars/Menus dialog, click the Toolbars button to display its options.
| 2. | Select the name of the toolbar you want to rename (Figure 57).
| 3. | Click the Rename button to display the Rename Toolbar dialog (Figure 58).
Figure 58. Use this dialog to rename a toolbar you created. 
| 4. | Enter a new name for the toolbar in the Toolbar name box and click OK.
|
The name of the toolbar changes in the list in the Toolbars tab of the dialog. Tip
To delete a toolbar 1. | In the Customize Toolbars/Menus dialog, click the Toolbars button to display its options.
| 2. | Select the name of the toolbar you want to delete (Figure 57).
| 3. | Click the Delete button.
| 4. | Click OK in the confirmation dialog that appears (Figure 59).
Figure 59. A dialog box like this appears to confirm that you really do want to delete the toolbar. 
|
The name of the toolbar is removed from the list in the Toolbars tab of the dialog. Tip
To show or hide toolbars 1. | In the Customize Toolbars/Menus dialog, click the Toolbars button to display its options (Figure 52).
| 2. | To display a toolbar, turn on the check box beside the toolbar name.
or
To hide a toolbar, turn off the check box beside the toolbar name.
|
Tips You can also display or hide most toolbars by choosing the toolbar's name from the Toolbars submenu under the View menu (Figure 60), as discussed in Chapter 1. This submenu also includes the Customize Toolbars/Menus command, which opens the Toolbars pane of the Customize Toolbars/Menus dialog (Figure 52). Figure 60. The Toolbars submenu under the View menu. 
You must display a toolbar to make changes to its buttons as discussed on the following pages.
To add buttons to a toolbar 1. | In the Customize Toolbars/Menus dialog, click the Toolbars button to display its options (Figure 52).
| 2. | Make sure the check box for the toolbar you want to change is turned on so the toolbar appears onscreen.
| 3. | Click the Commands button to display its options (Figure 61).
Figure 61. The Commands button of the Customize Toolbars/Menus dialog. 
| 4. | Select a command category in the Categories list. The commands that appear in the Commands list change.
| 5. | Scroll through the Commands list to find the command you want to add to the toolbar.
| 6. | Drag the command from the Commands list to the toolbar you want to add it to. A vertical bar appears where the button will be inserted (Figures 62a and 62b). When the bar is in the desired location, release the mouse button. The toolbar button appears (Figures 63a and 63b).
Figure 62a. You can add a button to a new toolbar... 
Figure 62b. ...or an existing one. 
Figure 63a & 63b. The toolbars from Figures 62a and 62b after adding a button. 
| 7. | Repeat steps 4 through 6 for each button you want to add to a toolbar.
| 8. | When you are finished adding buttons, click OK to dismiss the Customize Toolbars/Menus dialog.
|
To remove buttons from a toolbar 1. | In the Customize Toolbars/Menus dialog, click the Toolbars button to display its options (Figure 52).
| 2. | Make sure the check box for the toolbar you want to change is turned on so the toolbar appears onscreen.
| 3. | Drag a button off the toolbar (Figure 64). When you release the mouse button, the button disappears (Figure 65).
Figure 64. Drag the button off the toolbar. 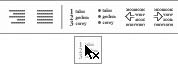
Figure 65. The button is removed from the toolbar. 
| 4. | Repeat step 3 for each button you want to remove from the toolbar.
| 5. | When you are finished removing buttons, click OK to dismiss the Customize Toolbars/Menus dialog.
|
To restore a toolbar to default settings 1. | In the Customize Toolbars/Menus dialog, click the Toolbars button to display its options (Figure 52).
| 2. | Select the name of the toolbar you want to restore to its default settings.
| 3. | Click the Reset button. A warning dialog appears (Figure 66).
Figure 66. A dialog like this one confirms that you really do want to reset the toolbar. 
| 4. | Click OK. The toolbar is restored to its default settings.
|
Tip
To add commands to a menu 1. | In the Customize Toolbars/Menus dialog, click the Toolbars button to display its options (Figure 52).
| 2. | Make sure the check box beside Menu Bar is turned on so the customizable menu bar appears onscreen.
| 3. | Click the Commands button to display its options (Figure 61).
| 4. | Select a command category in the Categories list. The commands that appear in the Commands list change.
| 5. | Scroll through the Commands list to find the command you want to add to the menu.
| 6. | Drag the command from the Commands list to the menu you want to add it to. The menu opens and a horizontal bar appears where the command will be inserted (Figure 67). When the bar is in the desired location, release the mouse button. If you click the menu to display it again, you'll see that the command has been added (Figure 68).
Figure 67. Drag a command from the Customize Toolbars/Menus dialog to a menu. 
Figure 68. The command is added to the menu. 
| 7. | Repeat steps 4 through 6 for each command you want to add to a menu.
| 8. | When you are finished adding commands, click OK.
|
Tip
To remove a command from a menu 1. | In the Customize Toolbars/Menus dialog, click the Toolbars button to display its options (Figure 52).
| 2. | Make sure the check box beside Menu Bar is turned on so the customizable menu bar appears onscreen.
| 3. | Click the name of the menu containing the command you want to remove to display the menu (Figure 68).
| 4. | Drag the command off the menu (Figure 69). When you release the mouse button, the command is removed (Figure 70).
Figure 69. To remove a command from a menu, simply drag it off. 
Figure 70. The command is removed from the menu. 
| 5. | Repeat steps 3 and 4 for each command you want to remove from a menu.
| 6. | When you are finished removing commands, click OK.
|
To remove a menu 1. | In the Customize Toolbars/Menus dialog, click the Toolbars button to display its options (Figure 52).
| 2. | Make sure the check box beside Menu Bar is turned on so the customizable menu bar appears onscreen.
| 3. | Drag the name of the menu you want to remove off the Menu toolbar. When you release the mouse button, the menu is removed.
| 4. | Repeat step 3 for each menu you want to remove.
| 5. | When you are finished removing menus, click OK.
|
 Warning! Warning!
To restore menus to default settings 1. | In the Customize Toolbars/Menus dialog, click the Toolbars button to display its options (Figure 52).
| 2. | Select Menu Bar in the scrolling list.
| 3. | Click the Reset button. A warning dialog appears (Figure 66).
| 4. | Click OK. The menu bar is restored to its default settings.
|
Tip
|