| Comments are annotations that you and other document reviewers can add to a document. These notes can be viewed onscreen but don't print unless you want them to. To insert a comment 1. | Select the text for which you want to insert a comment (Figure 14).
Figure 14. Start by selecting the text you want to enter a comment about. 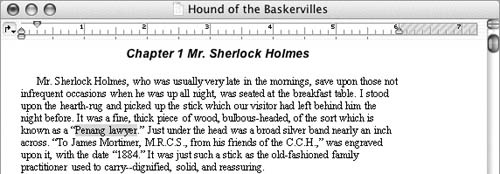
| 2. | Choose Insert > Comment (Figure 15).
Figure 15. Choose Comment from the Insert menu. 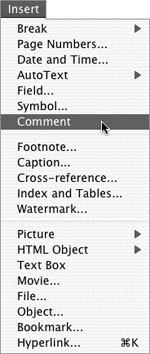
A few things happen: A comment marker (colored parentheses) appears around the selected text, the Reviewing toolbar appears, the window splits, and the insertion point moves to the Reviewing pane at the bottom of the window under a color-coded heading with your name (Figure 16).
Figure 16. Word prepares to accept your comment. 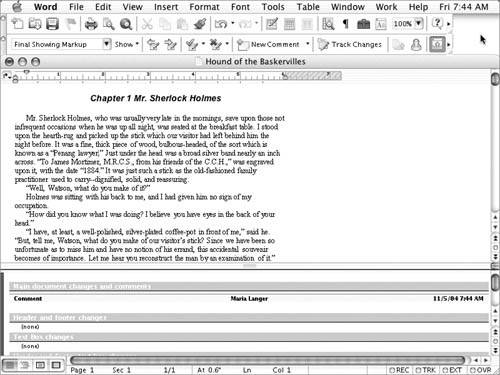
| 3. | Type in your comment. It can be as long or as short as you like (Figure 17).
Figure 17. Enter your comment in the Reviewing pane at the bottom of the window. 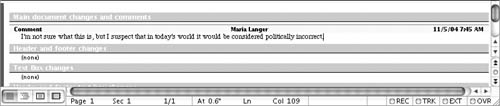
|
 Tips Tips
Word gets your name and initials from the User Information pane of the Preferences dialog. I tell you more about that in Chapter 20. The colored parentheses that appear in the document window (Figure 16) do not print.
To close the Reviewing pane Click the Reviewing Pane button on the Reviewing toolbar. Tip
To view comments In Normal view, position the mouse pointer over text enclosed in colored parentheses. A box appears. It contains the name of the person who wrote the comment, the date and time the comment was written, and the comment text (Figure 18). Figure 18. In Normal view, a comment appears in a box when you point to marked text. 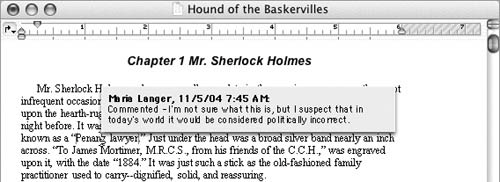
Or In Page Layout view, comments should appear automatically in a "balloon" that points to commented text (Figure 19). Figure 19. In Page Layout view, comments appear in "balloons" that point to commented text. 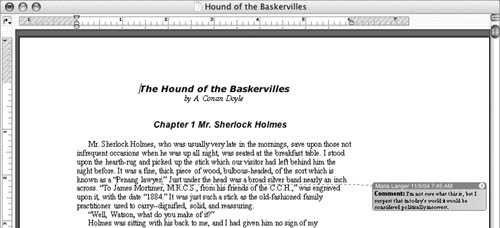
Or Click the Reviewing Pane button on the Reviewing toolbar to display the Reviewing pane and the comments it contains (Figure 20). Figure 20. When the Reviewing pane is displayed, it shows all comments entered in a document. 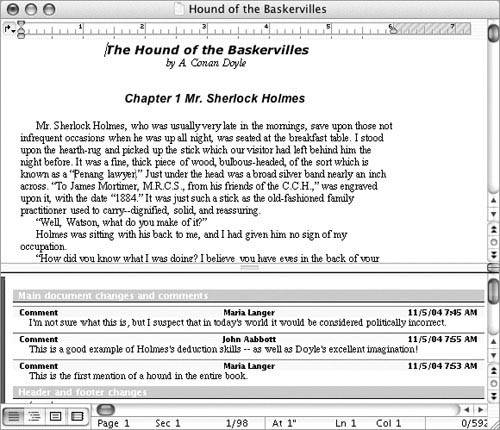
Tips If comments or comment markers do not appear in the document window, choose Comments from the Show pop-up menu on the Reviewing toolbar (Figure 21). Figure 21. Use the Show pop-up menu to make sure the markup you want to see is displayed. 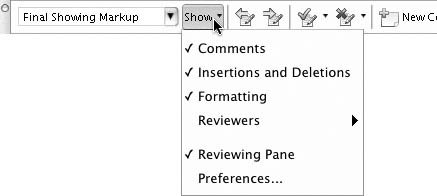
If the Reviewing toolbar is not displayed, choose View > Toolbars > Reviewing to display it. You can change the size of the Reviewing pane by dragging the border between it and the main document window.
To delete a comment 1. | If necessary, choose View > Toolbars > Reviewing to display the Reviewing toolbar.
| 2. | In the document window, position the insertion point anywhere within the parentheses surrounding commented text.
| 3. | Click the Reject Change/Delete Comment button on the Reviewing toolbar. All traces of the comment disappear.
|
To print comments 1. | Choose File > Print (Figure 1) or press  to display the Print dialog (Figure 10). to display the Print dialog (Figure 10).
| 2. | Choose Microsoft Word from the third pop-up menu (Figure 11) to display Microsoft Word Print options (Figure 12).
| 3. | Choose one of the markup options from the Print What pop-up menu (Figure 13):
Document showing markup prints each page of the document, slightly reduced, with comments in the right margin. Figure 22 shows what this looks like in Print Preview. Figure 22. Here's the first page of a document printed with markup. 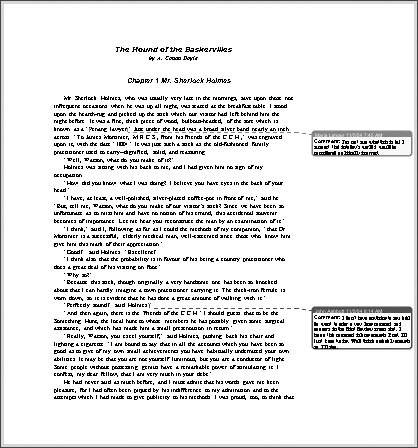
List of markup prints the contents of the Reviewing pane.
| 4. | Set other options as desired in the Print dialog.
| 5. | Click Print to print the chosen markup option.
|
Tip
|