Creating and Consuming a Web Service with Visual Studio .NET
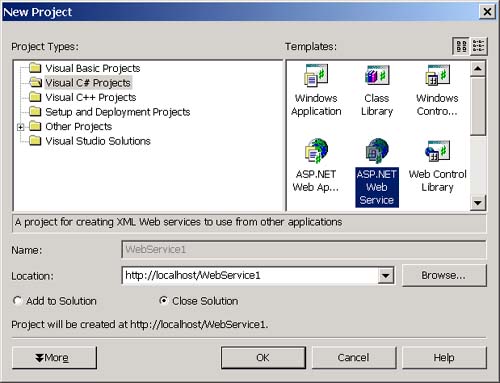
Creating and Consuming a Web Service with Visual Studio .NET In the previous section you created an Arithmetic Web service without using any of the Web service development features in Visual Studio .NET. In this section, I explore some of the tools available in Visual Studio .NET for Web service development. I also look at returning and accepting more complex data from the Web service. Visual Studio .NET includes a project template for creating an XML Web service. This project template will create an asmx file for the Web service using the code-behind directive. It also creates the corresponding source file for the asmx file and creates the IIS virtual directory for the XML Web service. To create a project using this template, perform the following steps:
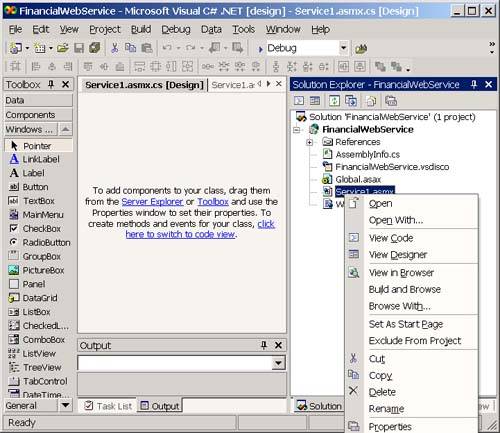
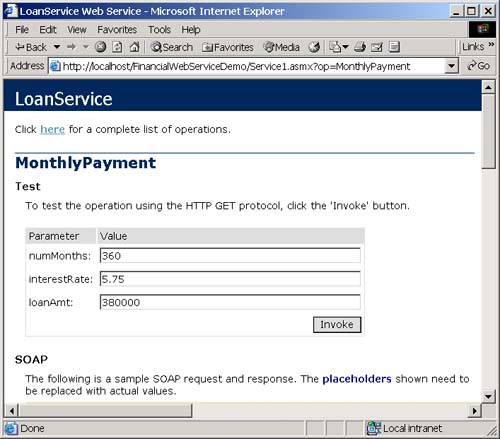
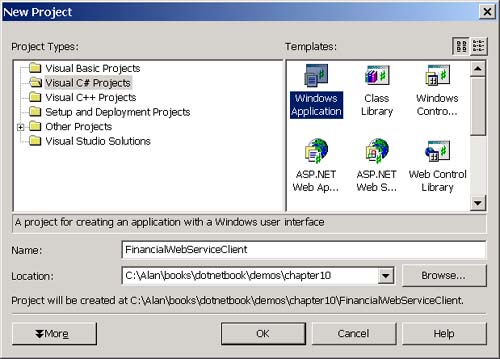
This creates a project on your machine beneath your InetPub directory at wwwroot \FinancialWebService . On my machine, the Web service resides at D:\Inetpub\wwwroot\FinancialWebService . In this directory, Visual Studio .NET creates a project file with the extension .csproj. This file is actually an XML file. Try bringing it up in Notepad, and you can see how Visual Studio .NET stores all of the necessary information about a project. The project directory will also contain an asmx file called Service1.asmx (you can obviously change this name if you like). The contents of this file are as follows : <%@ WebService Language="c#" Codebehind="Service1.asmx.cs" Class="FinancialWebService.Service1" %> The contents of the code-behind file are as follows: using System; using System.Collections; using System.ComponentModel; using System.Data; using System.Diagnostics; using System.Web; using System.Web.Services; namespace FinancialWebService { public class Service1 : System.Web.Services.WebService { public Service1() { InitializeComponent(); } private IContainer components = null; private void InitializeComponent() { } protected override void Dispose(bool disposing) { if(disposing && components != null) { components.Dispose(); } base.Dispose(disposing); } // [WebMethod] // public string HelloWorld() // { // return "Hello World"; // } } } There is also a Global.asax file and a corresponding Global.asax.cs file. The contents of the Global.asax file are shown here: <%@ Application Codebehind="Global.asax.cs" Inherits="FinancialWebService.Global" %> Here are the contents of the Global.asax.cs file: using System; using System.Collections; using System.ComponentModel; using System.Web; using System.Web.SessionState; namespace FinancialWebService { public class Global : System.Web.HttpApplication { public Global() { InitializeComponent(); } protected void Application_Start(Object sender, EventArgs e) { } protected void Session_Start(Object sender, EventArgs e) { } protected void Application_BeginRequest(Object sender, EventArgs e) { } protected void Application_EndRequest(Object sender, EventArgs e) { } protected void Application_AuthenticateRequest(Object sender, EventArgs e) { } protected void Application_Error(Object sender, EventArgs e) { } protected void Session_End(Object sender, EventArgs e) { } protected void Application_End(Object sender, EventArgs e) { } private void InitializeComponent() { } } } These files contain an override of the System.Web.HttpApplication class. You can customize the behavior of your HttpApplication by adding logic to the empty event handlers shown in global.asax.cs . The project also contains an important file called [ProjectName].csproj.webinfo . For the project that I just created, the name of the file is FinancialWebService.csproj.webinfo . The contents of this file are as follows: <VisualStudioUNCWeb> <Web URLPath = "http://localhost/FinancialWebService/ FinancialWebService.csproj" /> </VisualStudioUNCWeb> If you ever need to move your project to another virtual directory, you need to change the URLPath in this file to point to the new location. To implement the financial Web service, you can go to the code for the Web service by right-clicking the Service1.asmx file in the solution explorer view of Visual Studio .NET as shown in Figure 10-10. Figure 10-10. Viewing the code for your Web service. Change the name of the class from Service1 to LoanService and add the MonthlyPayment and LoanAmount methods that follow: 1. public class LoanService : 2. System.Web.Services.WebService 3. { 4. public LoanService () 5. { 6. InitializeComponent(); 7. } 8. 9. // The rest of the code is omitted for clarity... 10. 11. [WebMethod] 12. public decimal MonthlyPayment(short numMonths, 13. double interestRate, decimal loanAmt) 14. { 15. double monthlyRate, tempVal; 16. decimal unRoundedAmt; 17. monthlyRate=interestRate/1200; 18. tempVal=Math.Pow((1+monthlyRate), 19. (double)numMonths); 20. unRoundedAmt=(decimal)((double)loanAmt* 21. (monthlyRate*tempVal/(tempVal-1))); 22. return decimal.Round(unRoundedAmt,2); 23. } 24. [WebMethod] 25. public decimal LoanAmount(short numMonths, 26. double interestRate, decimal monthlyPmt) 27. { 28. double monthlyRate, tempVal; 29. decimal unRoundedAmt; 30. monthlyRate=interestRate/1200; 31. tempVal=Math.Pow((1+monthlyRate), 32. (double)numMonths); 33. unRoundedAmt=(decimal)((double)monthlyPmt* 34. (tempVal-1)/(monthlyRate*tempVal)); 35. return decimal.Round(unRoundedAmt,2); 36. } 37. } The MonthlyPayment method takes a number of months, an annual percentage rate, and a loan amount, and it calculates the monthly payment needed to pay off the loan amount. The LoanAmount method takes a number of months, an annual percentage rate, and a monthly payment, and it calculates the loan amount that you can afford. You can now test this Web service using the test HTML page by navigating to the following URL: localhost/FinancialWebService/. If you do this, you see the test page shown in Figure 10-11. Figure 10-11. Viewing the code for your Web service. Let's now look at a feature that Visual Studio .NET provides to automate the process of creating a client of a Web service. Let's create a Windows Forms-based client this time to show that you can call an XML Web service just as easily from either type of client. To create a Windows Forms client for the financial Web service, perform the following steps:
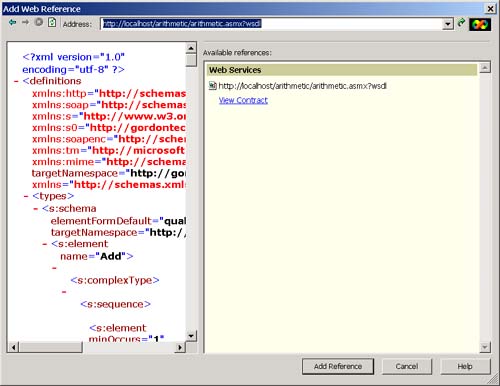
Next, add a Web reference for the client. To do this, perform the following steps:
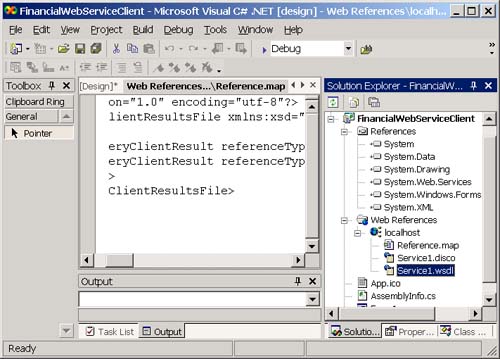
Visual Studio adds a Web References folder to the solution view in your project as shown in Figure 10-14. Figure 10-14. The Web reference in Visual Studio .NET. This folder will contain the DISCO and WSDL files for the Web service as well as a map file that contains location information for the Web service. However, notice that there is no source file. If you go to the operating system folder for the project, you will see that the Add Web Reference command created a new directory with the name Web References . Beneath this directory is a directory called localhost . Beneath that directory you will see four files: (1) reference.cs , (2) reference.map , (3) service1.disco , and (4) service1.wsdl . The reference.cs file will contain the exact same proxy code that you generated earlier using wsdl.exe. Therefore, using the Add Web Reference command in Visual Studio .NET is equivalent to running WSDL to generate a proxy and then adding the source code for the proxy to your project. The reference.map and service1.disco files contain location information for the Web service, and service1.wsdl contains a copy of the WSDL file. After you compile the client, you should be able to type in loan amounts, an interest rate, and a number of months and calculate a monthly payment, or you can enter a monthly payment, interest, and a number of months and calculate a loan amount. |

| | |
| Team-Fly |
| Top |
EAN: 2147483647
Pages: 119