Live Trace: Converting Rasters to Vectors
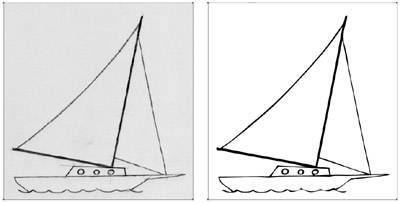
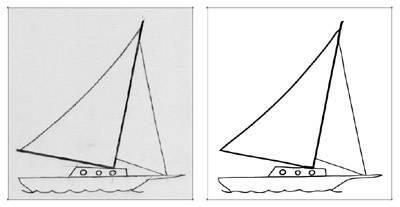
| Certain Illustrator features, like Pathfinder, are incredibly useful and as a result, are used many times a day. Features like 3D are also extremely cool, but they aren't used as often. Every once in a while, a feature comes along in Illustrator that is cool and fun to use, but that is also practical enough that you use it on a regular basis. Illustrator's Live Trace is such a feature. The concept is simple enough: take a raster-based image and convert it into a vector-based image. You would want to do this to get around the limitations of a raster-based file. For example, if you want to scale artwork up in size, or if you want to edit the artwork easily and use spot colors, you want to work with a vector-based file. There are separate applications (like Adobe Streamline) and Illustrator plugins (like Free Soft's Silhouette) that have the ability to convert raster content into vectors, but Illustrator CS2's Live Trace is a far step above and beyond what those tools are capable of. One of the main reasons for this is because of how Live Trace works. Live Trace uses a two-step process when converting rasters to vectors. In the first step, Live Trace conditions the raster image for optimal tracing. This means that Illustrator makes adjustments to the raster image, like adjusting contrast or blurring jagged edges. In the second step, Live Trace draws vector paths, creating highly accurate vector art (Figure 8.14). Although the tracing is theoretically done at that point, Illustrator retains a link to the original raster image so that you can make adjustments to the tracing settings. As you update the different raster conditioning and vector tracing settings, you can preview the results immediately. This makes it easy to get just the right tracing result that suits your needs best. Figure 8.14. Illustrator's Live Trace feature starts with the original raster image (top), conditions the image (center), and then converts it to clean vectors (bottom). The first two examples in this 3-page spread use the Black and White setting for tracing, whereas the third shows the Grayscale tracing setting.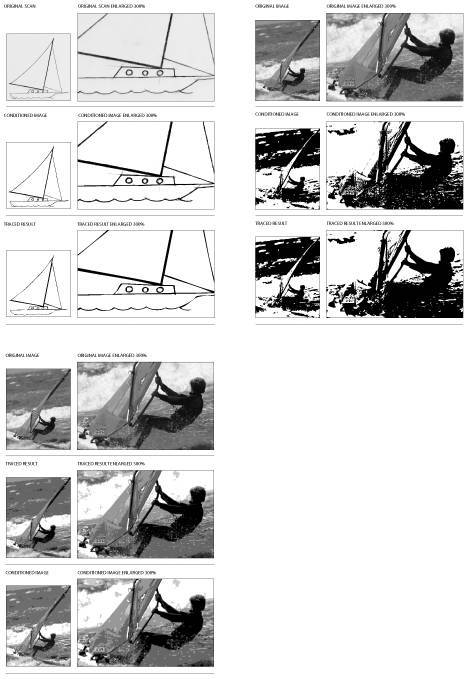
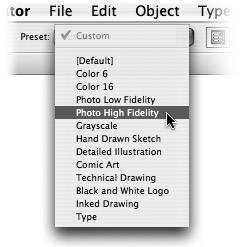
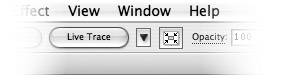
Tracing an ImageTracing an image is simple. Select any raster image in your Illustrator document and click the Live Trace button in the Control palette. Alternatively, you can choose Object > Live Trace > Make. This action traces the image using Illustrator's default trace preset. Illustrator actually ships with 13 different tracing presets, each optimized for different kinds of images and desired result. Once the image is traced, it maintains a live link to the raster image and you can customize the tracing settings. For example, once the image is traced, the Control palette changes to reflect different settings, including a Preset pop-up menu (Figure 8.15). Choose from any of Illustrator's thirteen different presets to see a different traced result on your screen. Figure 8.15. The Preset pop-up menu in the Control palette lets you quickly experiment with different tracing presets. If you know which tracing preset you want to use before you trace your image, you can select it directly by clicking the upside-down triangle that appears just to the right side of the Live Trace button and choosing it from the list that pops up (Figure 8.16). Figure 8.16. It doesn't look like a pop-up menu, but it is. Clicking the upside-down triangle allows you to apply a specific tracing preset when you first choose to trace an image. As long as Illustrator maintains a live link to the raster image, you won't be able to edit the actual vector paths that were created during the tracing process. In order to do so, you either have to expand the traced object or convert it to a Live Paint group. We discuss both of these options later, but for now, we're going to focus on how to customize the tracing settings so that you can get the bests results from the Live Trace feature.
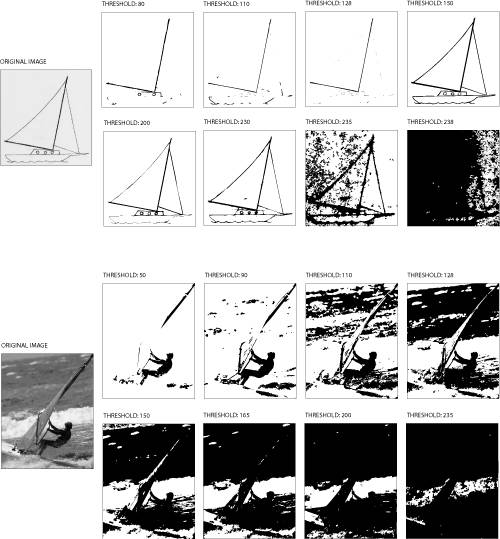
Exploring the Live Trace Preview OptionsOnce you've traced an image, Illustrator displays the traced result on your artboard so that you can see the results. However, Illustrator offers a variety of different settings that you can use to control how both the raster image and the traced vector result appear on your artboard. When a traced image is selected on the artboard, the Control palette updates to contain two icons that, at first glance, look like triangles. Upon closer inspection, you'll notice that one icon features a jagged edge; this icon is used to control how the raster image is previewed. The icon on the right, which has a smooth edge, is used to control how the traced vector result is previewed (Figure 8.17). Each of these settings is separate and can be chosen independently of the other. Figure 8.17. Once you've traced an image, you can use the two icons in the Control palette to control how the artwork appears on the artboard. Previewing the Original Raster ImageIn the Control palette, the jagged triangle on the left controls how the raster image is viewed. Click once on the icon and choose from one of the four available settings (Figure 8.18). Figure 8.18. You can preview the raster image with the Original Image setting (left), the Adjusted Image setting (center), or the Transparent Image setting (right). The No Image option is not shown for obvious reasons.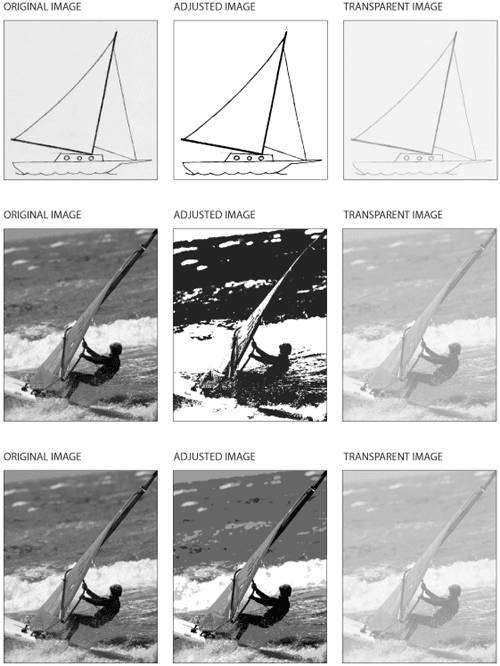
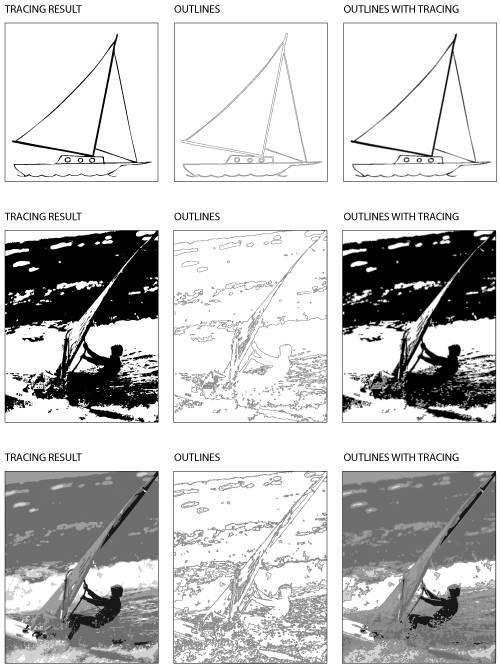
Previewing the Traced Vector ResultIn the Control palette, the smooth triangle on the right controls how the traced vector result is viewed. Click once on the icon and choose from one of the four available settings (Figure 8.19). Figure 8.19. You can preview the vector result with the Tracing Result setting (left), the Outlines setting (center), and the Outlines With Tracing setting (right). The No Tracing Result option is not shown.
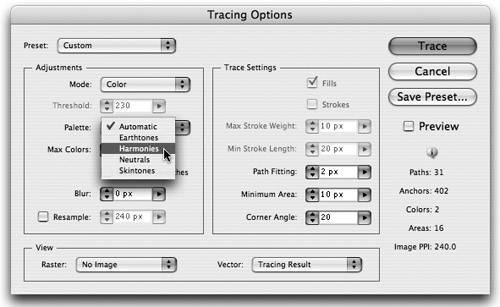
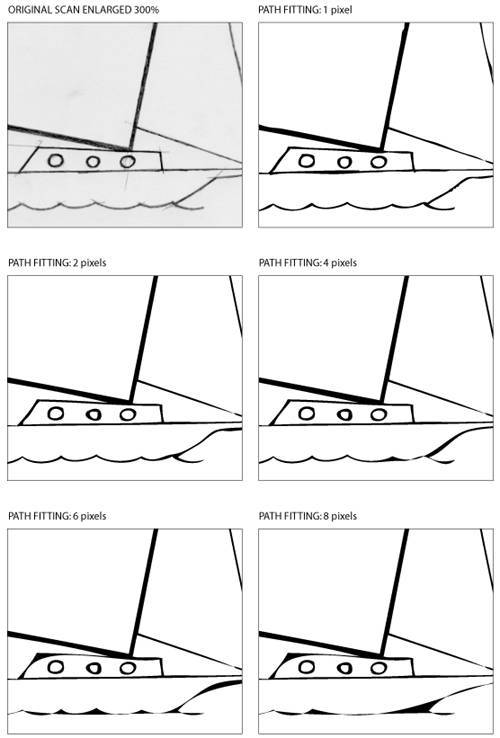
Tweaking to Get the Perfect TraceWhat makes the Live Trace feature a joy to use is the ability to make adjustments to the settings while you see the results update on your screen. Aside from the different presets that you can apply, Illustrator contains a dialog box chock full of settings that you can use to ensure that you get the results you need from the Live Trace feature. To access these settings, select a Live Trace object and click the Tracing Options dialog button in the Control palette. Alternatively, you can choose Object > Live Trace > Tracing Options. Once the Tracing Options dialog appears on your screen, you'll notice that it's split into several different sections (Figure 8.20). Figure 8.20. The Tracing Options dialog offers a smorgasbord of settings to achieve the perfect trace.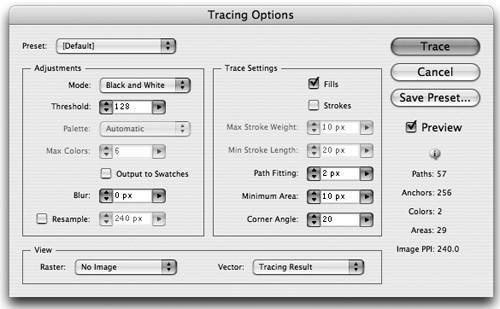 First of all, a Preview check box appears on the far right of the dialog, which allows you to see results update as you make changes to the different settings. Directly underneath the Preview check box is a list of important details about your traced object. The values for the number of paths, anchor points, colors, distinct closed areas, and image resolution update as you make adjustments to the settings in the dialog. Keeping an eye on these values helps you make decisions as you edit your trace settings. At the top of the dialog is a Preset pop-up menu, similar to what you see in the Control palette when a Live Trace object is selected. Stepping through the different presets in the Tracing Options dialog allows you to see the settings for each of the presets. The rest of the Tracing Options dialog is separated into three sections called Adjustments, Trace Settings, and View. The View section allows you to specify how the traced object appears on your artboard, as discussed in the earlier section, "Exploring the Live Trace Preview Options." The following "Modifying the Raster Adjustments" and "Adjusting the Vector Trace Settings" sections will help you clearly understand the two-step process that the Live Trace feature performs when converting raster images into vector form. Modifying the Raster AdjustmentsThe Adjustments settings found on the left side of the Tracing Options dialog apply to the raster conditioning that occurs before the image is traced.
Adjusting the Vector Trace SettingsThe Trace Settings found on the right side of the Tracing Options dialog apply to the actual tracing of the image and determine how the final vector paths are drawn.
Editing Live Trace PathsOnce you've achieved a trace result that you're satisfied with, you might want to edit the Bézier paths, either to delete portions of the image, or to apply your own colors, gradients, or patterns. In order to edit the vector paths of the traced object, you will need to either expand the trace, or convert the traced object to a Live Paint group.
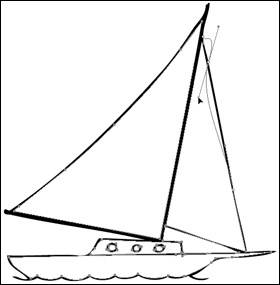
Expanding a Live Trace ObjectWith a Live Trace object selected, click the Expand button in the Control palette. Alternatively, you can choose Object > Live Trace > Expand. You can then use the Direct Selection tool to edit anchor points and Bézier paths (Figure 8.26). At this point, the traced object is no longer linked to the original raster image, and the traced result can no longer be adjusted using any of the Live Trace options. Figure 8.26. Once you've expanded a Live Trace object, you can edit the paths as you would with any vector object.
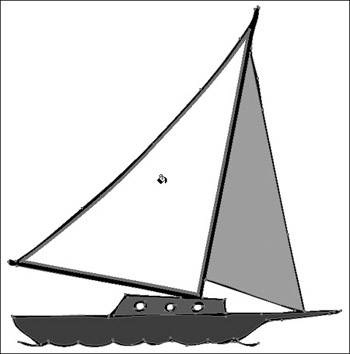
Converting Traced Images to Live Paint GroupsIn Chapter 4, Advanced Vectors, you learned about Illustrator's new Live Paint feature, which allows you to apply fill attributes to areas, even if they aren't fully enclosed shapes. If you've traced an image because you want to fill regions of the image with color, converting the Live Trace object to a Live Paint group makes a lot of sense. With a Live Trace object selected on the artboard, click the Live Paint button that appears in the Control palette. This action expands the traced object and converts all of the resulting vector objects into a Live Paint group in a single step. You can then use the Live Paint Bucket tool to fill your art with color without any additional steps (Figure 8.27). For more information on Live Paint groups, refer to Chapter 4. Figure 8.27. What started out as a pencil sketch quickly turns into final art when you combine the Live Trace and the Live Paint features in Illustrator.
|

EAN: 2147483647
Pages: 147