Viewing Documents
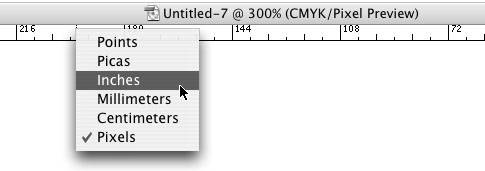
| As you're working in Illustrator, you can choose to view your artwork in different ways, each offering different benefits. The most common view mode, Preview mode, allows you to create and edit art while seeing a close representation of what your art will look like when printed (Figure 1.26). In Outline mode, Illustrator hides all of the pretty colors and shows you just the geometry of the shapes in your document. Although it may be difficult to visualize what your file is going to look like when printed, Outline mode gives you the ability to easily see if shapes are aligned correctly and it gives you a better idea of the structure of the file (Figure 1.27). Think of Outline mode as an X-ray film that a doctor reads. Although just black and white, an X-ray reveals what's going on behind the scenes. Just like a doctor reads an X-ray, an experienced Illustrator user can sometimes get a better idea of how an Illustrator file is constructed when in Outline mode. You can toggle between Preview and Outline mode by pressing Command-Y (Ctrl-Y). Figure 1.26. When viewing artwork in Preview mode, you can get a really good idea of what your file will look like when printed.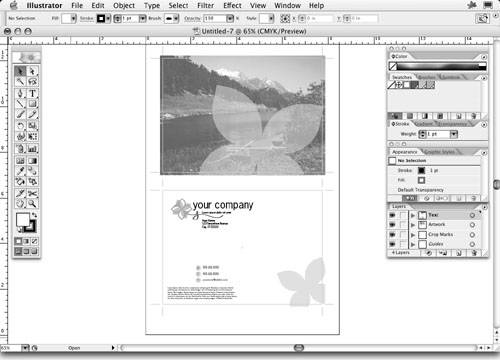 Figure 1.27. Viewing a file in Outline mode can make it easier to select objects and to identify the underlying structure of a file.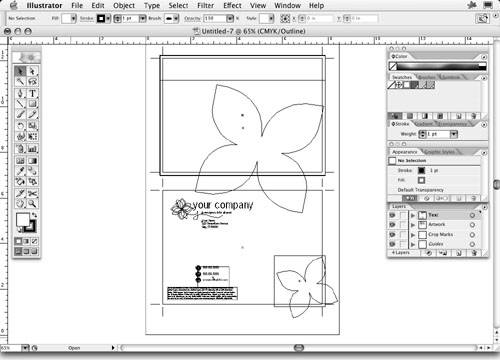 For those in the print business, Illustrator has a special preview mode called Overprint Preview, which you can access by choosing View > Overprint Preview. Overprinting is a process you use when creating color separations to control how certain colors interact with each other (we'll cover overprinting in detail in Chapter 11). Because overprinting is an attribute only applied in the print process, designers traditionally struggled with proofing files that specified overprints. Illustrator's Overprint Preview mode simulates overprints so that you can see how they will print (Figure 1.28, next page). In truth, Overprint Preview is far more accurate than Illustrator's regular Preview mode, especially when your file uses spot colors. However, Overprint Preview is noticeably slower than normal Preview in redraw performance. Figure 1.28. In the top example, the vector shape's fill is set to Overprint, as shown in the Appearance palette. In the lower example, with Overprint Preview turned on, you can see the effects of the overprint.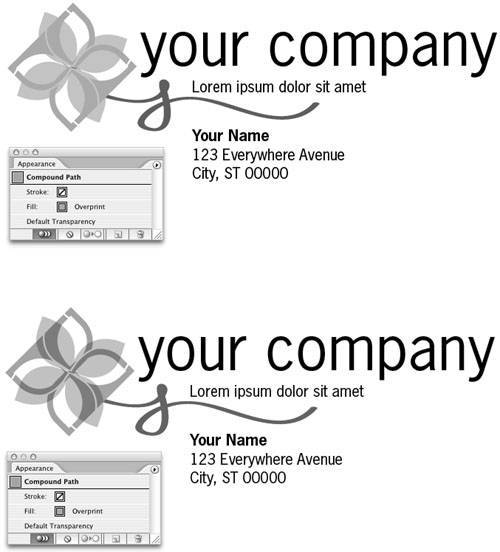 Not to leave Web designers in the cold, Illustrator has yet another preview mode called Pixel Preview, which you can also access via the View menu. Illustrator, as a vector-based application, produces art that is resolution-independent. Most of today's printers have high-resolution settings and modern image setters use resolutions upwards of 2500 dots per inch (dpi). For that reason, print designers aren't worried about how good their artwork looks on their screen, because they know that when output at high resolution, everything will be perfect. Web designers, however, care very much about how their artwork appears on a computer screen because that's exactly how people view their designs. Pixel Preview renders artwork to the screen as pixels and shows how anti-aliasing affects the art (Figure 1.29). We'll cover Pixel Preview and these Web-specific issues in Chapter 10, Illustrator and the Web. Figure 1.29. In Pixel Preview mode, Illustrator displays artwork as it would display in a browser. Zooming in on your artwork reveals the actual pixels and the effects of anti-aliasing. Rulers and GuidesEven though you can scale Illustrator artwork to virtually any size, it's still important to be able to create artwork using exact and precise measurements. Package designers and technical illustrators are always careful about creating artwork to scale, and even designers need to know what size a logo or an illustration has to be. Choose View > Show Rulers to display vertical and horizontal rulers along the left and top edge of your document window. You can Ctrl-click (right-click) a ruler to change its measurement system (Figure 1.30). Although the rulers can help identify the coordinates of objects that appear in a document, rulers also serve another function. You can click a ruler and drag a guide out onto your artboard. A guide is a line that's visible on your screen but not on your printed or exported art. Guides have "magnetic personalities" and objects that are moved or drawn near them stick to them, helping align objects and create consistent art and layouts. Figure 1.30. The Ruler contextual menu allows you to specify any of the measurement systems that Illustrator supports.
By default, once you drag out a guide, it is locked and you can't reposition it. However, you can choose View > Guides > Lock Guides to toggle the editability of guides. Guides that aren't locked can be easily edited and positioned anywhere on your screen. To position guides precisely, use the Control palette to specify exact coordinates. |

EAN: 2147483647
Pages: 147