Image Panoramas
|
Great panoramas in Photoshop start with great source images. The rolling hills and azure skies of Tuscany just scream for an image that extends horizontally, taking in the full field of vision. Although you can spend thousands of dollars on a panoramic camera with an extended format that will capture a wide field of vision, you can stitch together a series of images taken with a standard camera using Photoshop's Photomerge command. The general process involves shooting a series of sequential images horizontally or vertically and then combining them in Photoshop to create a single seamless image. Using Photomerge doesn't necessarily mean that you have to keep the camera perfectly level and use special equipment, although Panoramic tripod heads are definitely a plus if you're serious about this discipline. The process does mean that your camera's auto metering and auto white balancing should be turned off while shooting. If you leave them on, each image will shift in color and exposure, making them much harder to stitch together. The other thing to keep in mind is to leave lots of overlap between frames, allowing about a third of the images to overlap. Panorama sources
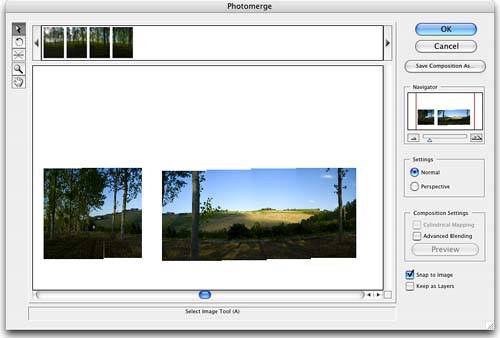
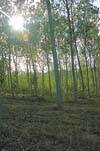
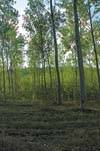
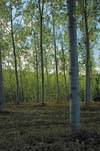
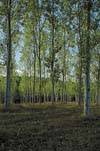
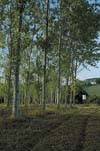
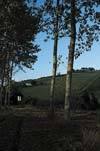
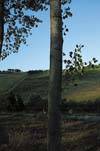
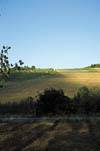
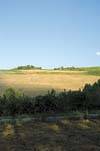
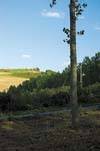
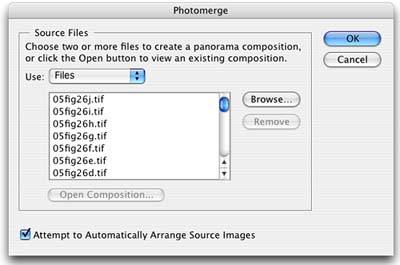
About the Original Images In this exploration, there are ten original photos, shot in a sequence, from which I assembled the final image. I had spent the day in the hills northwest of Siena, shooting in and around San Gimignano, but the crowded and touristy streets of the walled city were wearing thin on me. There was nothing very interesting to see, and the plethora of bad restaurants and currency conversion storefronts obliterated whatever charm might have been left in the city. So I got in the car and began to drive. The late afternoon sun made everything glow, and the winding roads and softly rolling hills soon made me forget the tourist-choked streets of San Gimignano. As I rounded a bend in the road, there was a grove of birch trees on my left, backlit by the setting sun. I pulled over, set up my gear and shot this panorama sequence. The photos represent a 180-degree field of vision; the sun is at your back as you face the sunlit hill on the right. Building the EffectAfter sharpening all the source images with Unsharp Mask, I placed them in a single folder for easy access. To begin stitching the images together, I opened Photoshop and selected File, Automate, Photomerge. In the Photomerge dialog box that appeared, I set the Use menu to Folder and clicked Browse. I navigated to the target folder of images and clicked the Choose button. All the images in the selected folder appeared in the Photomerge dialog box, and I clicked OK to start the Photomerge process (see Figure
Alternatively, you can set the Use menu to Files and then browse to select each file separately. The Shift key allows you to select multiple sequential files, while the The Initial MergeWhen you click OK, Photomerge automatically opens each target file and attempts to combine all the pieces into a cohesive panorama, within the Photomerge interface. Initially, it tries to match images using sequential file names and then by looking for repetition in edge patterns. Matched files are assembled in the work area of the dialog box, using the program's best guess at what goes together. If it cannot make a match, it leaves the unused files as thumbnails in the upper gallery of the Photomerge dialog box (see Figure
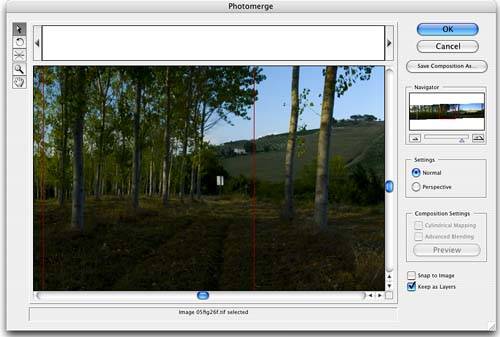
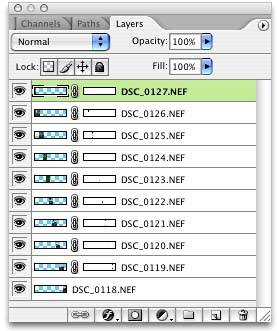
 After Photomerge makes its best attempt at merging all the files you selected, automation starts to fall away and the alchemy starts. If a file was left out or not matched, I dragged its thumbnail into the compositing area and positioned it manually. If the edges were not properly aligned, I dragged them into proper position, turning off the Snap To Image option on the right side of the dialog box as necessary for more pinpoint control. The preview image was quite small because I used ten source images. Dragging the Zoom slider in the Navigator section to the right enlarged the preview, allowing me to switch the view from detailed to global as needed. Before clicking OK, I enabled the Keep as Layers and Advanced Blending check boxes to smooth the transitions and provide more control in the next steps (see Figure
 Tweaking the AlignmentRemember that Photomerge is only a starting point. After it assembles the images into a single frame, you usually need to apply some post-Photomerge correction. Having preserved each layer separately, I used the Move tool to tweak and adjust layer alignment. I like to zoom to 100% or even 200% in some cases to make sure that things are aligned. Be sure to use the Navigator palette (select Window, Navigator) to move between the frame edges, dragging the red active window box to define the visible area. In most cases, you'll need to compensate for perspectival distortion that throws the edges out of alignment. I like to use layer masks to align the edges between frames, concealing or revealing the top overlapping layer. To add a mask, click the Add Layer Mask icon in the Layers palette and paint with the Brush tool, varying the brush feather and opacity to create the mask. Remember, black conceals the current layer and white reveals it. Leaving significant overlap between frames pays dividends during this step in particular because you have a larger area to blend the overlapping images. It's a bit tedious, but I worked my way through all nine layer transitions, adding a mask to each layer and aligning them so that the transitions were seamless (see Figure
Exposure AdjustmentsCorrecting exposure differences was the next step, and it was a bit tricky. This particular image represents a 180-degree field of vision; the birch trees on the left are actually at your back as you look towards the sunny hill. When I shot the source photos, I exposed for the deep blue sky; as a result, the rest of the image went a bit dark. To compensate, I added a Curves adjustment layer by selecting Curves from the Adjustment Layer pull-down menu in the Layers palette. I added a single data point with a value of Input: 134, Output: 206, which lightened the image. Because the sky was now overexposed, I selected the layer mask for the Curves adjustment layer, selected the Brush tool with black as the foreground color, and painted a mask into the sky to maintain its original tone (see Figure
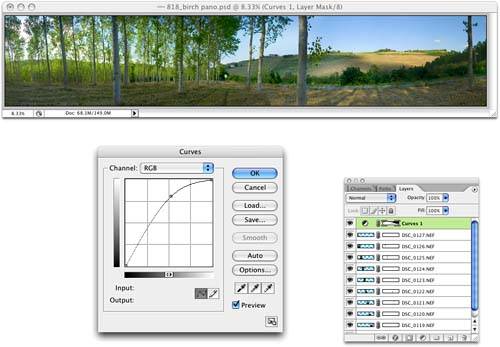 I wanted to try to express more of the brilliant light that was breaking through the birch trees as I took these photos. I added a second Curves adjustment layer, this time with two data points forming a slight S curve. The point values were Input: 53, Output: 41 and Input: 183, Output: 239 (see Figure
 Finally, because I was combining multiple images taken from different angles, the chances of having the image edges line up as a perfect rectangle are pretty slim. To square things off, I selected the Crop tool, drew a marquee to define the rectangle for the image, and clicked to crop the image. |

EAN: 2147483647
Pages: 141
- Using SQL Data Manipulation Language (DML) to Insert and Manipulate Data Within SQL Tables
- Working with SQL JOIN Statements and Other Multiple-table Queries
- Writing External Applications to Query and Manipulate Database Data
- Working with Data BLOBs and Text
- Repairing and Maintaining MS-SQL Server Database Files