Task 7 How to Use Smart Sharpen
| New with Photoshop CS2, the Smart Sharpen filter offers more control than the Unsharp Mask filter. For example, Smart Sharpen allows you to sharpen more in the shadows than the highlights, or vice versa. In addition, Smart Sharpen includes alternative sharpening methods that go beyond anything Unsharp Mask could ever do. 1. Open the Smart Sharpen FilterWith your image open, select Filter, Sharpen, Smart Sharpen. The Smart Sharpen dialog box has a much larger preview pane than does Unsharp Mask, so you can safely disable the Preview check box if it slows down the preview refresh time. Set the Zoom to at least 100% using the + and buttons located under the preview pane.  2. Set the Amount SliderThe Amount slider determines how much sharpening is applied. As you increase this value, you increase the edge contrast added to the image. This is how the sharpening effect is achieved. However, higher values can also exaggerate noise and image grain. 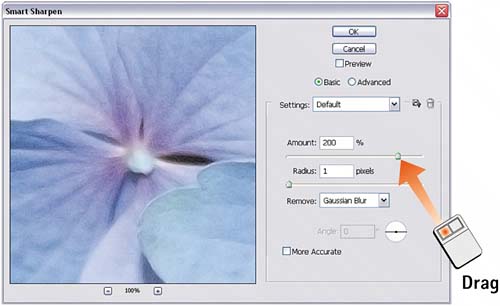 3. Set the Radius SliderThe Radius slider determines the width of what Photoshop considers to be an edge (remember that sharpening works by adding contrast to edges). You should be as conservative as possible with the Radius slider because higher values add halos around image details. Lower is better here. 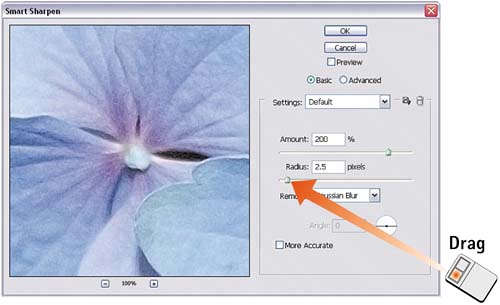 4. Set the Remove MethodSmart Sharpen provides three blur-removal methods, available from the Remove drop-down menu. Gaussian Blur works exactly like Unsharp Mask, whereas Lens Blur uses a more sophisticated algorithm to provide finer sharpening. Motion Blur assumes that the blur was caused by camera shake or subject movement and sharpens at an angle you specify. Although the More Accurate option increases the accuracy of all sharpening methods, it can be a drain on computer resources. 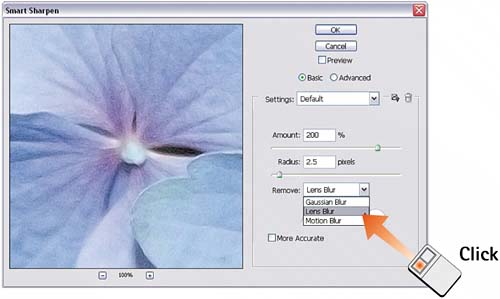 5. Set the Advanced ControlsWhen you click the Advanced option, the sharpening controls area displays three tabs. The Sharpen tab has the controls used in steps 24. The Shadow and Highlight tabs provide controls to fade the sharpening effect in their respective tonal ranges. On each tab, you can specify the Fade Amount from 0% (no fade at all) to 100% (no sharpening at all). The Tonal Width slider sets how much of the highlight or shadow range to fade. Radius defines the area used to identify a pixel as a highlight or a shadow. 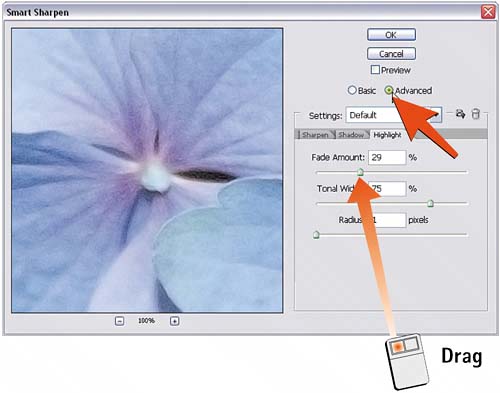 6. Apply the EffectSmart Sharpen uses navigation techniques common to most Photoshop filters, so clicking and holding inside its preview pane shows the unsharpened version. Releasing the mouse button restores the sharpened preview. Toggling this before/after view can be helpful. Click and drag inside the preview pane to shift the area displayed, or click in the actual image to center that section in the preview pane. When you've inspected the entire image, click OK to apply the effect. 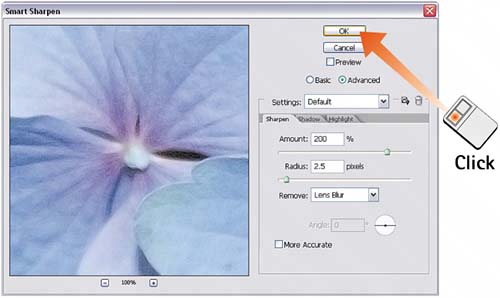
|
EAN: 2147483647
Pages: 184
- Option 3: Multi-Hop MP-eBGP Between RR and eBGP Between ASBRs
- Case Study-Inter-AS Implementing Route-Reflector and BGP Confederation in Provider Networks
- Deployment Scenarios with CSC Architecture
- Case Study 2: Implementing Multi-VRF CE, VRF Selection Using Source IP Address, VRF Selection Using Policy-Based Routing, NAT and HSRP Support in MPLS VPN, and Multicast VPN Support over Multi-VRF CE
- Command Reference