Creating Web Pages with Nvu
| "Is Nvu free the way Firefox is free?" Stef asked. "Yes," I said, "it's what us techies call open source software, which means that it's developed and supported by a community of programmers, not just a single company. Here's what the Nvu Web site says about the software."
"Sounds perfect!" Claude said. "It's actually quite good," I agreed, "and the price is certainly perfect for our needs. When you get home, I want you all to go to the Nvu Web site and download the latest version of Nvu. Now, let me start the editor and show you what I mean. And Claude, you're going to be my guinea pig. Did you bring me the information I requested?" "Yeah," he said, "I signed up for hosting and I printed out the email they sent me." "Great," I said, "because we're going to build some pages and place them on your VoIP-at-Home.com site. You're about to create a Web presence! So let's get cracking." Getting Started with NvuMaking Room If you need extra room when working with Nvu, close the site manageryou can reopen it when needed. Launch Nvu for the first time and you'll see a window like the one shown in Figure 6.1. At the top are toolbars similar to a word processor's. On the left side is the Nvu Site Manager, and on the right is the page editor. The page editor is where you create and edit the page. Figure 6.1. The Nvu application window.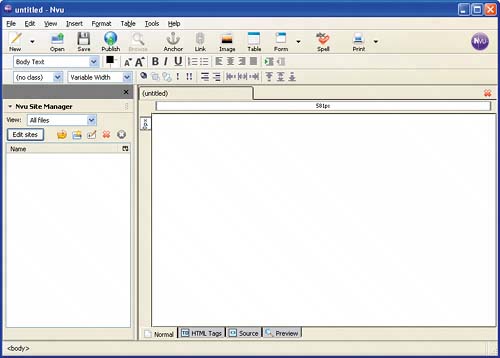 Before proceeding, select Preferences from the Tools menu to bring up the Nvu Options dialog. Uncheck the checkbox labeled "Use CSS styles instead of HTML elements and attributes." This will simplify the HTML that the editor creates. We'll discuss what CSS is later, when we talk about styles. Nvu automatically creates a blank Web page for you when it starts. Before going any further, select Page Title and Properties from the Format menu to display the Page Properties dialog (Figure 6.2). You can set basic information about the Web page from this dialog, including:
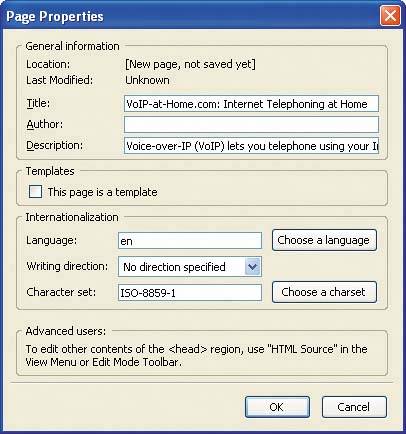
Figure 6.2. The Page Properties dialog.
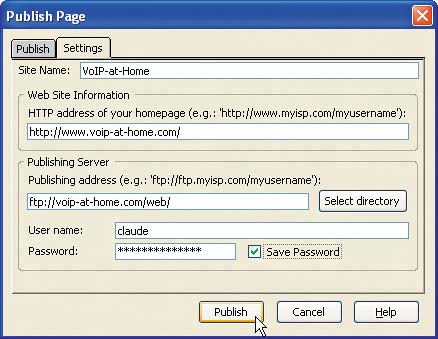
Every page needs a title. In this case, it's "VoIP-at-Home.com: Internet Telephoning at Home" because we're building the home page for Claude's site. Nvu will refuse to save the page until you set its title, so you might as well do it first. Most of the other properties can be left as is except for the description and the language. The page description is shown by Google and other search engines on its search-results page, so take the time to write a short phrase that describes what the page (and the site) is about and that will attract searchers to your site. The language should be set to "en" (short for "English") unless you're writing your page in a different language. Your Preference Note that default values for most of Nvu's properties can be set from the Nvu Options dialog. Now save the page by selecting Save As from the File menuit's always a good idea to save the page as soon as you set its title. Create a folder for the site and save the page there. Nvu will suggest a name for you based on the title, but remember to follow the page title rules from Chapter 5 and use lowercase letters and no spaces. Since we're creating the home page for Claude's site, the File name should be the standard "index.html." Title Chop-Chop If a title is too long to fit in the title bar, the browser will truncate it (cut the last part off) to make it fit. Make sure the title is readable if it's shortened. You're ready to add content to the body, the part of the page that is shown by the browser when it loads the page. The body is currently empty, but the page itself isn't empty: The information you entered in the Page Properties dialog is stored in the head of the page, which isn't shown by the browser. To see the head, switch Nvu to the Source view, either by selecting HTML Source from the View menu or by clicking the Source tab at the bottom of the window (Figure 6.3). The source view shows the raw HTML that Nvu stores when you save the file. You don't need to use this, so switch back to the Normal view by clicking the Normal tab. The Normal view is where you do most of your work. Figure 6.3. The Nvu Source view.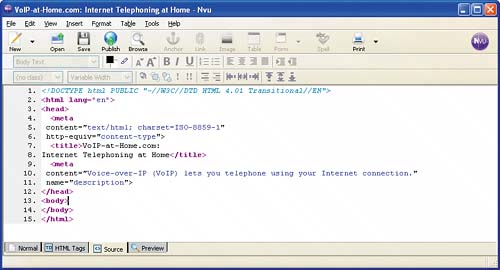 A Web page is built out of page elements and styles. Page elements describe the structure of the page: This is a heading, this is a paragraph, this is a link to another page, and so on. Page elements are edited in the Normal view, which looks and behaves a lot like a word processor. Styles establish how the page elements are to be displayed: Bold the headings, use an eleven-point font for paragraphs, color links blue, and so on. In other words, page elements are like nouns (things) and styles are like verbs (actions). Styles are edited in a separate view, which we'll discuss later. To create new page elements, type directly into the Normal view as you would with a word processor. For Claude's home page, I entered a heading, a subheading, an introductory paragraph, and a copyright line (Figure 6.4). Figure 6.4. The initial text for Claude's home page.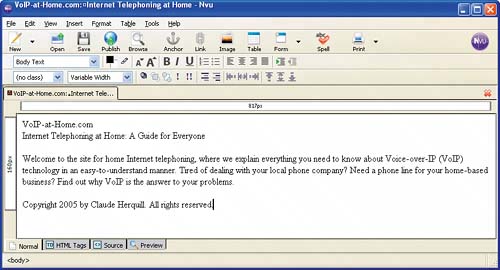 By default, each paragraph you enter is created as a page element called Body Text. You can change a paragraph from one type of element to another by first selecting it with the mouse and then choosing an option from the Paragraph submenu of the Format menu (Figure 6.5). For the heading, select the Heading 1 page element. The subheading should be changed to Heading 2. Change the two remaining paragraphs to the Paragraph type. The page now looks different: The headings are in larger, bolded fonts and the paragraphs are farther apart than they were before (Figure 6.6). Figure 6.5. Changing the type of a paragraph. Figure 6.6. Claude's home page with the new page elements.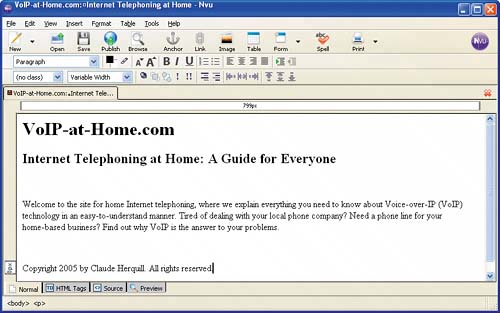 Quicker Page Elements To make page element changes more quickly, use the leftmost drop-down list in the toolbar. Text within a paragraph can also be formatted, just as with a word processor, by using the toolbar icons to bold and italicize text or even change its size. Don't forget to save the page after changing it. Peeking Under the HoodSince we were working on his site, Claude was extremely interested in what I was doing. He wanted more details, though. "Can I see the Source view again?" Claude asked. "Sure," I said, "in fact, why don't you take control. This is your site we're building, after all." I moved my chair over so Claude could sit in front of the computer. Once he was settled, he switched Nvu back to the Source view to see the raw HTML that the editor had generated (Figure 6.7). Figure 6.7. Viewing the raw HTML in the Source view.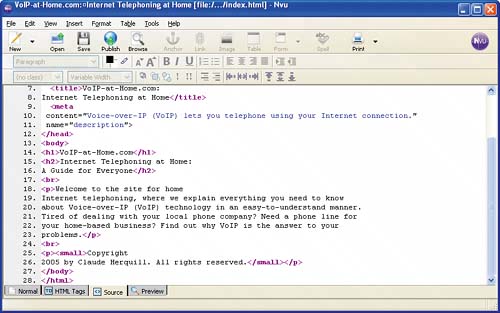 "Very interesting," he said. "This is actually pretty readable. Those words in angle brackets are the page elements, right?" "Right," I said. "They're called tags. They usually come in pairsone to start a markup command, one to end it." Learning HTML The W3Schools site www.w3schools.com/html offers a very thorough tutorial on HTML. For a quick list of common HTML tags, see www.w3schools.com/html/html_quick.asp. "And the end one has a slash in it?" Claude asked. "Yep." "The spacing doesn't matter much, does it?" Stef noticed. "No," I agreed, "you can pretty much put as many spaces and carriage returns as you want between most things. The browser doesn't care, but it's definitely easier for us to read if there's lots of white space." "So what's this view all about, then?" Claude asked as he clicked the HTML Tags tab between the Normal and Source tabs. "Hmmm…it's like the Normal view, but it shows you where the tags start." He clicked the H2 tag and the subheading was selected (Figure 6.8). Figure 6.8. The HTML Tags view.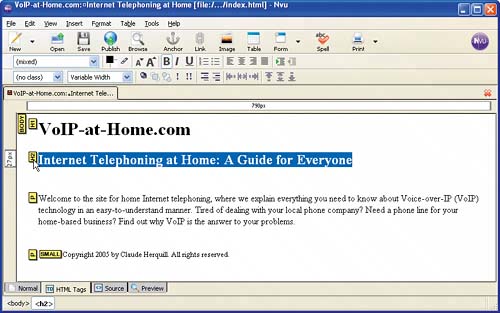 "It makes it easy to select the text that the tag applies to!" Stef said. "Can I change the page from this view, too?" Claude wondered. I nodded yes. "OK, I want to add a copyright symbol to the last line." He started looking through the menus. "Let me see, Word lets you insert symbols from a menu. I wonder if this program does.…Ah! There it is, under Insert!" He selected Characters and Symbols from the menu, and a dialog popped up. He found the copyright symbol in the drop-down list, clicked the Insert button, and dismissed the dialog. "This is pretty easy," he said as he clicked the Preview tab next to the Source tab. "Funny, this view looks just like the Normal viewI thought it'd be different." "That's because you're not doing anything complicated in the Normal view," I explained. "If you do, the Preview will show you what it should look like in a browser." "Should?" Anita asked. "Can it be different?" "Well," I replied, "browsers have different behaviors, yes, so if you're doing complicated layouts, you should definitely see how the page looks in different browsers. There's a Browse icon on the toolbar that displays the page in the Web browser you normally use. But for simple layouts, the built-in Preview should be fine." Claude switched back to the Normal view. "Can we jazz this page up? It's not very exciting! And there are no links anywhere." "We'll get to that, but not just yet," I said. "First, let's publish the page to your Web site." Publishing the Page"All right, Claude, you stay at the keyboard," I continued, "and let's see if you can figure out what to do." Claude scanned the Nvu menus and toolbar. "Well," he said, "there's a big button here labeled 'Publish,' so I'm going to click it." He did, and the Publish Page dialog appeared (Figure 6.9). "Huh. OK, what now?" asked Claude. Figure 6.9. The Publish Page dialog.
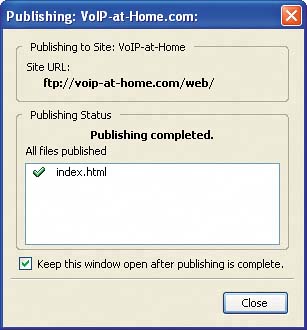
"Before you can place the HTML file on your Web site, you need to create what Nvu calls a publishing site," I explained. "The publishing site tells Nvu how to connect to the hosting service's computer. The information you need is in the email the hosting service sent you." Claude reached for the printout he'd brought. "Nvu supports multiple publishing sites, so you give them names to tell them apart." "All right," Claude said, "we'll call the site 'VoIP-at-home,' but I'll drop the .com part. The HTTP address of the homepage is http://www.voip-at-home.com. The publishing address…hmm…the mail from the hosting service says that I should FTP to voip-at-home.com/web. What's FTP?" Stef jumped in at that point. "I know! It stands for file transfer protocol," she said. "It's for copying files from one computer to another." "Right," I said. "So type in 'ftp://voip-at-home.com/web' as the publishing address, and then enter the user ID and password that they sent you." "Dad's FTP address is a lot different than the one my hosting service sent me," Stef said. "They're not as standard as Web addresses," I explained, "but it shouldn't matter as long as you use the address they supplied you. Now, Claude, you're ready to publish." Claude hit the Publish button. Another dialog appeared as Nvu copied the index.html file from my computer to Claude's hosting service (Figure 6.10). Figure 6.10. Publishing the page to the hosting service.
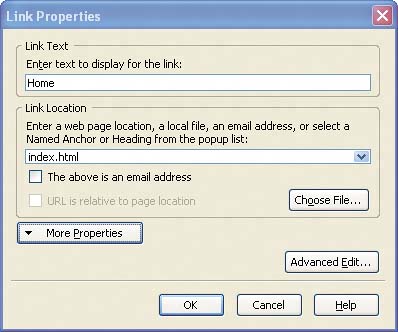
"It's done," Claude said, "so can I try my Web page now?" I nodded, and Claude opened a browser window and typed the address of his site, www.voip-at-home.com. "There it is!" he yelled as the home page appeared (Figure 6.11). Figure 6.11. The Web page is now live on the site.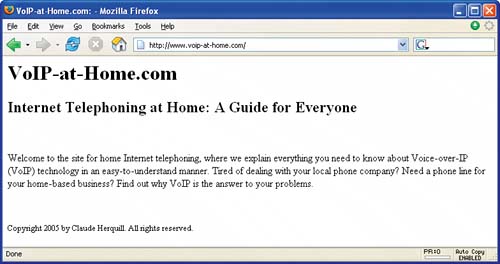 "Yay Dad!" Stef said, and Anita was smiling, too. "Great job, Claude," I said. "Now let's add another page to your site and link it to your home page. Anita, will you please take the helm?" I motioned her over and Claude switched seats with her. "I know this is your father's site, but I want each of you to try editing a Web page. All right, we need to create an about page and link it to the home page and vice versa. Why don't you go ahead and show me how to do it?" Adding and Linking PagesAdding a page with Nvu is as easy as clicking the New icon on the toolbar, setting its title, and saving it to disk. Anita was able to figure this out in short order. She titled the new page "About VoIP-at-Home.com" and saved it to disk as "about.html." She added a heading and a couple of paragraphs. The home page was still accessible from within Nvu, so she quickly copied the copyright line from the home page to finish the simple about page (Figure 6.12). Figure 6.12. The newly created about page.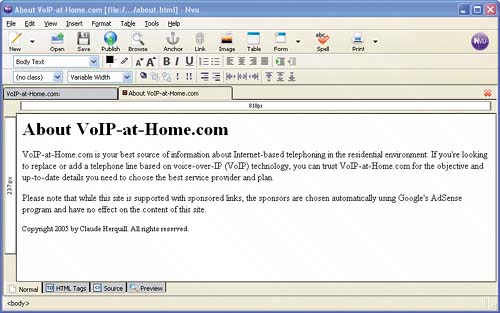 Now it was time to link the two pages. Anita moved the cursor to the top of the about page and inserted a blank paragraph. Then she clicked the Link button to open the Link Properties dialog (Figure 6.13). After entering "Home" for the link text and "index.html" for the link location, she clicked the OK button to create the new link. Pleased with herself, she immediately went to the bottom of the page and highlighted her father's name in the copyright message, then clicked the Link button again. She had noticed the email address option on the Link Properties dialog. She checked the option and entered her father's email address, claude@voip-at-home.com, to create a second link on the about page (Figure 6.14). Clicking this link would send an email to Claude. Figure 6.13. The Link Properties dialog.
Figure 6.14. The about page with its new links.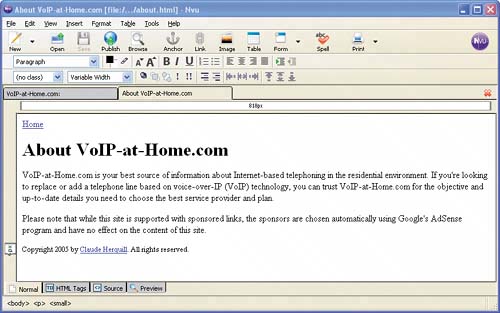 Feeling very confident, Anita then switched to the home page and added a link to it, a link called "About this site" that referenced the about.html page. She also added an email link. When she was done, she clicked button to update the site. Testing and More Testing"Look," Anita said, "here's the updated home page." She activated the browser window and reloaded the page, which now sported two links. "And here's the new about page," she continued, clicking the "About this site" link. Unfortunately, the page didn't show up because the browser couldn't find it. "You forgot to publish the about page," I explained to her. "What you've got now on the home page is called a broken link, because the page it links to is missing. Don't worry, it's a common mistakeeven professionals do it. That's why you should always check your changes before you publish a page. Check it visually in the Preview view, then use the Browse button to load it into a browser and check the links." "Like I always proofread my reports before submitting them," Stef said, as Anita clicked the Browse button to check the about page. "What does this mean?" she asked, pointing to a new dialog on the screen (Figure 6.15). Figure 6.15. Asking for permission to launch a browser window.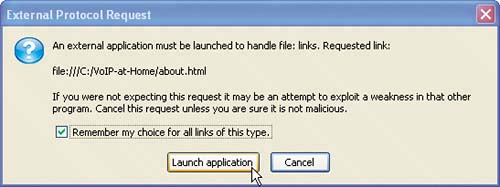 "It's a bit cryptic," I agreed. "Nvu's asking your permission to launch a browser. Click the Launch Application button to continue." As soon as she did, a new browser window displaying the about page appeared. She clicked the Home link to load the home page. She then clicked "About this site" again to return to the about page. She also tested the email links at the bottom of each page. "Everything looks good," she said, "so let me publish the about page." She did, and this time when she clicked the "About this site" link on the www.voip-at-home.com home page, the about page was loaded. "Perfect!" I said. "Two pages up already. Now let's beautify them a bit." |
EAN: 2147483647
Pages: 96