Working with the Application Object
| This chapter covers some of the major objects in the Excel object model, starting with the Application object. The major objects in the Excel object model have many methods and properties, and it is beyond the scope of this book to describe these objects completely. Instead, this chapter focuses on the most commonly used methods and properties. The Application object has the largest number of methods, properties, and events of any object in the Excel object model. The Application object is also the root object in the Excel object model hierarchy. You can access all the other objects in the object model by starting at the Application object and accessing its properties and the properties of objects it returns. The Application object also has a number of useful application-level settings. Controlling Excel's Screen Updating BehaviorWhen your code is performing a set of changes to a workbook, you may want to set the ScreenUpdating property to False to prevent Excel from updating the screen while your code runs. Setting it back to TRue will refresh the screen and allow Excel to continue updating the screen. Beyond the cosmetic benefit of not forcing the user to watch Excel change cells while your code runs, the ScreenUpdating property proves very useful for speeding up your code. Repainting the screen after each operation can be quite costly. Be sure to set this property back to true when your code is finished; otherwise, the user will be left with an Excel that does not paint. As you will see below, a try-Finally block is a handy way to ensure that the property is reset even if an exception is thrown. An even better convention to follow than just setting the ScreenUpdating property back to true is to save the value of the ScreenUpdating property before you change it and set it back to that value when you are done. An important thing to remember when doing Office development is that your code is not going to be the only code running inside a particular Office application. Add-ins might be running, as well as other code behind other documents, and so on. You need to think about how your code might affect other code also running inside Excel. As an example, another add-in might be running a long operation of its own, and that add-in might have set the ScreenUpdating property to False to accelerate that operation. That add-in does an operation that triggers an event that is handled by your code. If your code sets the ScreenUpdating property to False, does something, and then sets the ScreenUpdating property to true when it is done, you have defeated the add-in's attempt to accelerate its own long operation because you have turned screen updating back on. If instead you store the value of ScreenUpdating before you set it to False and later set ScreenUpdating back to its original value, you coexist better with the other code running inside Excel. Listing 5.1 shows an example of using the ScreenUpdating property with VSTO. Note Because it is important that you set ScreenUpdating back to its original value after your code runs, you should use Visual Basic's support for exception handling to ensure that even if an exception occurs in your code, ScreenUpdating will be set back to its original value. Visual Basic supports TRy, Catch, and Finally blocks to deal with exceptions. You should put the code to set ScreenUpdating back to its original value in your Finally block because this code will run both when an exception occurs and when no exception occurs. Listing 5.1. A VSTO Customization That Sets the ScreenUpdating Property
Controlling the Dialog Boxes and Alerts That Excel DisplaysOccasionally, the code you write will cause Excel to display dialog boxes prompting the user to make a decision or alerting the user that something is about to occur. If you find this happening while a section of your code runs, you might want to prevent these dialog boxes from being displayed. You can set the DisplayAlerts property to False to prevent Excel from displaying dialog boxes and messages when your code is running. Setting this property to False causes Excel to choose the default response to any dialog boxes or messages that might be shown. Be sure to get the original value of this property and set the property back to its original value after your code runs. Use try, Catch, and Finally blocks to ensure that you always set the property back to its original value, as shown in Listing 5.1. Changing the Mouse PointerDuring a large operation, you might want to change the appearance of Excel's mouse pointer to an hourglass to let users know that they are waiting for something to complete. The Cursor property is a property of type XlMousePointer that allows you to change the appearance of Excel's mouse pointer. It can be set to the following values: xlDefault, xlIBeam, xlNorthwestArrow, and xlWait. Be sure to get the original value of Cursor before changing it and set it back to its original value using TRy, Catch, and Finally blocks. Listing 5.2 shows the use of the Cursor property. Listing 5.2. A VSTO Customization That Sets the Cursor Property
Displaying a Message in Excel's Status BarStatusBar is a property that allows you to set the message displayed in Excel's status bar, located in the bottom-left corner of the Excel window. You can set the StatusBar property to a String representing the message you want to display in the status bar. You can also set StatusBar to False to display Excel's default status bar message. If Excel is displaying the default status bar message, the StatusBar property returns a False value. As with the other application properties in this section, you want to save the original value of the StatusBar property before changing it, and be sure to set it back to its original value using try, Catch, and Finally blocks. Remember to save the value of the StatusBar property to an Object variable because it can return a String or a Boolean value. Listing 5.3 shows an example. Listing 5.3. A VSTO Customization That Uses the StatusBar Property to Show Progress
A Property You Should Never UseExcel provides a property called EnableEvents that can be set to False to prevent Excel from raising any of its events. Although you might be tempted to use this property, don't do it. Think again about the fact that your code is almost never going to be running by itself in Excel. Other developers will be creating add-ins and code behind documents that will also be running inside Excel. By setting this property to False, you effectively break all the other code that is loaded inside Excel until you set it back to TRue. The problem that this property is trying to fix is the problem of your code calling a method that in turn raises an event on your code. You might not want that event to be raised because you called the method; therefore, you do not want your code to be notified of something it already knows. Your code might call a method such as Close on Workbook that will cause Excel to raise the BeforeClose event, for example. If you want to prevent your BeforeClose event handler from running in this case, you have several options that are better than using EnableEvents. The first option is to stop listening to the BeforeClose event before you call the Close method. A second option is to create a guard variable that you can set before you call Close. Your event handler for BeforeClose can check that guard variable and return immediately if the guard variable is set. Controlling the Editing Experience in ExcelExcel provides a number of properties that you can use to control the editing experience. To understand the part of the Excel editing experience that these properties control, launch an instance of Excel, and create a blank worksheet. Click a cell in that worksheet, and type a number. Notice that Excel lets you type in the cell or in the formula bar at the top of the window. You can move the insertion point inside the cell to edit the contents of the cell further. When you press the Enter key after editing the cell, Excel moves to the next cell down. (Your editing settings might differ, but this explanation represents the default behavior of Excel 2003.) Excel enables you to control whether the contents of the cell can be edited directly inside the cell through the Edit Directly in Cell option in the Edit tab of the Options dialog box. The EditDirectlyInCell property lets you change this setting in your code. Setting this property to False makes it so the user can edit the contents of a cell only using the formula bar. When you press Enter after editing a cell, Excel typically moves to the cell below the cell you were editing. You can control this behavior in the Edit tab of the Options dialog box. The MoveAfterReturn property and MoveAfterReturnDirection property enable you to control this behavior in your code. By setting MoveAfterReturn to true, you tell Excel to change the selected cell after the user presses Enter. MoveAfterReturnDirection controls the cell Excel moves to after the user presses Enter if MoveAfterReturn is set to true. MoveAfterReturnDirection can be set to a member of the XlDirection enumeration: xlDown, xlToLeft, xlToRight, or xlUp. Controlling the Look of ExcelYou can control the look of Excel through the properties listed in Table 5.1.
Controlling File and Printer SettingsYou can configure the behavior when a new, blank workbook is created through the SheetsInNewWorkbook property. This property takes an Integer value for the number of blank worksheets that should be created in a new workbook. The default is three blank worksheets. As with most of these settings, you can also set this property in the General tab of Excel's Options dialog box. The DefaultFilePath property corresponds to the default file location setting in the General tab of Excel's Options dialog box. You can set this to a String representing the file path that you want Excel to use by default when opening and saving files. You can set the default file format you want Excel to use when saving files by using the DefaultSaveFormat property. This property is of type XlFileFormatan enumeration that has values for the various file formats Excel supports. To save Excel files by default in Excel 5 format, for example, you set this property to xlExcel5. Another useful property when dealing with files is the RecentFiles property, which returns a collection of strings containing the names of all the recently opened files. Properties That Return Active or Selected ObjectsThe Application object has a number of properties that return active objectsobjects representing things that are active or selected within Excel. Table 5.2 shows some of these properties.
Properties That Return Important CollectionsThe Application object is the root object of the object model and has properties that return several important collections. The Workbooks property returns the collection of open workbooks in Excel. The Windows property returns a collection representing the open windows in Excel. Both the Workbooks and Windows collections are discussed in more detail later in this chapter. Controlling the Calculation of WorkbooksExcel provides a number of settings and methods that correspond to some of the options in the Calculation tab of the Options dialog box. The Application object provides a Calculation property of type XlCalculation that you can use to set Excel's calculation behavior. By default, Calculation is set to automatic calculation or xlCalculationAutomatic. You can also set Calculation to xlCalculationSemiautomatic, which means to calculate all dependent formulas except data tables. Finally, Calculation can be set to xlCalculationManual, which means that Excel recalculates the workbook only when the user or your code forces a calculation. If you have set Calculation to xlCalculationManual or xlCalculationSemiautomatic, you can force a complete recalculation of all open workbooks with the Calculate method. Using manual calculation may be another way to speed your code if you are updating a large number of cells that are referred to by formulas. As with other application-level properties, you should restore the original value of the property in a Finally block, as shown earlier in this chapter. Using Built-In Excel Functions in Your CodeThe WorksheetFunction property returns a WorksheetFunction object that enables you to call the built-in Excel formulas from your code. It provides access to more than 180 formulas. Listing 5.4 illustrates three of them. Listing 5.4. A VSTO Customization That Uses the WorksheetFunction Object
Selecting and Activating a Range of CellsGoto is a method that causes Excel to select a range of cells and activate the workbook associated with that range of cells. It takes an optional Object parameter that can be either a String containing a cell reference (in "Sheet1!R1C1" format) or a Range object. We talk more about cell reference formats such as "Sheet1!R1C1" in the section "Working with the Range Object" later in this chapter. It also takes an optional Object parameter that can be set to true to tell Excel to scroll the window so that the selection is at the top-left corner of the window. Listing 5.5 shows some examples of calling the Goto method. Listing 5.5. A VSTO Customization That Uses the Goto Method
Spell CheckingExcel provides a method called CheckSpelling that you can use to check the spelling of a single word. It takes a required String parameter containing the word to check. It also takes an optional Object parameter that can be set to a String for the filename of the custom dictionary to use. Finally, it takes an optional Object parameter that can be set to true to ignore uppercase words when spell checking. CheckSpelling returns False if the word passed to it is misspelled. Listing 5.6 shows an example of calling the CheckSpelling method. Listing 5.6. A VSTO Customization That Uses the CheckSpelling Method
Sending a Workbook in E-MailExcel provides a simple way to send a workbook as an e-mail message using three methods called MailLogon, Workbook.SendMail, and MailLogoff. MailLogon logs on to the mail system and takes the username as a String, the user's password as a String, and whether to download new mail immediately as a Boolean. It is also important to check the MailSession property to make sure that a mail session is not already established. If MailSession is not Nothing, you do not need to call the MailLogon method. Workbook's SendMail method takes the recipients as a required String if there is only one recipient or as an array of strings if there are multiple recipients. It also takes a subject for the message as a String and whether to request a read receipt as a Boolean. Listing 5.7 shows a simple example that mails a workbook. Listing 5.7. A VSTO Customization That Mails a Workbook
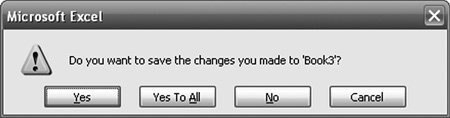
Quitting ExcelYou can use the Quit method to exit Excel. If any unsaved workbooks are open, Excel prompts the user to save each unsaved workbook. You can suppress the prompts by setting the DisplayAlerts property to False, which causes Excel to quit without saving workbooks. You can also check the Workbook.Saved property on each workbook and call Workbook.Save to save each unsaved workbook. Remember that when users are prompted to save, they get a dialog box that looks like the one shown in Figure 5.1. If the user clicks the Cancel button, or if any code is running that handles the BeforeClose event and sets the cancel parameter to TRue, Excel will not quit. Figure 5.1. Excel prompts when you call Quit and a workbook needs to be saved. Undo in ExcelExcel has an Undo method that can be used to undo the last few actions taken by the user. Excel does not support undoing actions taken by your code, however. As soon as your code touches the object model, Excel clears the undo history, and it does not add to the undo history any of the actions your code performs. Sending Keyboard Commands to ExcelExcel provides a method called SendKeys that you can use as a last resort when you cannot find a way to accomplish a command through the object model but know how to accomplish it through a keyboard command. It takes the keys you want to send to the application as a string and a Wait parameter that, if set to true, causes Excel to wait for the keystrokes to be processed by Excel before returning control to your code. You can specify modifier keys like Alt, Ctrl, and Shift by prefacing the keystroke you want to send with another character. To send an Alt+T key command, for example, you call SendKeys("%t") because % is the symbol SendKeys recognizes as Alt. The symbol SendKeys recognizes as Ctrl is ^, and Shift is +. In addition, special strings correspond to keys such as the down arrow. To send a down-arrow keystroke to Excel, you call SendKeys("{DOWN}"). Table 5.3 lists the other special strings that correspond to common keys.
|
EAN: 2147483647
Pages: 221