Database Maintenance Plans
3 4
A maintenance plan is a set of tasks that SQL Server will perform on your databases automatically, according to the schedule you specify. The purpose of a maintenance plan is to automate important administrative tasks so that they will not be forgotten and to reduce the amount of manual work for the DBA. You can create a separate plan for each database, multiple plans for a single database, or a single plan for multiple databases.
The four main categories of administrative tasks that you can schedule by creating a maintenance plan are as follows:
- Optimizations
- Integrity checks
- Complete database backups
- Transaction log backups
Performing these tasks is important for maintaining a well-performing and recoverable database. Which types of optimization tasks you include in your plan will depend on the performance and usage of your database. Performing integrity checks is a good way to ensure a consistent, healthy database. And regular backups are required to ensure the recoverability of the database in case of a system failure or user error. Because these backups are so important, you should create an automated-backup strategy. We'll look at each of these categories of tasks in more detail later in this section.
To create a maintenance plan, you use the Database Maintenance Plan Wizard. In this section, you'll learn how to use this wizard, and then you'll learn how to display the jobs in a maintenance plan and how to edit a plan.
Using the Database Maintenance Plan Wizard to Create a Maintenance Plan
To run the Database Maintenance Plan Wizard, follow these steps:
- Start the wizard from within Enterprise Manager by using one of the following techniques:
- Choose Database Maintenance Planner from the Tools menu.
- Click a database name in the left pane, and click New Maintenance Plan under the Maintenance heading in the right pane. If you do not see the Maintenance heading, make sure you have selected Taskpad in the View menu of Enterprise Manager. You also might have to scroll down to see the Maintenance heading.
- Click a database name, choose Wizards from the Tools menu, expand the Management folder in the Select Wizard dialog box that appears, and then choose Database Maintenance Plan Wizard.
- Expand a server in the left pane, expand the Management folder, right-click Database Maintenance Plans, and choose New Maintenance Plan from the shortcut menu.
- Right click on the database name and select All Tasks, and choose Maintenance Plan from the menu.
Once you open the wizard, you will see the Database Maintenance Plan Wizard welcome screen, shown in Figure 30-7.
Figure 30-7. The welcome screen of the Database Maintenance Plan Wizard.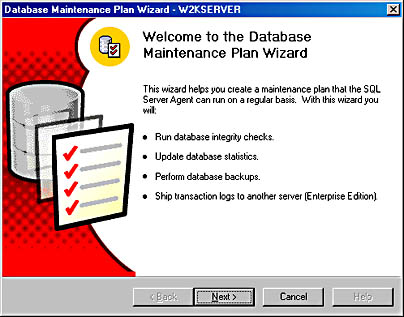
- Click Next to display the Select Databases screen, shown in Figure 30-8. Here you can select the database or databases for which you want to create this maintenance plan.
Figure 30-8. The Select Databases screen.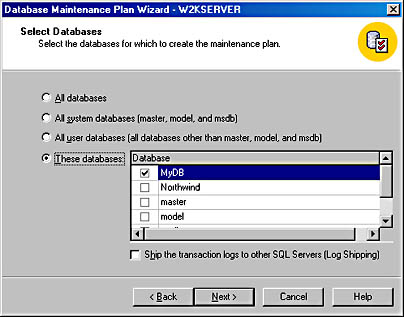
- Click Next to display the Update Data Optimization Information screen, shown in Figure 30-9. You can choose from the following types of optimizations for the database or databases you selected in the previous step:
- Reorganize Data And Index Pages This option causes all indexes on all tables in the database to be dropped and re-created, using a specified fill factor (or amount of free space on each page), which can improve the performance of updates. For read-only tables, reorganizing pages is not necessary. For tables that are inserted into or updated frequently, the free space that was originally available in your index pages starts to fill, and page splits will begin to occur. Select this option to re-create your indexes and reestablish free space for future growth, thus avoiding the delay and overhead caused by page splits.
You can choose to re-create the indexes with the original amount of free space, or you can specify a new percent per page to leave free. If you make this percentage too high, you run the risk of causing the performance of data reads to degrade. If you select this option, you cannot select the next option, Update Statistics Used By Query Optimizer.
TIP
Dropping and re-creating indexes can take longer than using DBCC DBREINDEX, as discussed in the section "Rebuilding Indexes" in Chapter 17. You might want to create your own job to rebuild indexes instead of using this option.
Figure 30-9. The Update Data Optimization Information screen.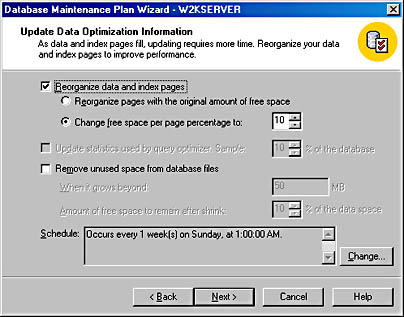
- Update Statistics Used By Query Optimizer Selecting this option will cause SQL Server to resample the distribution statistics on all indexes in the database. It uses this information to choose the optimal execution plan for queries. If you have not changed the default option for updating statistics (explained earlier in this chapter), SQL Server automatically generates statistics by sampling a small percentage of the data in the table that corresponds to each index.
The option in this screen can be used to force SQL Server to perform another sampling using a greater percentage of data (which you specify) or to determine how often SQL Server should update these statistics, instead of letting it decide. The larger the percentage of data sampled, the more accurate the statistics will be, but the longer SQL Server takes to generate them. This information can help improve performance when the data in the indexed columns has been modified greatly. You can verify the execution plan being used for your queries with SQL Server Query Analyzer to determine whether your indexes are being used efficiently and whether choosing this option is necessary. If you select this option, you cannot select the previous option, Reorganize Data And Index Pages.
- Remove Unused Space From Database Files This option is used to remove unused space; this process is also known as a file shrink. You can specify how large the amount of unused space should grow before the compression takes place and the percent of space that should remain free after compression. Once you have removed the free space, you can use DBCC SHRINKFILE to reduce the size of the file. You can make it smaller than it was when you originally created it, if desired. This will allow the disk space formerly occupied by the file to be used for some other need. Also, compressing data by removing unused space can improve performance. In read-only tables, compression is not necessary.
You can specify a time for these tasks to be performed by clicking Change and entering a new schedule in the Edit Recurring Job Schedule dialog box that appears (Figure 30-10). These tasks should be run when the system utilization is low, such as on the weekend or at night, as they might take some time to complete and might delay user response times.
- Reorganize Data And Index Pages This option causes all indexes on all tables in the database to be dropped and re-created, using a specified fill factor (or amount of free space on each page), which can improve the performance of updates. For read-only tables, reorganizing pages is not necessary. For tables that are inserted into or updated frequently, the free space that was originally available in your index pages starts to fill, and page splits will begin to occur. Select this option to re-create your indexes and reestablish free space for future growth, thus avoiding the delay and overhead caused by page splits.
- Click Next to display the Database Integrity Check screen, shown in Figure 30-11. In this screen, you can choose whether integrity checks will be performed. Integrity checks examine the allocation and structural integrity of tables and indexes (if the index option is chosen) by running the DBCC CHECKDB command. You can choose whether indexes should be included in the checks, whether SQL Server should attempt to repair minor problems found (selecting this option is recommended), and whether all integrity checks should be run before backups are performed. If you select to have checks performed before a backup and a problem is found, the backup will not execute. Click Change to change the time that these tasks will be performed. Integrity checks might take several hours to run, depending on the size of your databases, so be sure to schedule them to occur when database usage is low. Checks should be run on a regular basis, perhaps weekly or monthly or before database backups.
Figure 30-10. The Edit Recurring Job Schedule dialog box.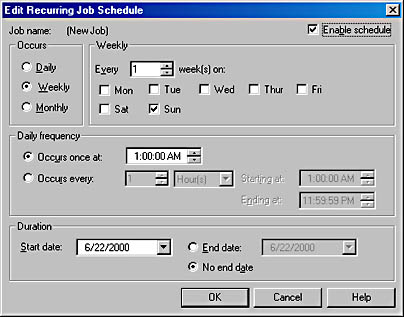
Figure 30-11. The Database Integrity Check screen.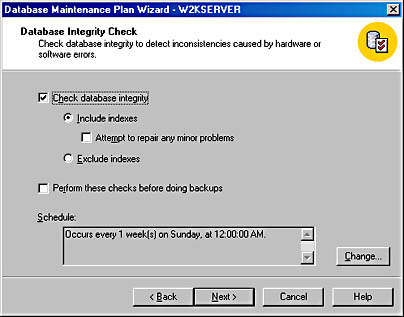
- Click Next to display the Specify The Database Backup Plan screen, shown in Figure 30-12. In this screen, you choose whether to create an automated-backup plan. (Creating such a plan is recommended.) To enable automatic backups, select the Back Up The Database As Part Of The Maintenance Plan check box. (See Chapter 32 for more information about performing backups.) You can instruct SQL Server to verify the integrity of the backup when it has finished. SQL Server does this by confirming that the backup is complete and that all the backup volumes are accessible. You can also indicate whether the backup should be stored on tape or disk. Click Change to change the time that the backup will be performed.
Figure 30-12. The Specify The Database Backup Plan screen.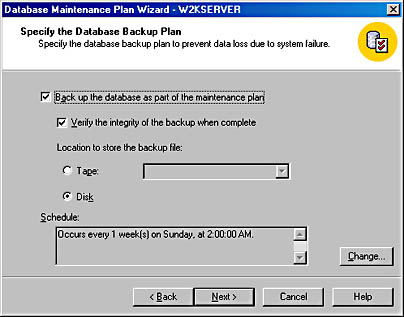
- Click Next to display the Specify Backup Disk Directory screen, shown in Figure 30-13. This screen appears only if you specified a backup to disk in the previous screen; it does not appear if you specified a backup to tape. In this screen, you can specify a location for the backup file, or you can use the default backup directory. If you have more than one database that you are backing up (such as master, model, msdb), you can choose to place the backup of each database in its own subdirectory to keep your backup files better organized. You can choose to have backup files of a certain age automatically deleted to free up disk space, and you can specify what filename extension you want to use for the backup files.
Figure 30-13. The Specify Backup Disk Directory screen.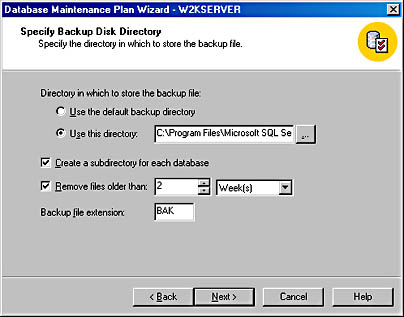
- Click Next to display the Specify The Transaction Log Backup Plan screen, as shown in Figure 30-14. This screen is similar to the Specify The Database Backup Plan screen shown in Figure 30-12, but the options on this screen are used to create a plan for backing up the transaction log. The transaction log backups should be performed between your database backups. To recover any changes since the last database backup, you use the transaction log backup. In other words, transaction log backups allow you to recover data between database backups.
Figure 30-14. The Specify The Transaction Log Backup Plan screen.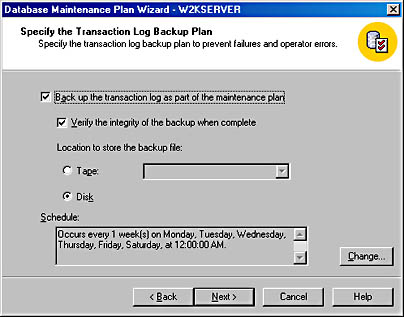
If you choose to store the backups on disk, the next screen you see will be the Specify Backup Disk Directory screen, in which you supply the backup file location information.
- Click Next to display the Reports To Generate screen, as shown in Figure 30-15. This screen gives you the option of creating a report that contains the results of the execution of the maintenance plan tasks. This report includes the details of the steps executed and any errors encountered. In this screen, you also select the location to store the report, and you can choose to delete reports older than a certain date and to e-mail the report to a specified e-mail alias.
Figure 30-15. The Reports To Generate screen.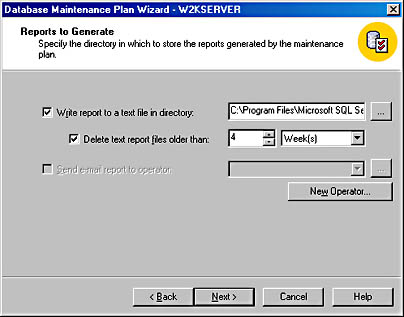
- Click Next to display the Maintenance History screen (Figure 30-16). Here you can choose whether a maintenance history report will be written to a database table on the local server, and you can set a maximum size for the report. You can also have the report written to a remote server and specify the maximum size of that report.
- Click Next to display the Completing The Database Maintenance Plan Wizard screen, shown in Figure 30-17. This screen shows a summary of your maintenance plan. The plan will have a default name, but you can specify a name by typing it into the Plan Name text box. Check the summary and backtrack if you want to change any options. If the plan looks satisfactory, click Finish.
Figure 30-16. The Maintenance History screen.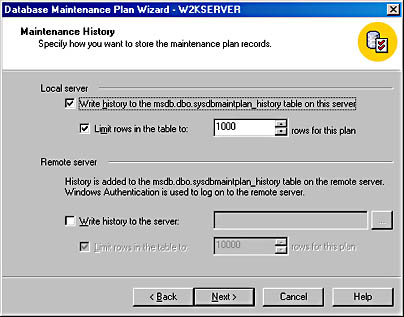
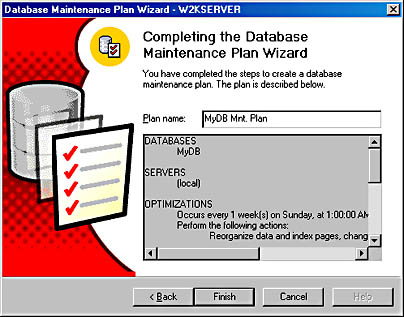
Figure 30-17. The Completing The Database Maintenance Plan Wizard screen.
Displaying the Jobs in a Maintenance Plan
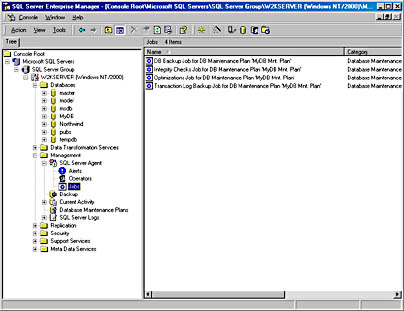
For our sample maintenance plan, we created a task in each of the four categories. To see a list of the jobs, or scheduled tasks, expand the Management folder in the left pane of Enterprise Manager, expand SQL Server Agent, and then click Jobs, as shown in Figure 30-18.
Editing a Maintenance Plan
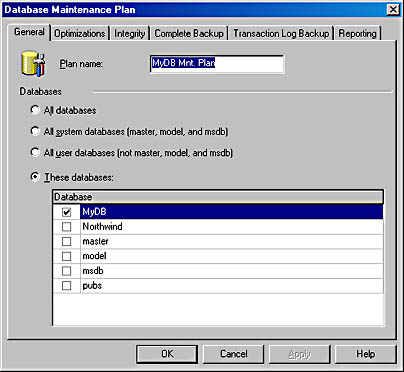
To edit a maintenance plan, in the left pane of Enterprise Manager, click the name of the database for which the plan was created, and then select the plan name under the Maintenance heading in the right pane. You might have to scroll down to see the Maintenance heading. The Database Maintenance Plan dialog box appears, as shown in Figure 30-19.
The General tab allows you specify which databases will be affected by your maintenance plan after you finish modifying it. The other tabs allow you to change the settings for the options that you configured by using the Database Maintenance Plan Wizard. When you have finished modifying the plan, click OK. Your plan will now begin running according to your schedule.
NOTE
You must have the SQL Server Agent service started for the automatic maintenance plans to run as scheduled. See Chapter 31 for more information about SQL Server Agent.
EAN: N/A
Pages: 264