Kpackage
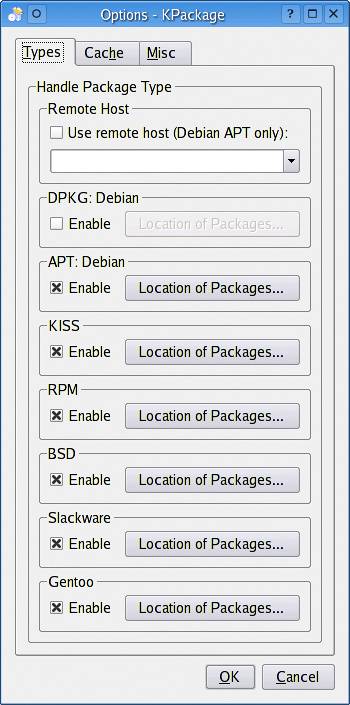
| KDE's package tool, kpackage, uses a graphical interface to allow for easy installation or removal of packages. When you first start up kpackage (which you can quickly call by pressing <Alt+F2> and typing kpackage), you'll get a two-panel display, with the installed packages on the left and an information window on the right. Click on an installed package (such as tar in Figure 7-3), and you'll get to know all about that package in the right-hand window's Properties tab. Figure 7-3. Kpackage, the KDE package manager.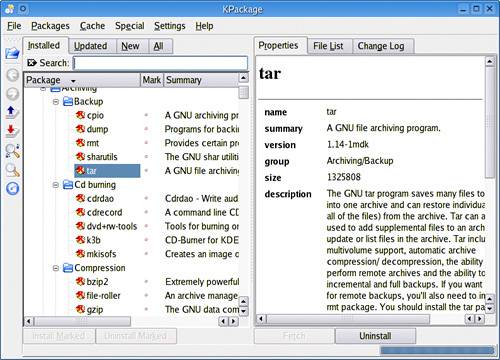 Click on the File List tab, and you'll get a listing of every file that makes up this package and where these files live on your system. This is actually a great way to get to know the packages installed on your system, and I highly recommend walking through the list and getting a feel for what comprises your Linux system. Notice as well that all of the packages in that tree view to the left are in a category hierarchy, based on what kind of package they are. To remove (or uninstall) a package, just click on the Uninstall button at the bottom of the screen (Figure 7-4). A warning screen will appear listing the package (or packages) you are looking to uninstall. If this is really what you want to do (and by the way, this is just an example I do not recommend that you uninstall tar), click Uninstall. A report of the uninstall process will appear in the right-hand-side information window. Figure 7-4. Using kpackage to uninstall software. Installing PackagesTo install a package, we first need to identify one, and there are many ways of doing this. Using Konqueror, you can surf over to your favorite software repository (such as RpmFind at http://www.rpmfind.net) and search for a package. When you find something compiled for your particular Linux distribution, click on the package file. Konqueror recognizes this as an RPM package and offers to bring up Kpackage, the installation tool. You can also right-click on the package, click Open with from the menu, and select or type kpackage. Another way to do this is to define package sources. These sources could be on a CDROM, on your hard drive, or at a location somewhere on the Internet. To add a package source, click Settings on the menu bar and select Configure Kpackage. A dialog will appear from which you can decide what kind of package source you want to add (Figure 7-5).These could be Debian APT, RPM, Slackware, and others. For this example, I clicked the Location of Packages RPM button. Figure 7-5. Selecting sources for package installation.
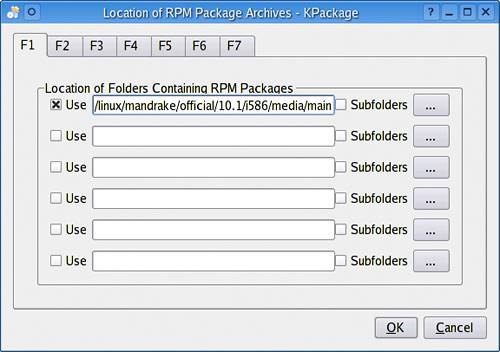
In the case of each of these possible package types, you have a lot of room for entering data sources (Figure 7-6). Each of the seven tabs is an opportunity for entering six different package locations. Enter the path to the directory containing the RPM packages you wish to install from and then click the Use checkbox to the left of the path. If this is a network location, make sure you enter the path to the directory in proper URL format (ftp://ftp.server.dom/path/to/packages). Figure 7-6. Selecting the path to a software installation source.
Dealing with DependenciesInstalling a single package without dependencies is easy. Select the package, then click Install Marked. If the package has dependencies, it requires additional steps. Let's pretend we want to install Gnumeric, a spreadsheet package that makes an excellent replacement for Excel. The first step is to find the package in the list from my new package archive. We can either scroll down the list until I find the package, or we can take a shortcut and do a search for it. To search for a package, either click the Find Package icon on the left-hand button bar or press <Ctrl+F> to bring up the search dialog. With gnumeric located, we can download the package by clicking the Fetch button on the bottom right-hand side (Figure 7-7). Figure 7-7. Searching for and fetching a package with Kpackage.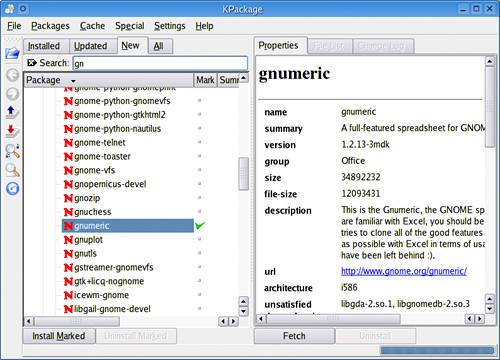 After fetching the gnumeric package, we are suddenly presented with quite a bit more information, including a list of unsatisfied dependencies. In my Gnumeric example, two packages are missing: libgda2 and libgnome-db2. Over on the left-hand side, we still have my listing of all the packages from our software repository. One by one, I fetch the remaining packages. By the way, it isn't necessary to wait until one package is downloaded before fetching the other. After clicking Install Marked, the installation dialog will appear (Figure 7-8) with a few last-minute options: Upgrade, Replace Files, Replace Packages, Check Dependencies, and Test (which doesn't actually do an installation). Figure 7-8. All set to launch the installation of multiple packages.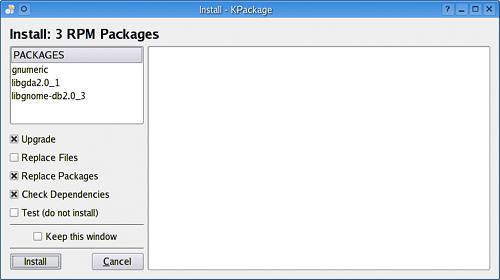 You can safely accept the default options, which are to upgrade, replacing old packages as well as checking dependencies. When you are ready to do the install, select your package (listed to the left) and click Install. You will now be asked for the root password. Enter it and press <Enter>. After a few seconds, the package installation will complete, and kpackage will display the status of the new package, along with its description.
|
EAN: 2147483647
Pages: 247