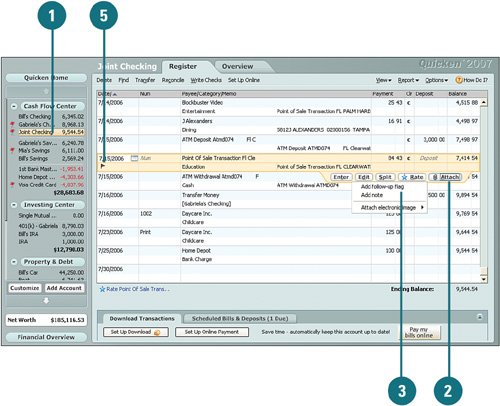
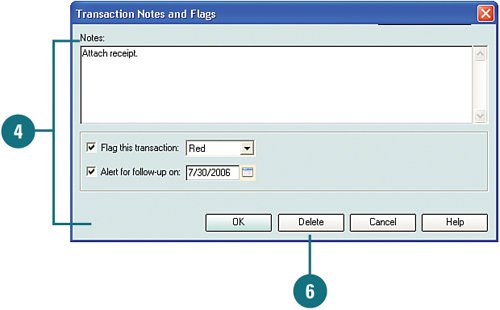
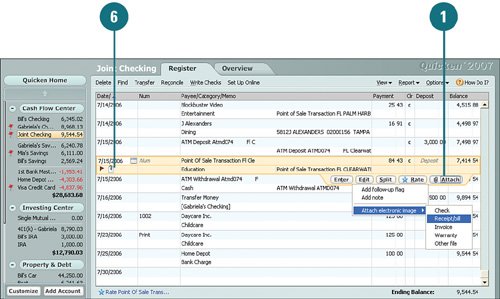
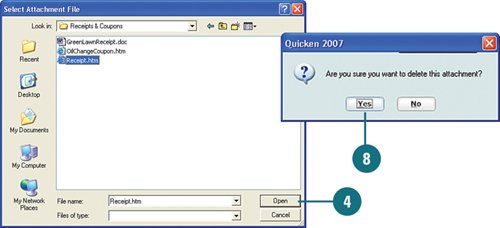
Flag and Attach Documents to Transactions
| You can flag transactions in your account registers; for example, as a reminder to follow up on the transaction at a later time. In addition, you can attach documents to transactions in your account registers, such as an electronic or scanned receipt to keep with the transaction. There's no losing an attached receipt! Flag Transactions
Attach Documents to Transactions
|

- A View on Knowledge Management: Utilizing a Balanced Scorecard Methodology for Analyzing Knowledge Metrics
- Measuring ROI in E-Commerce Applications: Analysis to Action
- Technical Issues Related to IT Governance Tactics: Product Metrics, Measurements and Process Control
- Managing IT Functions
- Governing Information Technology Through COBIT