Positioning Data on a Printout
Once you have your data and any headers or footers in your workbook, you can change your workbook s properties to ensure that your worksheets display all of your information and that printing is centered on the page.
One of the workbook properties you can change is its margins, or the boundaries between different sections of the printed page. You can view a document s margins and where the contents of the header, footer, and body appear in relation to those margins in the Print Preview window.
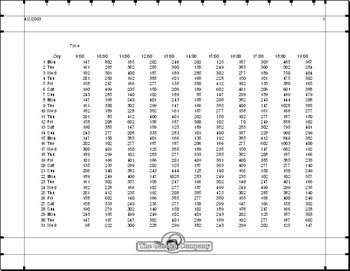
In the above graphic, the logo in the footer spills over the top margin of the footer. To remove the overlap, you can move the footer s top margin up, increasing the amount of space devoted to the footer. Increasing the size of the footer reduces the size of the worksheet body, meaning fewer rows can be printed on a page.
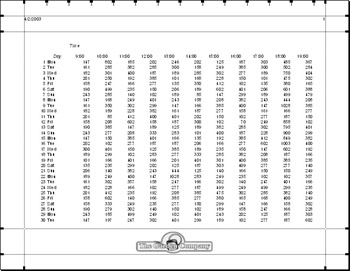
Another issue with printing worksheets is that the data in worksheets tends to be wider horizontally than a standard sheet of paper. For example, the data in the worksheet in the previous graphic is several columns wider than a standard piece of paper. You can use the controls in the Page Setup dialog box to change the alignment of the rows and columns on the page. When the columns follow the long edge of a piece of paper, the page is laid out in portrait mode ; when the columns follow the short edge of a piece of paper, it is in landscape mode . The following graphic displays the contents of the previous worksheet laid out in landscape mode.
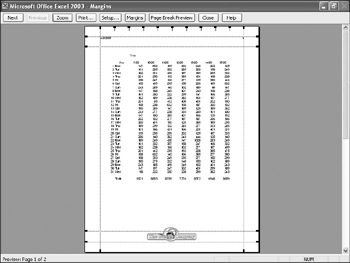
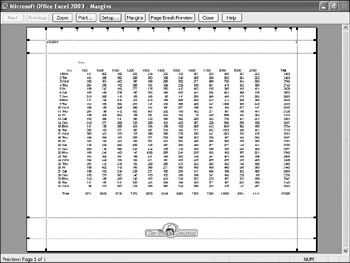
This is a better fit, but not all the data fits on the printed page. Once again, the Page Setup dialog box comes to the rescue. From within that dialog box, you can have Excel reduce the size of the worksheet s contents until the entire worksheet can be printed on a single page and also have Excel center the printed matter on the page so that there is an even margin around the printing.
In this exercise, you change the margins in a workbook to stop the graphic in the footer from overlapping with the data in the body of the worksheet. You then change the alignment of the workbook so that its contents are laid out in landscape mode and centered on the printed page.
USE the ![]() Margins.xls document in the practice file folder for this topic. This practice file is located in the
Margins.xls document in the practice file folder for this topic. This practice file is located in the ![]() My Documents\Microsoft Press\Office 2003 SBS\ChangingDocAppearance folder, and can also be accessed by clicking Start/All Programs/Microsoft Press/Microsoft Office System 2003 Step by Step .
My Documents\Microsoft Press\Office 2003 SBS\ChangingDocAppearance folder, and can also be accessed by clicking Start/All Programs/Microsoft Press/Microsoft Office System 2003 Step by Step .
OPEN the ![]() Margins.xls document.
Margins.xls document.
-
On the Standard toolbar, click the Print Preview button.
The Print Preview window opens.
-
Click Margins .
Margin lines appear.
-
Drag the second margin line from the bottom of the page up until it clears the graphic.
The top edge of the footer moves above the graphic.
-
Click Setup .
The Page Setup dialog box appears.
-
If necessary, click the Page tab.
-
Select the Landscape option button.
-
Select the Fit to option button and set to 1 page wide by 1 page tall.
-
Click the Margins tab.
The Margins tab page appears.
-
In the Center on page section of the tab page, select both the Horizontally checkbox and the Vertically check box.
-
Click OK .
The Page Setup dialog box disappears. The document view in the Print Preview window changes to reflect the new settings.
-
Click Close .
The Print Preview window disappears.
-
On the Standard toolbar, click the Save button to save your changes.
CLOSE the ![]() Margins.xls document.
Margins.xls document.
EAN: 2147483647
Pages: 350