Formatting a Table
In FrontPage, as in Word, you have several options for formatting tables. You can choose from a large variety of pre-formatted table styles or create your own look. You can even merge two or more cells into one cell so that a table entry spans several columns or rows.
FrontPage 2003 supports many of the standard Microsoft Office System table-formatting options, including the following:
-
By using Fill Right and Fill Down, you can quickly copy content from one table cell to several others.
-
By using AutoFormat, you can quickly create professional-looking tables by simply selecting a pre-formatted option from a list.
-
By using the Borders button, you can format selected table and cell borders as easily as you can in Word and Excel, simply by clicking the type of border you want.
In this exercise, you ll format the tables in The Garden Company s Web site, first by doing things the hard way ”and seeing just how easy that can be ”and then by checking out a few of FrontPage s ready-made formats.
USE the GardenCo Web site in the practice file folder for this topic. This practice file is located in the ![]() My Documents\Microsoft Press\Office 2003 SBS\ListsTables\FormatTable folder and can also be accessed by clicking Start/All Programs/Microsoft Press/Microsoft Office System 2003 Step By Step .
My Documents\Microsoft Press\Office 2003 SBS\ListsTables\FormatTable folder and can also be accessed by clicking Start/All Programs/Microsoft Press/Microsoft Office System 2003 Step By Step .
OPEN the GardenCo Web site.
-
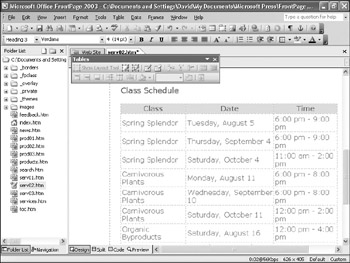
In the Folder List , double-click
 serv02.htm to open the Carnivorous Plants page in the Page view editing window.
 -
Scroll down to the table, and select the three cells of the header row.
-
Right-click the selection, and click Cell Properties on the shortcut menu.
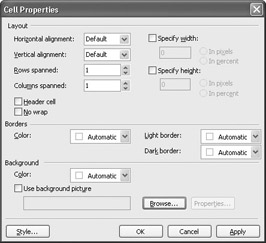
The Cell Properties dialog box appears.
-
In the Cell Properties dialog box, select the Header cell check box.
-
In the Background area, click the down arrow to the right of the Color box to display the Standard and Theme color palettes.
If you click More Colors, FrontPage displays a dialog box in which you can select from a palette of 127 colors or specify a custom color using the hexadecimal or RGB value. Your options are practically limitless!
-
Select your favorite color from the default set, and then click OK to close the Cell Properties dialog box and apply your changes.
Tip When a theme is attached to a Web page, the default colors include those used in the theme. It is generally best to select colors from the theme to maintain a consistent look and feel throughout your Web site.
The background color is applied, and the words inside the header cells become bold and centered.
-
Because the cells are still selected, click away from the table to reveal the actual cell color.
-
In the Folder List , double-click
serv01.htm to open the Spring Splendor page in the Page view editing window. -
Click anywhere in the table on that page.
-
On the Tables toolbar, click the Table AutoFormat button.
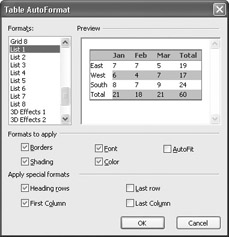
The Table AutoFormat dialog box appears.
-
In the Table AutoFormat dialog box, use the [ “] key to scroll through the Formats list on the left.
When you select a format, a sample table with that format applied is displayed in the Preview window.
-
Select the Subtle 1 format.
-
Because this table does not have a special first column, in the Apply special formats area, clear the First Column check box.
-
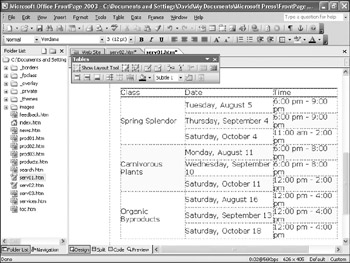
Click OK to apply the selected format to the table.
-
At the bottom of the Page view editing window, click the Preview button to switch to the Preview pane, then scroll down to see the table.

This table looks good, but notice that each class name in the first column is repeated three times. The table would look tidier if each class name appeared only once and spanned three rows.
-
At the bottom of the Page view editing window, click the Show Design View button to switch to the Design pane.
-
In the first column, select the three cells containing the words Spring Splendor .
-
On the Tables toolbar, click the Merge Cells button.
FrontPage merges the three cells into one cell that still contains three instances of Spring Splendor .
Tip To split one cell into multiple cells, select the cell, and click the Split Cells button. In the Split Cells dialog box, specify the number of rows or columns you want to split the merged cell into, and click OK.
-
Select and delete two instances of the class name, leaving just one.
The remaining class name is vertically centered within the cell.
-
Repeat steps 17 through 19 for the Carnivorous Plants and Organic Byproducts classes.
-
On the File menu, click Save All to save the open pages.
CLOSE the GardenCo Web site.
EAN: 2147483647
Pages: 350