Boosting Color
| Another simple and effective use of Hue/Saturation is to boost a key color. Usually the effect should be subtle, but distinct enough to give the image an extra punch. If your image will be printed in CMYK, you might find it useful to turn on your Gamut Warning (View > Gamut Warning or Command/Ctrl-Shift-Y) to make sure that you don't introduce nonprintable colors into your image. Depending on whether the color you're affecting is spread throughout your image or isolated, you may or may not need to use a layer mask to restrict the adjustment layer to specific areas. In the first two examples, the yellow was boosted easily without needing to use a layer mask. Figure 5.18. Boosting the yellow of the road markings (examples A and B) with a Hue shift (example C).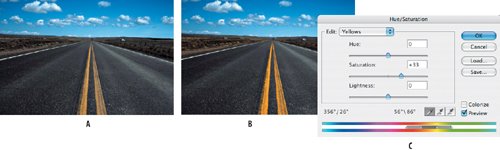 Figure 5.19. Boosting the yellow of the taxi (examples A and B) with a Hue shift (example C).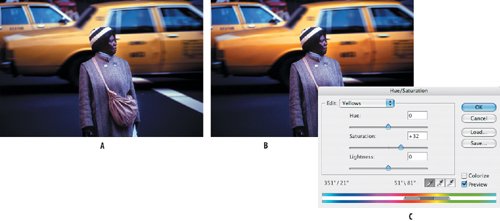 In the next example of a church and a sign, it's necessary to target the Hue shifts of the reds and the yellows with separate adjustment layers. While I could have made both changes on one adjustment layer, I separated the steps, making it clearer (to me at least) how the image was edited should I revisit it in the future. Because I wanted to reveal the color boost on less than 50% of the image, I then filled the layer mask with black, masking the effect of the adjustment layer. Then I switched my foreground color to white and painted on the layer mask with a soft-edged brush to reveal the boosted color in the signs. Figure 5.20. Boosting the red and yellow in the signs (examples A and B) and restricting the color shifts to specific areas using layer masks (example C).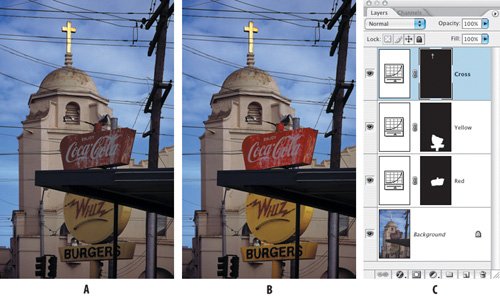 |
EAN: 2147483647
Pages: 93