Masking with Transparency


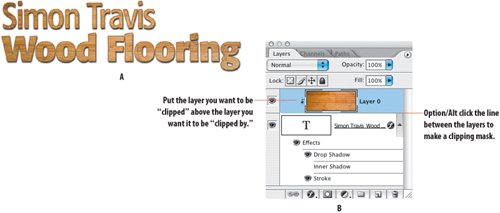
You can use the opaque pixels of one layer to mask other layers using a clipping mask (not to be confused with a clipping path, which is something different). The layer that is "clipping" other layers must have transparent areas and must be below the other layers. Put a layer (or layers) above this transparent layer and choose Layer > Create Clipping Mask (Command/Ctrl-Option/Alt-G) or Option/Alt-click the horizontal line between the two layers to clip the upper layer.

When a layer is clipped by another, the clipped layer (above) takes on the mask of the clipping layer (below).

Clipping masks are useful in the following situations:

  • If you are using adjustment layers to make color adjustments and want to confine the adjustment to a specific layer rather than having it affect all layers below it. (More on this in the next chapter.)

  • As an alternative to rasterizing Type or Smart Object layers, add a layer of color or texture above and have the Type or Smart Object layers clip those layers. If you edit your type, the changes are reflected on the clipping mask layer.

    Figure 4.57. I don't have to rasterize a Type layer to fill it with a texture (example A). Put the texture above the Type layer and make a clipping mask (example B).

  • If you have several layers that you want to clip to a particular shape.

    Figure 4.58. To make this collage conform to the map shape (example A), I placed a vector drawing of the map on the bottom layer and made it clip the layers above. Example B shows the layers indented, clipped by the bottom layer.

    Let's take a look at a scenario that uses both layer masks and clipping masks. In this reworking of Robert Indiana's famous LOVE graphic from the 1960s, I want each letter to take on a different texture. Where the texture is confined to the letter shapeas with the L and the Ethis is easily achieved with a clipping mask: putting the texture layer above the letter layer and Option/Alt-clicking the line between the layers.

    Figure 4.59. The four separate images used as background textures inside the letter shapes (examples A through D) and the finished composition (example E).

    Figure 4.60. On the Layers palette the thumbnails of layers that are grouped with or clipped by the layer beneath are shown indented.

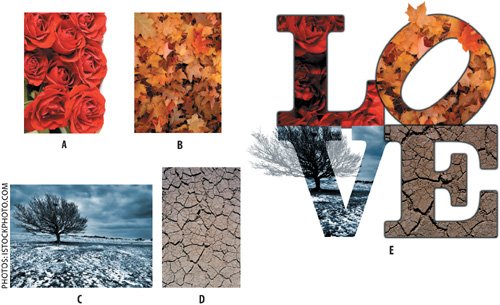
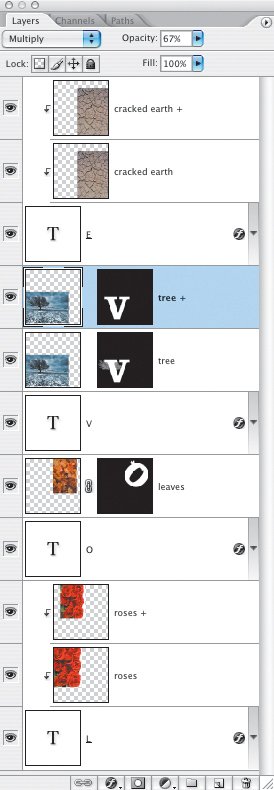
However, where I want the image to break out of the letter shapeas with the O and Vmy best option is to use a layer mask. This is easy: Command/Ctrl-click the thumbnail for the Type layer to load it as an active selection. Target the image layer and click Add Layer Mask to mask that layer with the type shape. For the "breakout" on the O, I painted in white on the layer mask to restore one of the leaf shapes.

Figure 4.61. The O layer mask.


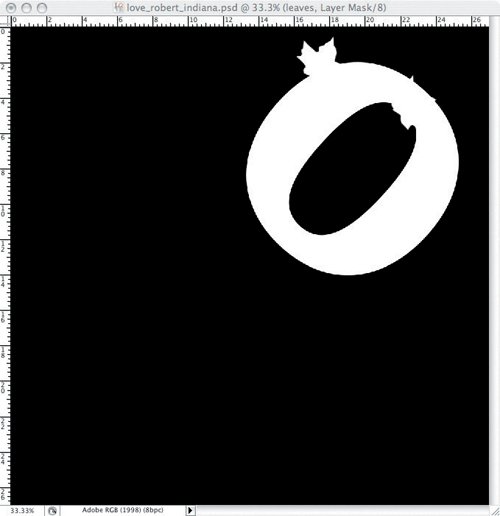
Where the tree breaks out of the V, it is necessary to load a pre-saved selection of the tree with its background knocked out. This is best done using a channel mask (see Masking Complex Detail in Chapter 6, "Channel Masking") made from a duplicate of the channels that offers the most edge contrastin this case the blue channel.

Target the layer mask of the tree layer and load your saved selection: Command/Ctrl-click the alpha channel thumbnail or choose Select > Load Selection. Fill the active layer with white. To reduce the opacity of just the tree, Command/Ctrl-click the V to load the letter shape as a selection. Inverse this selection and then, on the V layer mask, paint in 30% black over the tree.

Figure 4.62. The V layer mask.
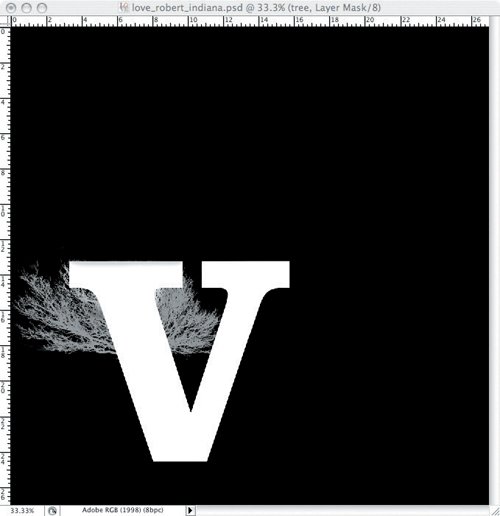


Adobe PhotoShop Unmasked. The Art and Science of Selections, Layers, and Paths
Adobe Photoshop Unmasked: The Art and Science of Selections, Layers, and Paths
ISBN: 0321441206
EAN: 2147483647
Year: 2004
Pages: 93
Authors: Nigel French

flylib.com © 2008-2017.
If you may any questions please contact us: flylib@qtcs.net