Fine-Tuning Color Selections
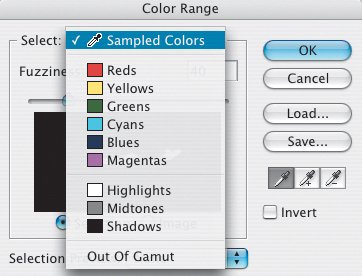
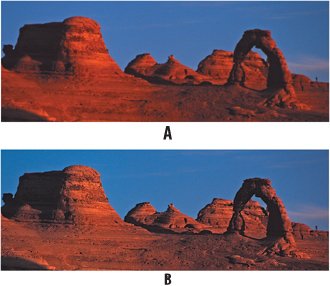
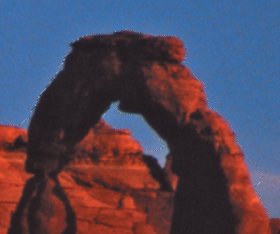
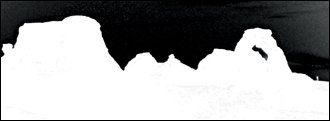
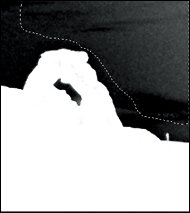
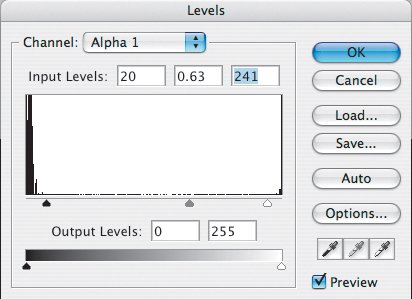
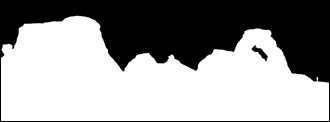
| In the previous chapter we saw how we can use the Magic Wand tool for making color-based selections. Sometimes there's a better way. Using Color Range to Make Complex Color-based SelectionsColor Range is actually a Selection tool, but I've included it in the Channels chapter because you're better equipped to use Color Range effectively once you understand how channels work. The Color Range feature uses a channels-like interface to show you which pixels are selected and which pixels are protected. It allows you to create a more sophisticated mask than you could achieve with the Magic Wand tool. Like the Magic Wand tool, Color Range makes selections based on the similarity of color values; its selections are noncontiguous. But the Color Range preview window gives a better indication of which pixels will be selected than the simple marching ants outline that results from a Magic Wand selection. And whereas the Magic Wand tool either selects or does not select a pixel, Color Range allows you to partially select pixelsjust like painting on a mask with gray. Color Range is the Swiss Army knife of selection tools. In addition to making selections by sampling colors with the eyedroppers, you can also make selections based on specific colors or tonal ranges or out-of-gamut colors. This is especially useful if you are working with an image where you want to change the hue of a particular color, affect only the shadows or only the highlights, or desaturate out-of-gamut colors to bring them back into the range of printable colors. Choose Select > Color Range and click with the eyedropper on the pixels you want to select. To extend the range of colors, select the plus eyedropper (or hold down Shift), and click in the preview area or image. To remove colors, select the minus eyedropper (or hold Option/Alt), and click in the preview area or image. When the Selection button is checked, your selection is previewed in the Color Range dialog box like a grayscale alpha channel. While I've never found any reason to change this, you can, if you wish, see your selection preview in the image window and choose from the Selection Preview drop down menu to view the selection as Grayscale, against a black or white matte, or as a Quick Mask. The Fuzziness slider is roughly equivalent to the Magic Wand's Tolerance setting but allows pixels to be partially selected. Move the slider to the right to increase the size of the selection. Note that you might get better results if you first make a rough selection before choosing Color Range. Figure 2.19. The Color Range tool. Selected areas of the image appear in white, masked areas in black, partially selected areas in gray.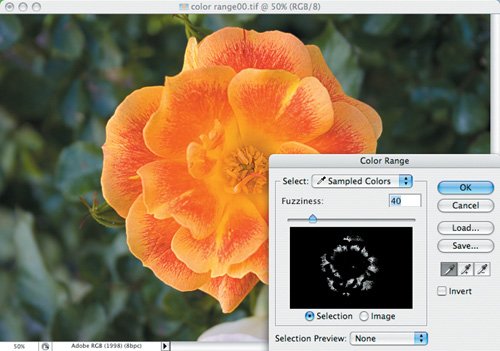 Figure 2.20. Click with the eyedropper on the image to sample the pixels you want to select. Use the plus eyedropper to extend the selection, the minus eyedropper to remove pixels from the selection. Move the Fuzziness slider to the right to expand the selection or to the left to shrink the selection.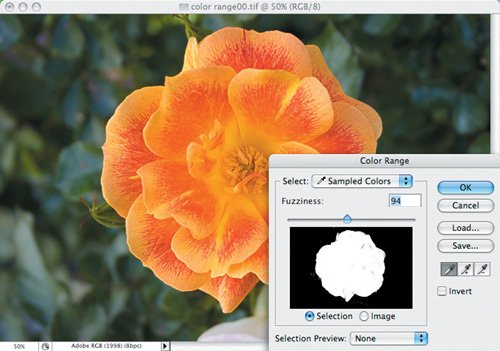 Figure 2.21. The resulting selection as represented by marching ants (example A), and after smoothing by 2 pixels and cleanup with the Lasso tool (example B).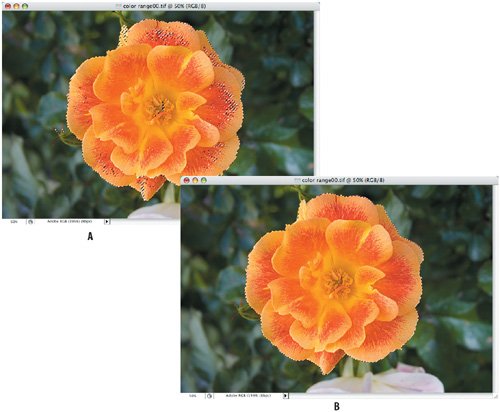 Figure 2.22. You can use Color Range to select more than just sampled colors. Color Range Versus the Magic WandThis image of Delicate Arch was shot with low light and scanned from a transparency on a midrange slide scanner. Consequently, there's a lot of grain, especially in the Blue channel, which, not surprisingly, is showing up most in the sky. I want to mask the sky so that I can make a tonal correction on the foreground. I also want to sharpen just the foreground so that I don't accentuate any of the graininess in the sky. Figure 2.23. The original image (example A) and the image edited using a mask to selective sharpen and improve the tonal range (example B).
|

EAN: 2147483647
Pages: 93