A Hard-Copy Scan
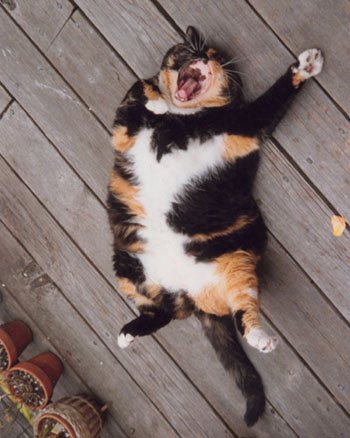
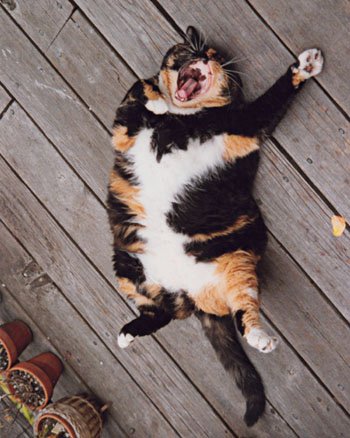
| While I much prefer working from the original film to working from prints (and much prefer working from digital captures to working from film), sometimes the print is all that's available, particularly with old photographs that may have great personal or even historical significance. The image in Figure 6-15 may not have much historical significance, but it does capture perfectly the utter disdain with which I'm treated daily once I've opened the cat food. Figure 6-15. A hard-copy scan
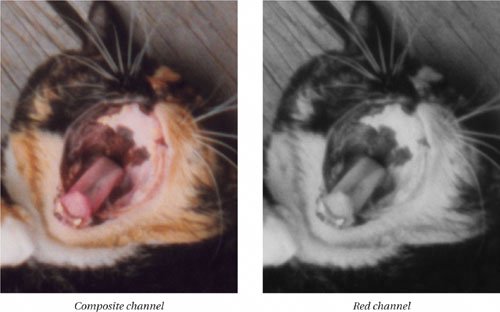
This image was shot with consumer film in a point-and-shoot camera, and scanned from a 4- by 6-inch drugstore print. I can't really expect to get much enlargement out of it, but I can still improve it. The first task to check the noise to see if it needs special treatment. Figure 6-16 shows a zoomed-in view of the composite and individual color channels. The blue channel is quite noisy while the others are relatively clean, so I duplicate the Background layer and run the Despeckle filter five times on the blue channel only. Figure 6-16. Checking the channels
The image is lacking midtone contrast, so the next step is to add a midtone contrast layer. I do so using the techniques described earlier in this booksee "Midtone Contrast" under "Overlay and High Pass" in Chapter 4, Sharpening Tools and Techniques. The midtone contrast layer doesn't really sharpen the imageit applies over a much wider area than the edges in the imagebut it has the effect of making the image appear quite a bit sharper. Hence it's important to add midtone contrast before sharpening, otherwise you're likely to oversharpen. Figure 6-17 shows the image after adding midtone contrast. Figure 6-17. After adding midtone contrast
Next, I create a sharpening layer using Option-Merge Visible. I'll use the sharpening layer to apply sharpening for source, and then, with the addition of a layer mask, for content. I set the Layer Style options for the sharpening layer to Luminosity blend mode with 66 percent opacity, and use the Blend If sliders to constrain the sharpening to the midtones. Then I run the Unsharp Mask filter with Amount 500, Radius 0.5 pixels, and Threshold 0. Figure 6-18 shows the process of creating the sharpening layer, and the results of applying the sharpening optimization for the image source. Figure 6-18. Applying sharpening for source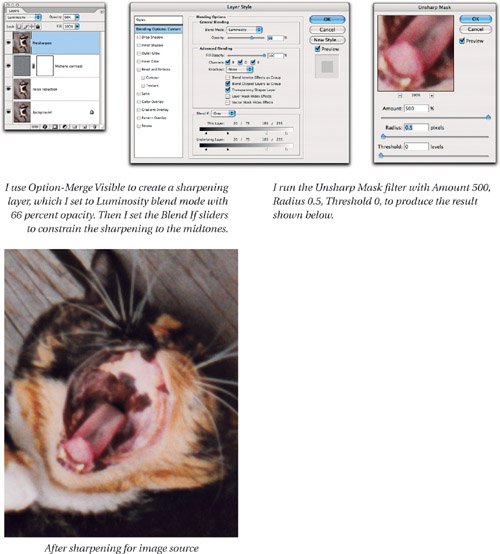 Next, I create an edge mask created from a blur layer, apply it to the sharpening layer as a layer mask, and sharpen for content through the layer masksee Figure 6-19. Figure 6-19. Applying sharpening for content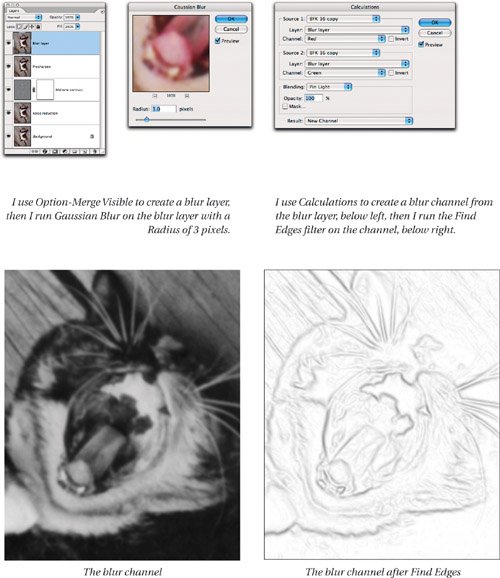 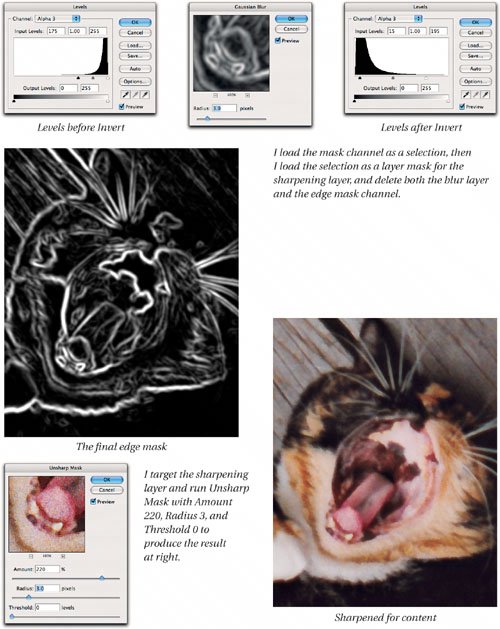 I downsample the image to 300 ppi using Bicubic Sharper, then apply the same output sharpening as in the previous examples to produce the final sharpened image in Figure 6-20. Figure 6-20. After sharpening for output
I've been able to make a quite decent 8- by 10-inch inkjet print from this image, which considering its origin as a 4- by 6-inch drugstore print is fairly remarkable. Older prints, especially contact prints, can contain a surprising amount of information, but they won't last forever, especially if they're color prints, so digitize and sharpen them while they're still in reasonable shape. |


EAN: 2147483647
Pages: 71