Output Sharpening
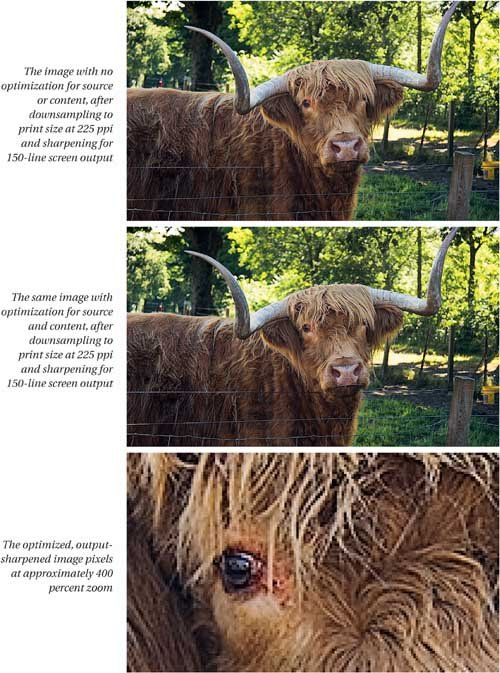
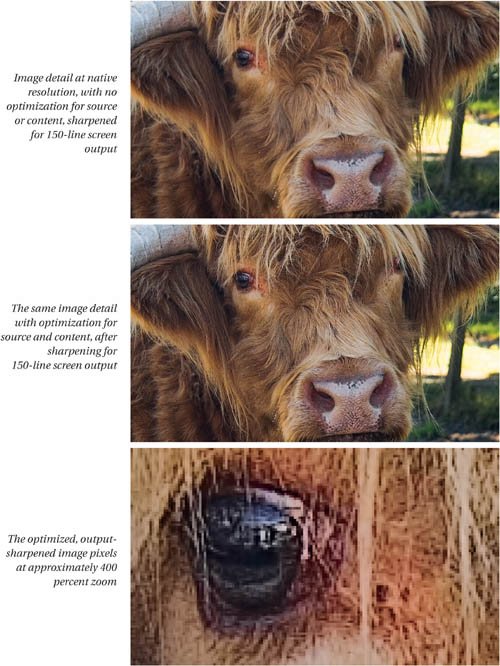
| The final step in the sharpening workflow compensates both for softening introduced by the output process, and for softening induced by resizing to final output resolution. At this stage in the workflow, all the other factors that affect sharpening have already been addressed, so this step can focus (no pun intended) entirely on the output process. Since the relationship between input pixels and output dots is always the same, it's possible to create a single optimal sharpening routine for each output process and resolution. It's true that different platesetters or different inkjet printers use subtly different screening algorithms, but all we can do is to sharpen the pixelswe can't control how they get turned into dotsand in practice, these small differences are below the threshold that we can address by sharpening pixels. Matte papers may need slightly more sharpening than glossy or luster papers to achieve the same apparent sharpness, since the ink bleeds a little more on matte papers, but the difference is quite small, and it's up to you to decide whether it's worthwhile making separate sharpening routines for the same device on matte and glossy papers. It's almost certainly overkill to make more than two paper-specific routines. By far the most important factor is the pixel resolution you send to print, because it dictates the size of the pixels, and hence the size of the sharpening haloes. Up to this point in the workflow, we've tried to avoid obvious sharpening haloes. For output sharpening, however, we want haloes that may be obvious on the computer display when viewed at actual pixels (or higher) zoom, but that will still fall below the threshold of visual acuity at reasonable viewing distance for the print. Unlike all the previous sharpening passes, output sharpening is applied globally to the entire image, with no masking, and to the entire tonal range without protecting the highlights and shadows. It's by far the simplest of the sharpening passes, but it's a vital one. Output Sharpening in PracticeIn this book, I'm limited to showing the output sharpening for the 150-line screen used to print it. But within these constraints, I can show how output sharpening interacts with the previous stages of the sharpening workflow on the same images downsampled to different resolutions. Figure 3-9 shows several versions of an image. All versions were produced from the same native-resolution master file. The only differences are in the output resolution and the output sharpening that accommodates it, and whether or not it had been optimized for source and content. Figure 3-9. Output sharpening
Output sharpening is very much like traditional prepress sharpening. You'll see that the versions without optimization for source and content aren't unacceptably soft, but you'll also see that the optimized versions are sharper, without appearing oversharpened. The optimizations for source and content allow me to take the same master file and produce optimally sharp versions of the image at different sizes and resolutions simply by downsampling and applying the appropriate output sharpeners. Output Sharpening and the DisplayJust to round out the picture, Figure 3-9 also shows a zoomed detail of the optimized-and-output-sharpened image that corresponds roughly to viewing the image pixels on screen at 400 percent zoom. I included these views not because attempting to judge sharpness by looking at pixels at 400 percent zoom is a useful or even rational activityit isn'tbut simply to dramatize the fact that images that are well sharpened for output will almost certainly look scary on the computer display. As I explained back in Chapter 2, Why Do We Sharpen?, it's just about impossible to judge final print sharpness from the display. At the risk of some redundancy, I reiterate the point here because it bears repeating. One of the biggest leaps of faith in the entire Photoshop universe is sending pixels that looks hideous on screen to a printing device, but if the pixels don't look seriously crunchy on the display, you're almost certainly under-sharpening your images. The only reliable way to evaluate print sharpening is to sharpen the image, print it, and look at the print! |

EAN: 2147483647
Pages: 71