Using and Abusing the Dock
If you've spent any time at all working with Mac OS X, you already know the Dock basics: any application that is running shows up in the Dock (with a triangle beneath it), as well as any applications or files you add yourself (or, if you haven't modified the Dock in any way, any applications that were already in the Dock when you first booted into Mac OS X). You can click on any application icon in the Dock to switch to that application. Simple, right? Yes, it is, and that's part of the beauty of the Dock, especially for new users. However, if your Dock expertise doesn't go much beyond these basics, you're not taking advantage of all the features and power that the Dock provides. In this section I'll show you these features and how to get more out of them.
Accessing and Using Dock Items
| User Level: | any |
| Affects: | individual user |
| Terminal: | no |
I'll talk about customizing the Dock's contents shortly, but first I want to make sure you're aware of everything you can actually do with an item once it's in the Dock. As you're surely already aware, clicking on an item in the Dock is just like double-clicking on it in the Finder: an application in the Dock will launch (or, if it's already running, will be made active); a file in the Dock will be opened using whatever application is associated with it; and a folder or volume in the Dock will open in a new Finder window.
In addition, all Dock items support drag-and-drop. If you drag a file onto an application's Dock icon, the application will attempt to open that file—this is one of the easiest ways to open a file in an application other than the one it is associated with (to open an Acrobat PDF file in Preview, for example). If you drag any kind of item onto a folder or volume in the Dock, it works just as if you dragged the item onto that folder or volume in the Finder (only without the spring-loaded folders).
Dock Menus
One of the least-used features of the Dock is Dock menus. Every item in the Dock has its own Dock menu, accessed by control/right-clicking on the item's Dock icon. This menu, by default, contains a Show In Finder command that will open a new Finder window to the actual location of the item (the Dock icon is simply a representation of the item, kind of like an alias). If the Dock item is an application that is currently running, its Dock menu also includes a Quit command and a list of currently open windows within that application. This is a great way to switch directly to a specific window in a specific application, even if you can't see it on your screen, without having to first switch to the application and then find the window from the application's Window menu. Finally, if the Dock item is a folder or volume, its Dock menu includes a hierarchical listing of everything inside that folder or volume.
| Tip | Since the Finder is an application, it follows that the Finder's Dock menu will always include a list of open Finder windows; select one to bring it to the front immediately. |
In addition, many applications take advantage of the Dock's menu capabilities to add their own menu items. For example, Figure 6.5 shows the Dock menu for iTunes; you can see what track is currently playing, rate it for future reference, or control iTunes directly from the Dock menu. This is very handy when iTunes is hidden behind whatever application you're currently working in. Try control/right-clicking on other applications when they're running—you'll find that quite a few have their own customized Dock menus.
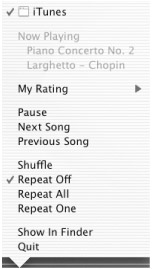
Figure 6.5: iTunes' Dock menu
| Tip | If you hold down the option key when accessing an application's Dock menu, the Quit command changes to Force Quit; this is a convenient alternative to the Apple Menu's Force Quit command, since you can force quit the offending application directly. |
Customizing the Dock's Contents
| User Level: | any |
| Affects: | individual user |
| Terminal: | no |
One of the great things about the Dock is that although it comes preconfigured out of the box with the applications most people will use, you ultimately decide exactly what it will look like. Here are a few tips for customizing its content.
| Note | As I showed you in Chapter 1, you can limit a user's capabilities in the Accounts pane of System Preferences. If you've disabled "Remove items from the Dock" for a user, that user won't be able to modify the Dock's contents. |
Left Side versus Right Side
You've probably noticed that the Dock is split into two sections by a thin vertical line. Apple's official names for these two parts are…the left side of the Dock and the right side of the Dock. (You'd think they would have come up with something a bit more clever, no?) If you've ever wondered what the difference is, it's actually rather simple: the left side of the Dock is for applications, and the right side of the Dock is for files, folders, volumes, and minimized windows (and the Trash, of course).
Adding Items to the Dock
Adding items to the Dock is as easy and intuitive as could be: just drag an item from the Finder to the Dock (applications to the left side; files, folders, and volumes to the right), and existing Dock items will politely move out of the way to make room for the new item. If an application is already running and you want to keep it in the Dock, control/right-click on the application's Dock icon, and select "Keep in Dock" from the resulting Dock menu. (You can also drag the application's Dock icon to any other position in the Dock; the application will remain in the Dock at that position after you quit it.)
| Tip | Often when you attempt to drag an item onto a Dock icon, the Dock thinks you're trying to add the item to the Dock, and the existing Dock icon will move out of the way. As you drag the item back and forth, the Dock icon keeps moving out from under the mouse. (It's kind of like that hallway "I'm trying to get past you but we look like we're dancing" routine.) You can prevent this—and make sure you're dragging onto a Dock item—by holding down the command key as you drag. This effectively locks Dock icons in their place as long as you hold the command key down. |
Removing Items from the Dock
Removing an item from the Dock is even easier than adding it: drag the item's Dock icon anywhere outside of the Dock and release the mouse. The item will disappear in a puff of smoke. (This is the "poof" I mentioned earlier that you can customize using Transparent-Dock.) Note that if you drag a running application out of the Dock, its Dock icon will snap right back—since the Dock shows all running applications, you can't completely remove it while it is running. However, after you quit the application, it will no longer be in the Dock.
Question Mark in the Dock?
At some point you'll most likely see a question mark in the Dock where there was previously an application, file, or folder. This is the Dock's way of telling you that it can no longer find that item. Perhaps you deleted the item, or maybe you moved it to a different volume. On rare occasions it can even happen for seemingly no reason at all (although the cause is generally a bad Dock preference or mild disk corruption). To update the item, drag the question mark off of the Dock to get rid of it, then navigate to the item in the Finder and drag the actual item back onto the Dock. (If you're not sure what the item was, place the cursor over the question mark; even though the Dock item no longer works, it still presents the name of the item that was there before.) If you no longer want the item in the Dock, you can just drag the question mark off to delete it.
Accessing Files Quickly
You can drag any file into the right side of the Dock for quick access. However, chances are you want to do this with more than just a single document or file, and, well, the Dock only has so much room. A better approach is to drag folders to the Dock. In Chapter 5, I showed you how to add your Desktop to the Dock; you can use the same procedure to add any other folder as well. For example, you can place your Documents folder or your Home folder in the Dock; a control/right-click on the folder icon gives you a hierarchical menu of the folder's contents (and any subfolder's contents, and so on). Another approach that I use is to create a folder called "In Progress," into which I place aliases of all the documents or folders for projects on which I'm currently working. I can then access any of my work in progress quickly and easily.
Finally, you may remember from the last chapter that the Favorites folder (~/Library/Favorites) stores aliases to any files or folders you've designated as a Favorite from the Finder or any Open/Save dialog. If you put your Favorites folder in the Dock, you can add any file or folder to your Favorites folder (and, thus, to its Dock menu), by selecting it in the Finder and pressing command+T (or selecting File ➣ Add to Favorites).
Showing Mounted Volumes in the Dock
To take the "folder in the Dock" approach one step further, you can also drag any mounted volume to the Dock and get an instant, hierarchical menu of its contents. It can also be quite helpful if you like to have your Dock on the right side of your display—you can place your hard drive in the Dock, and then choose to hide mounted volumes in Finder Preferences.
The only drawback to this approach is that you have to manually place mounted volumes in the Dock when they mount, and manually remove them if they're unmounted or ejected. If this is a hassle for you, the freeware preference pane DockDisks (http://www.charlessoft.com/) will do the work for you.
Keeping Troubleshooting Utilities in the Dock
This is more of a tip than anything else, but it deserves separate mention. Every once in a while you may find that the Finder crashes or freezes and you can't get it to quit or restart on its own. Generally you could use the Force Quit option in the Apple Menu to quit the problem application, but that may not be possible if the Finder is the application having the problem. However, the Dock often still functions in these situations. If you keep the Process Viewer utility and/or Terminal in the Dock, you may be able to use one of them to force the Finder to quit, and it will relaunch on its own. (I'll talk more about force quitting applications in Chapter 7.)
Dock Storage: Minimizing Windows
You can hide any application using the Hide command in the application menu (or by pressing command+H). The problem with this feature is that often you don't want to hide the entire application and all its windows; you may just want to get one or two windows out of the way. In the classic Mac OS, you could simply double-click on a window title bar and the window would roll up like a window shade (in fact, the feature was actually called Window Shade); Mac OS X no longer provides this feature. What it does provide is a way to shrink windows down and place them in the Dock (called minimizing). You can minimize any window by clicking the yellow minimize button in the upper-left corner (or by pressing command+M). It will shrink into the Dock using the effect you selected in Dock preferences.
| Tip | To minimize all windows in a single application at once, hold down the option key as you click the minimize button. This even works for windows in the Finder. |
When a window is minimized to the Dock, it looks just like a miniature version of itself (Figure 6.6); in fact, if you have magnification turned on, you can move the mouse over it and see a larger view (I showed you this earlier in the chapter when I talked about Dock preferences). Most minimized windows will also have a small badge icon that indicates the application to which they belong; applications with Apple's "brushed metal" look will simply show a small version of the window. Figure 6.6 shows minimized windows for the Finder, Preview, and QuickTime Player.

Figure 6.6: Windows minimized to the Dock
To get your window back to full size again, just click its minimized Dock icon; it will grow back to its original size and position. (If the minimized window is the only one open in an application, clicking the application's Dock icon will also restore the window.)
| Tip | If you have minimized windows for an application, and you then hide that application, the minimized windows will appear to vanish from the Dock. Don't worry, they're still there; as soon as you unhide the application, its minimized windows will reappear, still in the Dock. In fact, if you find that minimized windows are starting to take up a lot of Dock space (this happens to me with minimized Finder windows), you can hide the offending application (including the Finder) to temporarily hide the Dock icons for that application's windows. |
Bringing Back the Window Shades
If you decide that you're really not a fan of this whole minimize-to-Dock thing, and you really, really liked the way Mac OS 9's WindowShades worked, you can get that functionality in OS X by installing the shareware preference pane WindowShade X (http://www.unsanity.com/haxies/wsx/). With WindowShade X installed, you actually get your choice of "get the window out of the way" behavior: windowshade the window, hide the entire application, minimize the window to the Dock, or make the window transparent (great for just peeking behind a window for a moment). In fact, you can invoke any of these four behaviors for any window. (It even gives you the cute WindowShade sound from OS 9.)
Dock/Keyboard Shortcuts and Commands
I've already mentioned a few of the things you can do using combinations of modifier keys and the mouse; a number of other Dock actions are also invoked using modifier keys; I discuss them all here, as well as the Dock's own keyboard-based application switcher.
Keyboard-Enhanced Actions
-
Control/right-clicking a Dock item (or clicking and holding the mouse button down) brings up its Dock menu.
-
Option+control/right-clicking a Dock item often reveals additional Dock menu options (including Force Quit in place of Quit).
-
Control/right-clicking on the Dock's divider brings up the Dock's preferences menu.
-
Option-dragging the Dock's divider line resizes the Dock in incremental steps. (You can resize it freely by simply dragging the divider line.)
-
Shift-dragging the Dock's divider line allows you to quickly change the Dock's position on the screen.
-
Command-clicking a Dock item reveals the item in the Finder.
-
Option-clicking an application in the Dock launches the application (or switches to it, if it's already running) and hides the frontmost application. (Remember that "application" includes the Finder.) This also works when you option-click in a window in an application; you can quickly hide the frontmost application by option-clicking anywhere on the Desktop.
-
Command+option-clicking an application in the Dock launches or switches to the application and hides all other applications.
-
Holding down command+option as you drag a document onto an application in the Dock forces that application to open the document (even if it's not the application the document is normally associated with).
-
Shift-clicking on a minimized window in the Dock restores the window in slow motion (useless, but cool to watch nonetheless).
-
Pressing command+option+D toggles Dock auto-hiding on/off. This command can be useful if you normally show the Dock and an application's windows overlap the top of it (Internet Explorer is guilty of doing this quite often); if you press this key combination twice, it will quickly hide and show the Dock, and Mac OS X will automatically resize the offending application's windows so that they don't overlap. Note that if an application has its own shortcut that uses command+option+D, this won't work; you'll need to switch to another application, or the Finder, first.
The Dock's Application Switcher
In addition to the keyboard-mouse actions I just listed, the Dock also has a built-in keyboard-based application switcher, loosely based on Windows' Alt-Tab functionality. If you hold down the command key and then press the tab key repeatedly, each active application's Dock icon will be highlighted in succession, left to right, one application per tab. When you release the command key, the currently highlighted application will be activated. Using this procedure, you can quickly switch to any running application without taking your hands off of the keyboard. (You can cycle through running applications right to left by pressing shift+command+tab.)
Although this feature of the Dock has been around for a while, the release of OS X 10.2 provided a small but significant improvement in the way it works. Instead of starting this cycling randomly, or from the left side of the Dock, under 10.2 and later it starts with the most recently used application. In other words, if you're using Mail to check your e-mail, and then switch to your web browser, when you press command+tab the first highlighted application will be Mail, and then the sequence will continue left to right from the Mail icon. What this means is that you can quickly change to the last application by pressing command+tab once, and switch back and forth between two applications in this manner without using the mouse or looking at the Dock.
In addition to switching between applications, you can also perform other actions using the Dock's keyboard switcher. As a particular application's icon is highlighted, you can press the H key to hide that application, or press the Q key to quit it. As long as you hold down the command key, you can cycle through all running applications, hiding or quitting them, until you settle on an application and release the command key to switch to it.
| Tip | One of the very cool things about drag-and-drop in OS X is that it works with the Dock's application switcher—you can actually switch applications while you're dragging a file or some data. For example, you can highlight and drag some text from an e-mail and, while still holding the mouse button down, press command+tab to switch to TextEdit. TextEdit will come forward, and you can then drop the dragged text into a TextEdit document window. (If a document isn't open, you can even press command+N to open a new one while you've got your text floating around with your cursor.) This is a great way to drag data to an application that's hidden behind other windows. (This feature also works with third-party keyboard application switchers, like those mentioned below.) |
Since I'm on the topic of controlling the Dock with the keyboard, I should point out that you can also access the Dock, including all Dock items and Dock menus, by enabling Full Keyboard Access in the Keyboard pane of System Preferences. When activated, control+F3 activates the Dock; you can then use the left/right arrow keys to move between Dock items, and the up/down arrow keys to scroll through Dock menus. Hit the return key to select any item.
Third-Party Keyboard Application Switchers
The Dock's built-in keyboard application switcher is very nice, but it does have its faults. If you have a lot of items in your Dock, it can be difficult to see which application is highlighted. Plus, the order in which it switches between applications is rather simple: last application used, then left to right (or right to left). Finally, if you have the Dock set to auto-hide, when you press command+tab you have to wait for it to pop up.
There are several application switchers available for Mac OS X; my two favorites are LiteSwitch X (http://www.proteron.com/liteswitchx/) and Keyboard Maestro (http://www.keyboardmaestro.com/). I talk about Keyboard Maestro in the online Finder supplement when I discuss automation utilities. It includes a great application switcher as part of its feature set. LiteSwitch X, on the other hand, is a bit less expensive and it only does one thing (but it does it very well): keyboard application switching. After installing LiteSwitch X, you can choose the keyboard combination used to switch applications (either tab or return, combined with a modifier key such as command, option, or control), as well as whether you want all windows or just the frontmost window in an application to be brought forward when you switch to it.
Using LiteSwitch X works much like the Dock's application switcher; however, instead of forcing you to look at the Dock, LiteSwitch X put up a nice, clear display in the middle of the screen (Figure 6.7). The name of the selected application is displayed so you know exactly what application will be activated when you release the keys. In addition, you can click on any application icon in the display to switch to it immediately, or control/right-click on an icon to perform any of a number of actions on it, such as Get Info, Hide/Show, Relaunch, or Quit. You can also access any of these functions by pressing an appropriate key while the icon is selected in the window.
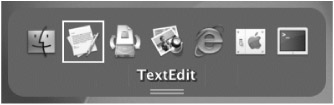
Figure 6.7: LiteSwitch's application switching display
Finally, LiteSwitch X's switching algorithm (and Keyboard Maestro's, for that matter) is much better than the Dock's. Instead of a simple left to right order, LiteSwitch X places application icons in reverse order of recent use. The most recently used application is on the left, followed by the one you used just before that, and so on. An application you haven't touched in hours will sit all the way to the right. Most of the time this sort of arrangement works much better because you're switching between recently used applications.
|
|