PHONE OPTIONS
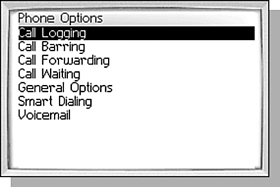
| The Phone application has a lot of options that can change the way your BlackBerry works. From the Recent Call list, click the Options menu item to show the Call Options screen as shown in Figure 9.14. Because there are so many options, they are organized into groups where each group contains a few options that are related. The following sections talk about the options within each group and what they are used for. Figure 9.14. There are multiple options to configure that affect how the phone features are used.
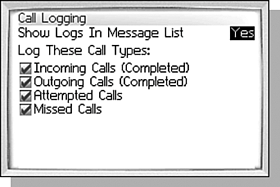
CALL LOGGINGIf you recall Chapter 6, "Managing Messages," we talked about Call History messages. These are the messages that are generated by a phone call of some kind. This option group allows you to manage how those Call History messages are created, as shown in Figure 9.15. Figure 9.15. These options affect how information about call messages are retained.
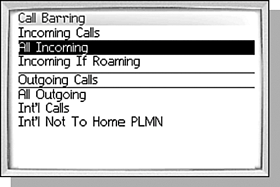
note Some groups, such as Call Forwarding, Call Barring, and Call Waiting, might not be available on your handheld because of your carrier or calling plan features. The first option, Show Logs in Message List, determines whether the Call History messages are displayed in the Message list or not. Changing this option to No causes all of the Call History messages to be hidden in the Message list. The Call History messages are still there and will still be generated, but they are simply not shown in the list. You can still find them by using the Search feature of the Message list. The four check boxes at the bottom allow you to specify which kinds of calls generate a Call History message. It may be that you don't want any Call History messages generated for attempted calls. If so, scroll the selection to that check box and press the Space key or click the Change Option menu item to toggle the check box. caution If call logging is disabled, any notes added to calls of that type will be lost. The software will still allow you to add notes and will give no indication that they are not being saved. CALL BARRINGIf your carrier and wireless plan support call barring, this option group will be available. When you open this option group, a small dialog is displayed that says Waiting for Network. During this time, the option settings are being retrieved from your wireless network carrier. If you are currently not in network coverage, you cannot set any of these options. The Call Barring configuration screen, seen in Figure 9.16, shows various situations where you can block calls from being completed. The screen is divided into sectionsIncoming Calls and Outgoing Calls. Figure 9.16. Blocking certain calls can save you time and moneyespecially if you are outside your plan's calling area.
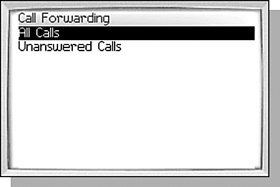
In the Incoming Calls section, there are two rules that you can choose fromAll Calls and Incoming If Roaming. You can enable either option by clicking the Enable menu item. Enabling the All Calls rule blocks all incoming calls. The other option, Incoming If Roaming, can be used to keep roaming charges under control by only allowing incoming calls if you are currently not roaming. In the Outgoing Calls section, there are three rules that you can choose fromAll Calls, International Calls, and International Calls Not to Home PLNM. Enabling the All Calls rule restricts the handheld to be used for incoming calls only. Enabling the International Calls rule will prevent the handheld from making calls to other numbers with other country codes, which can help keep your wireless costs under control. The last option will let you make international calls, but only to numbers within your home area. This can be useful when you want to allow international calling, but only so you can call into your company voice mail for instance. note The Password used in this section is not the same as the handheld security password that is set in the Security Options screen. These rules can also be password protected to prevent someone from disabling the rules when they shouldn't. Attempting to enable or disable any of these rules while the password is set causes a password verification dialog to be displayed. You can change the password by clicking the Change Password menu item. CALL FORWARDINGThis is another option group that may not be offered, depending on your wireless plan. You will need to be able to communicate with the wireless network in order to change these options. The screen shown in Figure 9.17 shows two situations when calls may be forwarded. The first is All Calls and means just that: Any call coming to your handheld will be forwarded to another number. The other situation is Unanswered Calls, which will forward calls to another number if you do not answer the call for some reason. Each of these situations can be activated or deactivated with the Enable or Disable menu items respectively. When an option is enabled, it is shown in the list in bold with the word (On) after the name in the list. Figure 9.17. The Call Forwarding Options screen provides two ways to configure call forwarding.
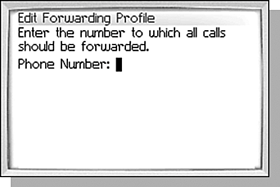
Each of these options has another screen where the numbers to forward the calls to are entered. Selecting the All Calls option and clicking the Edit menu item shows the screen seen in Figure 9.18. Here you can enter the phone number that all calls should be forwarded to when the Call Forwarding is activated. Figure 9.18. Forwarding all calls to another number can enable you to finish a task without interruptions.
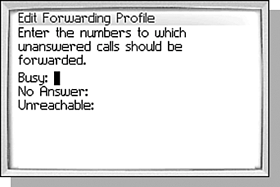
Similarly, selecting the Unanswered Calls and clicking the Edit menu item shows the screen in Figure 9.19. This screen, however, has three fields where you can enter different phone numbers to forward the calls to, depending on the circumstance of why you did not answer the phone. Even if you want them all to forward to the same number, you must enter the number in each of the three fields. Figure 9.19. Forwarding unanswered calls to an assistant or co-worker can help avoid unnecessary "phone tag."
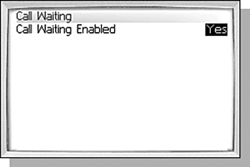
CALL WAITINGThis is another option group that may not be visible depending on your wireless plan and that will need to communicate with the wireless network in order to work. The screen shown in Figure 9.20 contains only one option, Call Waiting Enabled. If this option is set to Yes, receiving a call while already on the phone causes a tone to be played, and the second incoming call dialog that was discussed earlier appears. If the option is set to No, receiving a call while already on the phone generates a busy signal and may trigger Call Forwarding if it has been enabled. You can toggle the option by pressing the Space key or clicking the Change Option menu item. Figure 9.20. There is only one option in the Call Waiting group.
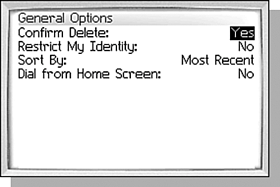
GENERAL OPTIONSOpening the General Options option group displays a screen (see Figure 9.21) with several options. Each of these options can be toggled to another setting by pressing the Space key or clicking the Change Option menu item. Figure 9.21. The General Options offer additional choices for how your device interacts with phone calls.
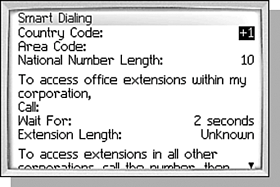
There are two additional options that are not shown in Figure 9.21Auto Answer and Auto Hangup. Changing Auto Answer to Out of Holster causes the call to be automatically answered when the handheld is removed from the holster. This is defaulted to Never because many people like to see who is calling before deciding to answer it. Auto Hangup is very similar. It defaults to In Holster which causes a call to be ended when the handheld is returned to the holster. The other choice is Never. The next option is Confirm Delete. If this option is set to Yes, a dialog is displayed asking you if you want to delete an item after you click the Delete menu item in the Recent Call list. This option doesn't change the Messages application when deleting Call History Messages, just the recent calls in the Recent Call list. The Restrict My Identity option determines whether the handheld sends Caller ID information when a call is placed from the handheld. It defaults to No, but if you are concerned about people you call getting your cellular phone number, you can change it to Yes. Earlier in the chapter we talked about how the Recent Call list is sorted. The Sort By option changes how that list is sorted. The default is Most Recent, which causes any call to a number or person to move that to the top of the list. A count is also kept each time a call is made to a number or person, and the Most Used setting uses this count to keep the calls you make the most often at the top of the list. The third way it can be sorted is by Name, much like the Address Book. note Because the number and letter keys are shared, if you enable Dial from Home Screen, all of the Home screen icon shortcuts will be removed. However, disabling this option does not make the shortcuts return immediately. In order to make the shortcuts reappear, the handheld needs to be reset. The last option is Dial from Home Screen. In Chapter 2, we talked about the icons on the Home screen and their shortcuts. This option allows you to type a number while the Home screen is displayed and have the One Time Dial dialog box be shown with that typed number already in the edit field. If you type in numbers a lot, this option may be really handy for you. SMART DIALINGThe smart dialing rules are supposed to clarify the entries that you have made in your Address Book and therefore allow you to not have to enter all of the absolutely necessary information. For instance, you can enter long-distance numbers without the 1 and local numbers without the area code if these options are configured correctly. The screen is divided into three areas and is shown in Figure 9.22. Figure 9.22. The Smart Dialing options make it easier to communicate with others in your office, even when you are on the go.
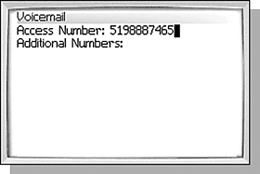
The top portion allows you to specify characteristics of the numbers in your own country. As mentioned previously, specifying the area code allows you to be able to enter local numbers without it. The National Number Length is used to determine whether a number dialed is an international number or not. The next two sections define rules for how to handle extensions in the Address Book. The first of these rules is To Access Office Extensions Within My Corporation. This is especially helpful because many corporations have populated their mail servers with only the extension for contacts. When these contacts are synchronized with your handheld, you can end up with entries where the phone number is simply x202. When this is the case, the smart dialing rule for Accessing Extensions Within My Corporation is used. The Call field is where you put the phone number to call to access your company phone system. The Wait For field allows you to set a timeframe to wait so that the phone system has time to answer the phone. The last field, Extension Length, allows you to specify the extension length for extensions in your company if they are all the same. The last rule, Access Extensions in All Other Corporations, is used when a number in an Address Book entry has a full phone number in it followed by the extension number, 123-456-7890 x202 for example. The only field associated with this rule is the Wait For field. Just like the other corporate phone system rule, this specifies how long to wait after dialing the number before dialing the extension. VOICEMAILTypically if your handheld has a voicemail service for it, this section will be configured for you. However, if you have a separate voicemail service or use it with your company voicemail, you can configure how to call it in this screen, shown in Figure 9.23. Figure 9.23. Set the Voicemail options if they aren't already configured by your carrier or if you use a voicemail system other than your wireless carrier's.
The first field, Access Number, is the phone number that should be called when you want to access voicemail. Only numbers can be entered here. The second field, Additional Numbers, contains any additional numbers that need to be dialed in order to access the voice mail box, such as the box number or a password. In addition to numbers, you can also add waits and pauses with the Add Wait and Add Pause menu items. They are displayed as inverted "w" and "p" characters in the edit field. A pause is a two-second pause and it is used to give the other phone system time to do something. A wait causes a dialog to be displayed prompting you to tell it when to continue, skip this step, or end the call. TTYTTY is also known as TDD, which stands for Telecommunications Device for the Deaf. TTY is only supported by some carriers and some networks on BlackBerry handhelds. The TTY option defaults to No, but if you set it to Yes, you can use your handheld to call TTY devices as well as make regular calls. If the handheld detects a TTY, it will disable the speaker and microphone and activate they keyboard. From this point on whatever you type on the keyboard will be displayed on the TTY device at the other end of the call. |
