| Site definitions are no longer required for the purpose of testing and uploading files, (as of Dreamweaver MX 2004), however nearly all site operations depend on having a site defined. This is especially important for ensuring that paths to images and other files are created and maintained properly. Template and library items depend on knowing which files are located in your site so that updates to templates can propagate to dependent files. Communication with remote and testing servers requires that a site be defined so that you are able to get and put files, as well as synchronize files and use the Check in/Check out system. Perhaps most important, if you don't define a site, Dreamweaver can't communicate with the database, can't create or use record sets, and won't allow the use of the Server Behaviors panel and other operations. Some of the Dreamweaver functionality that is covered in parts of this book requires that the files being worked with belong to a defined site. For this reason, you will need to create a site for Orange Whip Studio. Creating the Site Every application you create in Dreamweaver should have a defined site containing all the files that make up the application, along with settings and configuration options pertaining to servers and deployment. I am not going to cover sites in any detail just now, but will lead you through the basics of setting up a site. You must create a site for each application as follows: 1. | To start the Site Definition process, select Site > Manage Sites. This will display the Manage Sites dialog.
| 2. | Click New and choose Site from the pop-up menu that appears (see Figure 2.4).
Figure 2.4. Although the New button offers both Site and FTP & RDS Server options, it's important to note that Dreamweaver's functionality is limited if Site is not the option chosen. 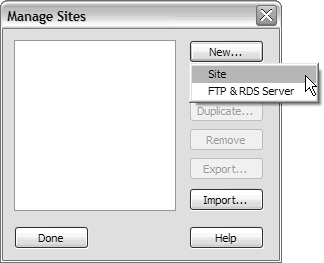
| 3. | The Site Definition window should look like Figure 2.5. If it doesn't look like this, make sure you've selected the Basic tab at the top (not the Advanced one).
Figure 2.5. The Site Definition window is used to create and edit sites. 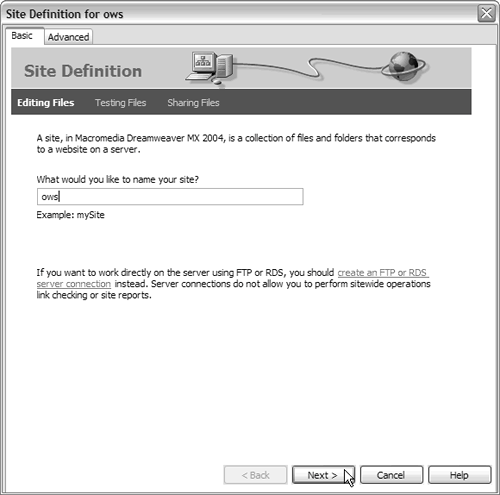
| 4. | Every site must have a name, so name this one ows (as seen in Figure 2.5), then click the Next button.
| 5. | You can use Dreamweaver to create static sites (ones that don't use server-side processing), as well as dynamic sites powered by several different server-side technologies. You're creating a ColdFusion site, so check the "Yes, I want to use server technology" option, and make sure you've selected ColdFusion as the server technology to use. If ColdFusion is installed locally (it should be), Dreamweaver will detect and state its presence, as seen in Figure 2.6. When you have made your selections, click the Next button.
Figure 2.6. Dreamweaver sites can be used for both dynamic and static content. 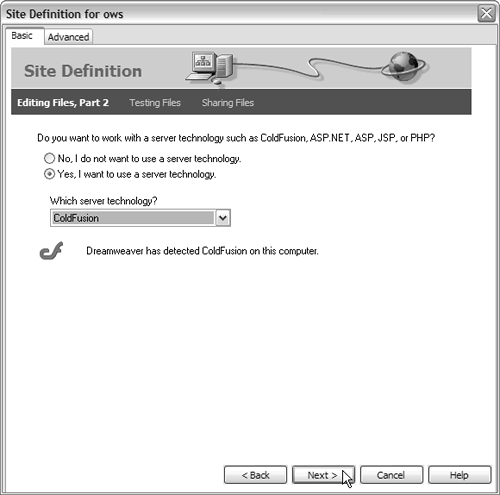
| 6. | Next, Dreamweaver will prompt you for the location of the hosting server (local or remote), as well as the path to the application root. If you are using a locally installed ColdFusion, select the first option, and specify the path to the recently created ows directory in the field below (as seen in Figure 2.7). You can either type the path or click the folder icon to select it interactively. When you're done, click the Next button.
Figure 2.7. When creating a site, you must specify the application root. 
| 7. | Dreamweaver needs to be able to communicate with the application server you're using (ColdFusion), so it needs to know the application root's URL. Generally Dreamweaver automatically detects the correct URL (as seen in Figure 2.8), so check the URL (and correct it if needed), then click the Next button.
Figure 2.8. To process your code correctly, Dreamweaver requires a complete, valid URL to the application root. 
NOTE Assuming you are running ColdFusion locally (this is advised) and assuming you installed the files in the default locations, the URL to access the ows folder will be http://localhost:8500/ows/ if you're using the integrated HTTP server, or http://localhost/ows/ if you're using an external HTTP server. You would then access folders beneath ows, such as the folder for this chapter, as http://localhost:8500/ows/2/ or http://localhost/ows/2/ (again, depending on whether you're using ColdFusion's integrated HTTP server). The port number (shown as 8500 in Figure 2.8) should be the same port number that you use when accessing ColdFusion Administrator. The port is usually 8500 or 8300 and can be 8501 or a chosen port number if you have an older version of ColdFusion already using one of the default ports. TIP To check that the URL is valid, click the Test URL button. If all is well, you'll see a verification message like the one shown in Figure 2.9. If you have problems resolving host localhost, TRy using IP address 127.0.0.1 instead. 127.0.0.1 is a special IP address that always refers to your own host, and localhost is the host name that should always resolve to 127.0.0.1. Figure 2.9. It's advisable to test the specified URL before proceeding. 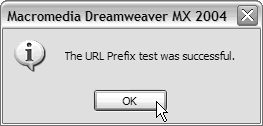
| 8. | Sites defined in Dreamweaver can point to up to three servers: a local server (for development), a testing server, and a production server. You won't be using any remote servers for the ows application, so select No as shown in Figure 2.10, then click the Next button.
Figure 2.10. If you're using remote servers for testing or deployment, you can specify them as part of the Site Definition. 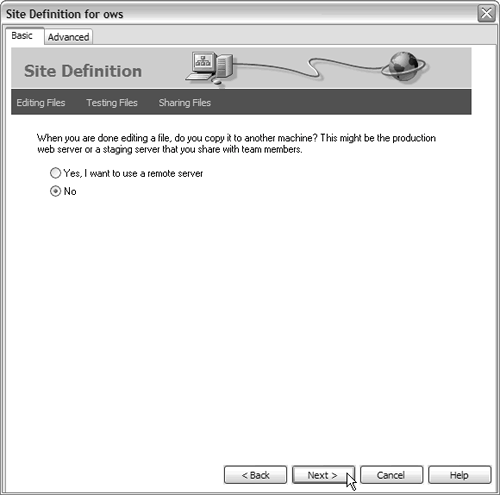
| 9. | Dreamweaver will display a summary screen as seen in Figure 2.11. Check that all the information is correct, then click Next to create the site.
Figure 2.11. Before creating the new site, Dreamweaver displays a summary of all the chosen settings and options. 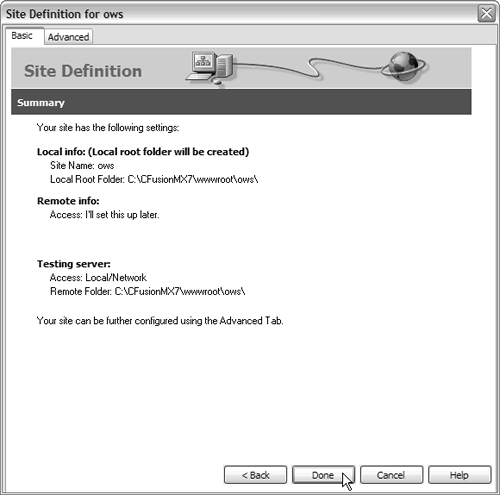
| 10. | You've now created a site, and Dreamweaver automatically opens it, ready for use (as seen in Figure 2.12).
Figure 2.12. Once a site has been created, Dreamweaver opens it for immediate use. 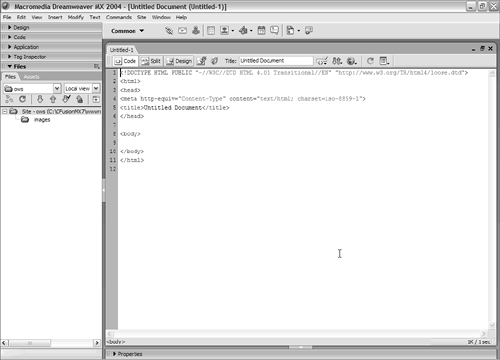
|
NOTE In the future you can open the site by selecting it from the drop-down list at the top of the Files panel.
About the Advanced Site Definition Dialog You learned about the Basic category when creating the ows site definition. At some point, you may wish to set up additional options in the Advanced section of the Site Definition dialog (Figure 2.13). Figure 2.13. Use the Advanced category to set up additional site definition options. 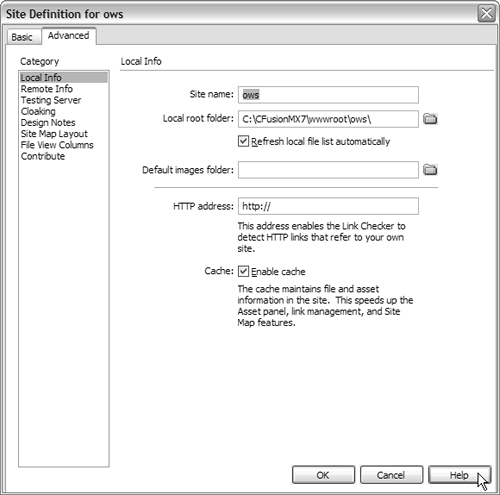
To edit an existing site, double-click the site name (ows, in this case) in the list menu located in the Files panel. If the Basic category is shown, click the Advanced tab. The following describes what you'll find in the categories listed on the left in the Advanced section of the Site Definitions dialog: Local Info. The information contained in this category pertains to the location of the site on your local machine and allows you to enable and disable the site's cache, which helps manage links and other site operations. Remote Info. This section holds the data needed to connect to the remote server via FTP, Local/Network, RDS, SourceSafe, or WebDAV. Testing Server. This section stores the facts relating to the server used for testing your application. Cloaking. This section specifies file types that should not be included in site operations such as uploading using Dreamweaver's cloaking feature (see "The Files panel" section later in this chapter). Items such as original source files for graphics and Flash usually don't need to be uploaded to the server, and therefore the .png and .fla file extensions are already listed for you to include as cloaked file types. To add other file types to the list, just type a space, followed by the file extension, at the end of the list. TIP Two common file types that you may wish to cloak are Dreamweaver templates (.dwt) and library items (.lbi). If these are listed, Dreamweaver knows not to include the files in operations such as uploading. Though cloaked files are usually excluded from the Assets panel, Dreamweaver is smart and knows to include templates and library items in those operations.
Design Notes. Design Notes allow developers to share file status, comments, and other information. You can choose whether to maintain Design Notes and whether to disable Design Note sharing via uploading. Sharing Design Notes is especially important when more than one individual, person, or site definition has access to the same site. Design Note information is stored in .mno files contained in _notes folders (hidden from view in the Files panel), which are all deleted when you choose the Clean Up button. NOTE Removing design note files also removes information related to your site including, Design Time CSS settings and any favorites in the Assets panel. Some extensions also use Design Notes and that information would be lost as well. There is no warning about these losses anywhere in Dreamweaver, so please choose this option with caution if you use those features.
Site Map Layout. The settings in this section determine the appearance of the Site Map used in the Files panel. After leaving the Site Definition dialog, you can view the Site Map by selecting Site > Site Map from the Dreamweaver menu or pressing the Alt-F8 (Option-F8) keyboard shortcut. File View Columns. This category enables you to customize the order of the columns within the Files panel and include your own additional columns if desired.
TIP If at any time while using the Site definitions dialog you need more information to make the appropriate selections or entries, choose the Help button, and you will be shown the information available for the particular category you are viewing.
Once you have modified the site definition to suit your desires, click OK. The dialog will close, and you will return to the workspace. |