| As discussed earlier in the chapter, a single report often needs to show data from different and frequently unrelated pieces of information. In the next example, the main report shows both customer and supplier information with two separate Subreports and each of them for a given geographic location using the main report's regional grouping hierarchy as a filter on the underlying Subreports. You will create a main report for the hierarchical geographic structure of Country, Region, and City hierarchy and then add one Subreport to show customer information and another Subreport for supplier information. Because there is no relationship between suppliers and customers, at least one of these pieces of information must come from a Subreport. For this sample, both elements come from a Subreport to highlight the capability to use multiple Subreports in a single main report. Follow these steps to explore this capability: 1. | Open the report designer and select Create New Report Using the Report Wizard. Click OK and browse to the datasource Xtreme Samples Database 11 datasource, expand the list of tables, and add the Customer table to the list of report tables by clicking the > button. Click Next.
| 2. | In the Fields window, add the fields Country, Region, and City to the report and click Next. In the Grouping window, add the same fields to the Group By list.
| 3. | Click Finish to complete the report. This builds the hierarchy that is used in the report.
| | | 4. | Change to Design mode. Move the fields in the group header to the left and indent them slightly at each lower level. Suppress all sections of the report other than the headers and expand each of the header areas below the fields. See Figure 12.11 to view what the framework of the report should look like.
Figure 12.11. Report hierarchy to act as the framework for Subreport content. 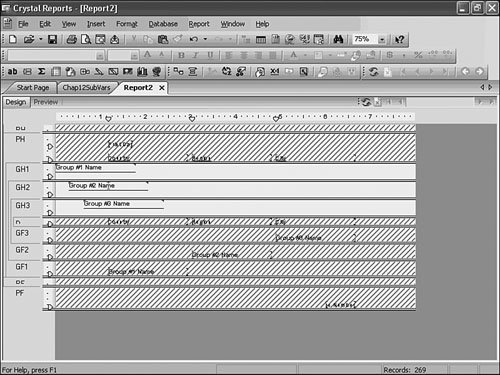
| | | 5. | With the framework complete, the next step is to create the content. There are different ways to create Subreports; in this instance, you will create the Subreports as separate files and later import them into the main report. Create the report for supplier information by navigating to the Start Page and selecting a new report with the Standard Report Wizard. Select the Xtreme Sample Database 11 connection, browse the list of tables for the Supplier table, and click the > button to move it to the list of selected tables. Click Next. From the Fields window, select Supplier Name and Phone and click the > button to move them to the Fields to Display. Click Finish to close the wizard. Minimize report content by changing to Design mode, moving the fields to the left edge, suppressing sections with no fields, and minimizing whitespace. Figure 12.12 illustrates a sample suppliers Subreport. Save this report to your local machine.
Figure 12.12. Supplier information Subreport, extra whitespace reduced to a minimum. 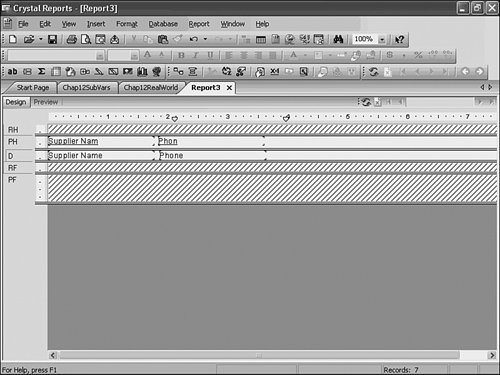
| | | 6. | Repeat step 5 for the customer table.
| 7. | Add each Subreport to the report three times, once each for Country, Region, and City. Use the Insert Subreport dialog accessed from the main Insert menu and, using the Choose an Existing report option, browse to the location where you have saved the recently created Subreports. Now link the regional fields (Country, Region, and City) to each of the Subreport's associated fields. This can be accomplished by accessing the Change Subreport Links option available on the right-click menu for each Subreport. For the Subreports based in the Country Group Header, you need to link the Country field from the main report to the Country field in the Suppliers table. You will need to link both the Country and the Region fields for the Subreports in the Region Group Header and you will also need to add City for those Subreports in the City Group Header.
| 8. | For each of the Subreports, ensure that the Keep Object Together formatting option is turned off. This is accessed from the Format Subreport dialog on the Common tab. You can use the Format Painter to copy one Subreport's format to the others to save you a few keystrokes.
| | | 9. | From the Report menu, select Section Expert. In the list of sections, ensure the Keep Together option is not checked for each Group Header. Click OK to close the window. Save the report. The design of the report should look like Figure 12.13 and the final result should resemble Figure 12.14.
Figure 12.13. Report with hierarchy and Subreports. 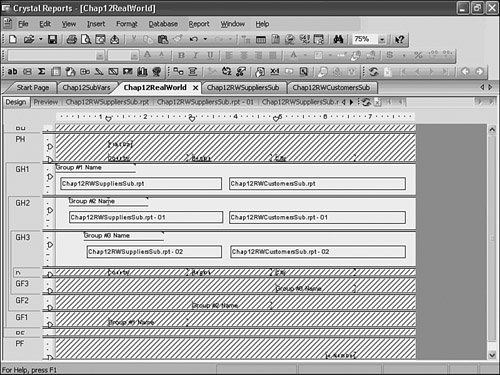
Figure 12.14. Report Preview showing a main-report hierarchy on region and multiple Subreports that are filtering their customer and supplier lists by their placement in the main report. 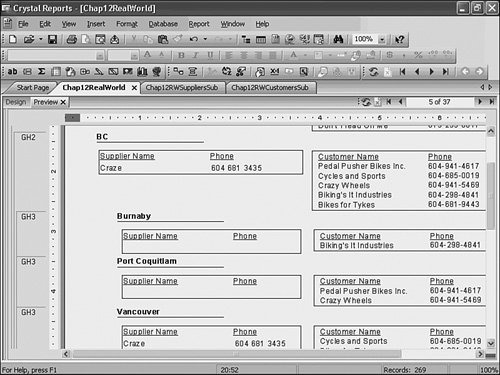
|
Preview the report and notice on Page 13 (Canada) that there is different and unrelated information for both Suppliers and Customers listed and that the information for both is specific to the location context. |