| Document management within the workspace is primarily focused on collaboration, version control, publication, and searching. Each document consists not only of its content, but also of a variety of configuration settings and metadata attributes that help to determine how it is utilized by the organization. Document Actions In addition to the usual open , save, and copy capabilities presented by Windows Explorer, you can also access most document management features by right-clicking on a document within the workspace. Check-in/ Check-out If you have the proper security role for the folder in which a document resides, you can choose to check-in or check-out a document by right-clicking and selecting the corresponding action. It is possible to use the Undo Check Out feature to abandon any changes you have made to an existing document and restore it to a checked-in state without restoring a subsequent version. Publish As a document author or coordinator , you can initiate the document publishing process by right-clicking on the document and selecting Publish from the menu. If the document is not configured to require approval, it will be immediately published within the workspace. If the document does require approval, the appropriate notification is sent to the approver(s) and the file awaits review and approval or rejection . Approval If you are selected as an approver for a document, you can approve or reject the document by right-clicking on the document in the workspace and selecting Approve or Reject. If you are a member of the local administrator group , you can bypass the approval process and publish the document directly. Edit Profile If you have checked out a document from the workspace, you can also access its document profile from Windows Explorer. Right-click on the document and select Edit Profile. This will take you to the Document Profile editor and allow you review and edit the metadata property values. Document Profiles As discussed earlier in the chapter, document profiles provide a way to apply additional metadata attributes to documents, in order to enhance search and indexing capabilities. While certain system-generated metadata like the file size and modification date is already included in the document profile, metadata provides additional descriptive information for the document, especially keywords that are not part of the text of the document. Existing document profiles and the Add Document Profile Wizard can be found in the Management/Document Profiles folder in the workspace. SharePoint Portal Server comes preconfigured with four document profiles: Announcement, Base Document, News Item, and Web Link. Each profile contains a different list of properties, corresponding to typical metadata properties useful for managing the corresponding document type. A workspace can contain multiple document profiles, and individual folders can be configured to make any combination of available document profiles applicable to documents they contain. By default, the Documents folder is configured to apply the Base Document profile to its documents. Custom Document Profiles If, upon evaluation of the contents of your documents, you determine that the existing document profiles do not contain the metadata attributes you feel would best fit documents in your workspace, you can create custom document profiles. There are several planning steps that should be considered in choosing to create and deploy custom document profiles: -
Examine the properties of the Base Document profile. Determine what additional attributes would be logical and useful additions to the document's metadata. -
From the workspace, navigate to the Management/Document Profiles folder, run the Add Document Profile Wizard, and follow the prompts. -
Choose a meaningful word or phrase to name your document profile. Select an existing document profile that most closely matches the profile you are creating to use a template in the creation of your new profile. -
Select only the properties that you require, and decide which should have single or multiple values. If you do not find an existing property element in the list that is appropriate to the metadata information you wish to capture, you can create a new property by defining its name and the type of value it should contain, and specifying whether the value is to be required by the author before the document can be successfully checked-in. -
Configure the order in which you would like the properties to be displayed within the document profile dialog. Select a property from the list, and use the up and down arrow buttons to change its order within the list. -
Confirm your choices and complete the wizard to make your new document profile available within folders in your workspace. While creating new document profiles, you can also create new document profile fields to allow additional levels of customization. Figure 10.8 provides an example of creating a new property called Department. Figure 10.8. Custom metadata properties can be created and configured to meet unique needs. 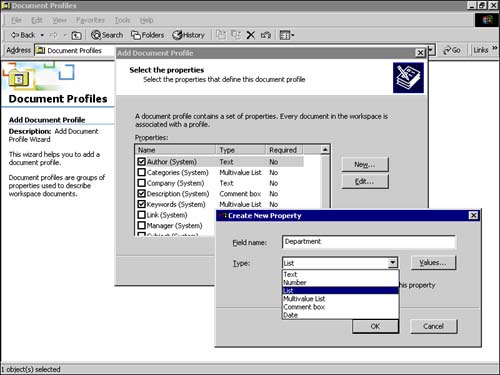 Once your document profile is created, you can choose to make your custom document profile available as the default folder for any folder within the workspace. To use the document profile, simply select it from the available document profiles list on the Profiles tab of the folder properties window. Document Properties and Settings To modify the properties of a document, you will be required to access a series of tabs or properties of the document. The properties of the document you will work with are as follows : -
General -
Profile -
Version -
Security -
Search and Categories The properties are discussed in more detail in the following sections. General Tab This tab displays the system-generated metadata information for the file, including the file's address, size, date created and modified, applied document profile, public status, and document status. The published status describes the document in relationship to its status as a published or unpublished document. Once the document has been published, this field displays the version of the most recent published version of the document. The Status field lists the current document status: checked-in or checked-out. If the document is checked out to a user, the version of the document and the user to whom the file is checked out are displayed. If the document is checked in, the current version of the document is displayed. Profile Tab This tab displays the list of properties from the document profile applied to the document, as well as the values for each metadata element currently stored within the profile. If the document is checked in or checked out to another user, this information is read-only. In order to edit the profile information, you must first check out the document from the workspace. If you elect to edit the profile, click the Edit Profile button at the bottom of the window. The Document Profile window will appear (see Figure 10.9) allowing you to select any of the available document profiles for that folder and add or change the value for any of the metadata properties contained by the applied document profile. Fields with an asterisk (*) are required fields. Figure 10.9. From the Profile tab, metadata values can be viewed and edited, or an alternative document profile can be selected. 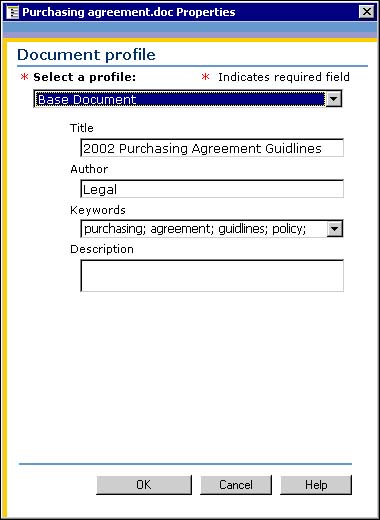 Carefully evaluate the value of metadata information for your organization, and configure your document profiles accordingly . Using metadata to enhance the accuracy of searches can bring valuable information into the hands of your organization. However, adding additional document properties and requiring specific property information for any group of files puts additional demands on document authors and can slow the migration process when first populating your document library. Versions Tab Here you can see the version history for each document and select to view previous versions of the document, as well as view previous document profile metadata information. Any version comments stored with the document are also visible from here. Each time a file is stored in an enhanced folder, SharePoint Portal Server records a history record for that file. This history record, maintained through the check-in/check-out and version features, prevents multiple authors from editing the same version of a document and overwriting another user's changes. Each time a file is checked in or published, it receives a new version number and the previous version is archived. If you check out a document, you are retrieving the most recent version, unless you expressly select a previous version. You can review version history information in the document's properties. Figure 10.10. Each version of the document is tracked and retained by the server. Retention time is also an adjustable setting within the MMC. 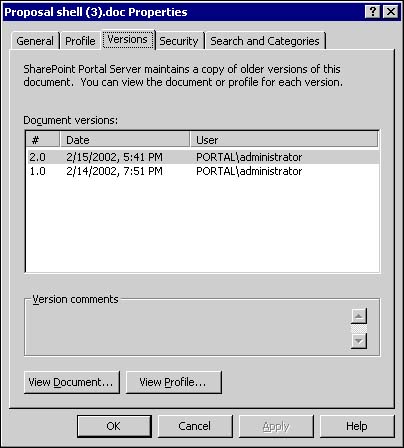 Versions are incremented in the standard major.minor fashion. Once published, a document is set to version 1.0. Any subsequent changes made to the document increment the minor revision to 1.1, 1.2, and so on. When the document is re-published, the major revision is incremented to 2.0. Security Tab While most of the security controls are at the folder level, the document does have one important access control setting. From this tab, you can deny access to the document by selecting local or domain user or group accounts. Users who are denied access to a document will not see the document when browsing through folders or in search results. Figure 10.11. The Deny Access list can contain both users and groups. 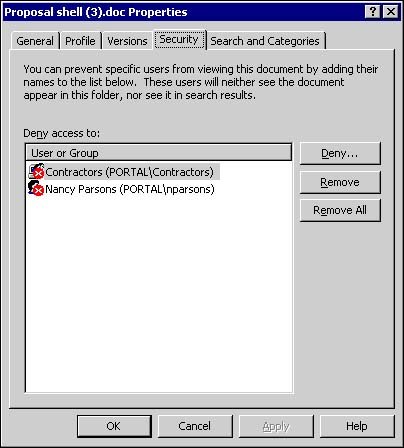 The Deny Access setting is an extremely powerful setting. It is best practice to use this feature only where absolutely necessary. Failure to use this setting carefully could result in increased administrative effort to manage. Search and Categories Tab A valuable tool in enhancing search results is the use of categories. Categories are a way that SharePoint Portal Server collects together similar documents through category assignment. You can select to include the document in any of the available categories and/or include the document in automatic categorization by the Category Assistant. Additionally, you can choose which of the applied categories and keywords best represent the content of the document through use of the Best Bet options. When you select preferred categories and specific keywords, the document is more likely to appear in related search results.  To learn more about categorizing documents, see "Categorizing Documents," p. 307. To learn more about categorizing documents, see "Categorizing Documents," p. 307. | 