Sizing, Aligning, and Grouping Controls
3 4
Once a control is on your form, you’ll want to place it in just the right spot and then adjust its size. The rulers and grid are especially helpful for both aligning and resizing controls. Use the Microsoft Windows drag-and-drop procedure to move controls. Inother words, click the control to select it, but don’t release the mouse button. The mouse pointer will turn into a small hand, and Access will display handles as shown earlier in Figures 8-6 and 8-7. (The handles are the small black squares around the border of the control.) While holding down the mouse button, drag the control to a new area, and then release the mouse button.
Sizing Controls
Most of the time, you can insert a control close enough to where you want it. You won’t have to drag it around the form too much unless you decide to rearrange your controls. A bigger chore is making your controls a consistent size. You can use three methods to size a control:
- Move a control’s handles to increase or decrease the control’s width and height (the direct route).
- Change the control’s Width and Height properties.
- Use the Size options on the Format menu.
The Direct Route
When you’re working with a single control, the easiest way to size it is to select the control and move one of the handles to increase or decrease the size of the control.
To directly manipulate the size of a control, follow these steps:
- Open any form in Design view, or open a blank form and add a few controls.
- Select a control, preferably a command button or a text box.
The selected control displays eight handles, three on each border.
- Move the mouse pointer over any of the handles.
The mouse pointer will change into a bidirectional mouse pointer. (As you move the mouse, Access will update the mouse pointer between the bidirectional mouse pointer and the small hand.) The direction of the arrows indicates the direction you can extend or reduce the control.
- Click any handle. When Access displays the bidirectional arrow, drag the handle in or out to resize the control.
Changing Size Properties
Another sizing method is to change the control’s Height and Width properties. Most of the time, you’ll use this method when you have a specific size in mind or you’re matching the dimensions of another control. For instance, you could create a group of small icon-size command buttons by changing each button’s Width and Height properties to 0.25", as shown in Figure 8-8.

Figure 8-8. Changing the Width and Height properties to 0.25" makes a small, square tool-type command button.
Adjusting Formatting Options
Access provides two formatting options for sizing controls: To Fit and To Grid. When you want the control to expand or shrink to fit the size of its caption or contents, apply the To Fit option. The To Grid option is similar except that the top and left borders will move to the closest grid point or line. To apply these formats, choose a control or controls and then select the appropriate option from the Format menu.
You can apply the To Fit and To Grid formats to one control or to several controls at the same time. However, some formats apply only to a multiple selection. With two or more controls selected in Design view, choose Format, Size to see the options shown in Figure 8-9.
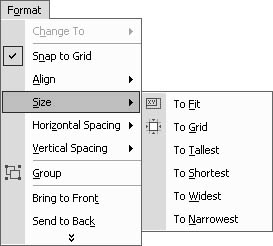
Figure 8-9. Several size formats are available for controls.
The To Tallest and To Shortest options adjust all selected controls to match (heightwise) the largest or smallest control in the selection. Similarly, To Widest and To Narrowest adjust all the selected controls to match (widthwise) the largest or smallest control in the selection.
To size a multiple selection of controls using the format options, follow these steps:
- Select two or more controls, as shown in Figure 8-10. As you can see, all the text box controls are different sizes.
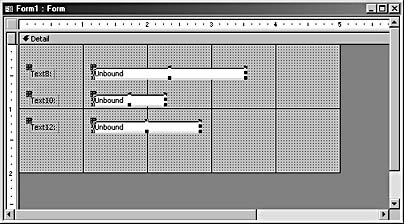
Figure 8-10. Each control in this multiple selection is a different size.
- Choose Format, Size. If you want all the controls to be the same width as the first text box, select To Widest (because the first text box is the widest of the bunch). Figure 8-11 shows that all the selected controls are now the same width.
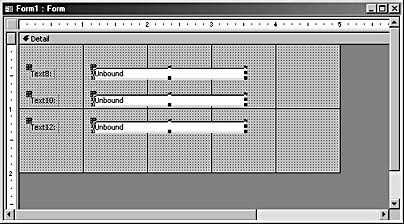
Figure 8-11. Now the controls are all the same width.
tip - Use the Format Painter to save time
Sometimes you can size a control faster by using the Format Painter. Just keep in mind that this tool will copy all the source control’s formats to the target control. Select the control whose size (and formats) you want to copy, and then click the Format Painter tool on the Formatting toolbar. Next click the control you want to resize. To lock the Format Painter, click it twice. Then click as many controls as you want. To unlock the tool, click it one last time.
Aligning Controls
The term aligning controls means lining up the actual control, not aligning the data that the control displays. The points and lines on the grid are helpful for aligning controls. You can also use the horizontal and vertical rulers to line things up just right. However, most of the time you’ll be aligning multiple controls. The easiest way to do that is to use the formatting options. Simply select all the controls you want to align, and then assign one of the formatting options shown in Figure 8-12.
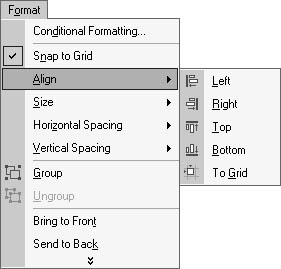
Figure 8-12. Choose one of these format options when aligning multiple controls.
tip - Change text alignment using the Form/Report Formatting toolbar
The type of data a control displays often determines how the control aligns the data when displayed. By default, controls use General alignment, by which strings are left-justified and numbers are right-justified (most of the time). You can quickly change the text alignment in a control by simply clicking the Center, Align Right, or Align Left text alignment button on the Form/Report Formatting toolbar.
The first four formats are self-explanatory. If you choose the Left option, Access moves all the selected controls to align with the left border of the leftmost control. Right, Top, and Bottom are basically the same: Access aligns all the controls using the most extreme control as the anchor.
To align multiple controls, follow these steps:
- Select all the controls you want to align. Figure 8-13 shows an example selection.

Figure 8-13. When aligning multiple controls, first select the controls you want to align.
- Choose Format, Align.
- Choose Left, and Access aligns the left borders of all the selected controls. To align all the controls by their top borders, choose Format, Align, Top. Figure 8-14 shows the results.
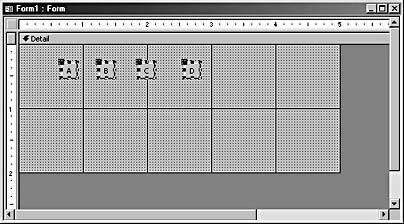
Figure 8-14. These controls all have the same top position.
When you work with multiple selections, you don’t have to worry about overlapping controls. Access won’t position one control on top of another to align it. Instead, Access will position the controls right next to each other. For example, let’s say you select the two command buttons shown in Figure 8-15 and assign the Left alignment format.
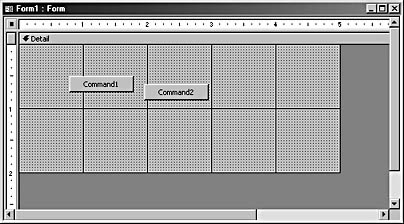
Figure 8-15. Applying the Left alignment format to the two selected controls would seem to cause them to overlap.
You might expect Access to position the control to the right on top of the far left control, as shown in Figure 8-16, partially blocking the control beneath.
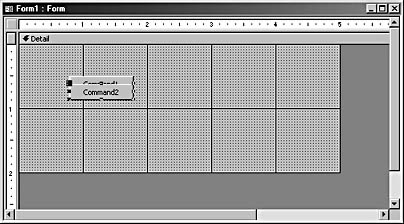
Figure 8-16. You can manually place one control on top of another, partially or totally obscuring the control underneath.
To see how Access solves this potential problem, select both controls, and choose Format, Align, Left. As you can see in Figure 8-17, Access slides the button on the right as far left as possible without obscuring the leftmost button.
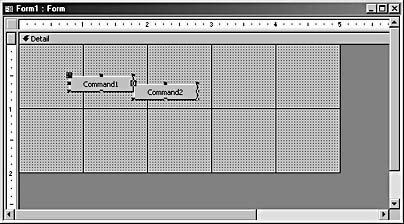
Figure 8-17. Access won’t overlap controls.
If you mean to stack one control on another, use drag-and-drop to position the controls. (In fact, some techniques require stacked controls.) Once you have a stack, you can assign the Send To Back or Bring To Front format to one or more controls in that stack. Doing so allows you to quickly rearrange the controls in Design view, with the exception of the List Box and Subform controls. These two controls must always be on top, so you can’t assign the Send To Back format to either control.
tip - Select a single control in a stack
Finding and selecting a single control in a stack of controls can be difficult. You can solve this problem by choosing the control in the Object selector on the Form/Report Formatting toolbar. Or press Tab to cycle through all the controls, and watch the title bar in the properties sheet until the name of the appropriate control appears.
To learn more about selecting multiple controls, see the section "Selecting Multiple Controls."
The To Grid option will align the top and left borders of an individual control or a multiple selection of controls with the nearest grid point or line. You might want to experiment with this option a bit; the result of applying this format isn’t always what you expect.
Using the Left and Top Properties
In the section "Changing Size Properties," you learned how to quickly size controls by using the same value for both the Width and Height properties. You can use this same technique with the Top and Left properties to align controls. To align controls by their left borders, assign all the controls the same Left property value. Likewise, to align controls with the same top position, assign the same Top property value. To stack controls, assign them the same Top and Left property values.
Spacing Controls Evenly
Aligning controls with the same left, right, top, or bottom position is just one alignment possibility. Creating even spacing between each control is another option. For example, the text boxes shown in Figure 8-18 are neatly aligned by their left borders. However, the spacing between the controls isn’t uniform.

Figure 8-18. These controls are left-aligned, but the space between each control isn’t uniform.
You can use the Horizontal Spacing and Vertical Spacing formatting options to easily correct this type of display problem. To evenly distribute the vertical space between the controls, follow these steps:
- Create a multiple selection by using one of the methods discussed in the section "Selecting Multiple Controls."
- Choose Format, Vertical Spacing.
- Choose Make Equal to evenly distribute the controls. Notice that the top and bottom controls didn’t move. Access moves only the controls between the top and bottom controls, as shown in Figure 8-19.
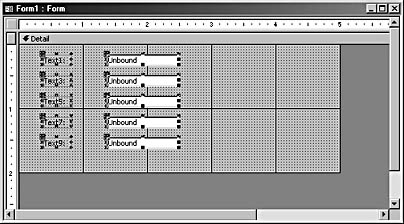
Figure 8-19. After you apply the Make Equal setting to the Vertical Spacing format, the controls are evenly spaced.
Horizontally positioned controls, such as those shown in Figure 8-20, are just as easy to evenly space.
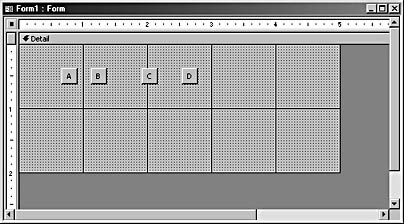
Figure 8-20. These controls are aligned by their top borders, but the space between each control isn’t uniform.
To use the Horizontal Spacing format, follow these steps:
- Create a multiple selection by using one of the methods discussed in the section "Selecting Multiple Controls."
- Choose Format, Horizontal Spacing.
- Select Make Equal to evenly distribute the controls, as shown in Figure 8-21. Access adjusts only the controls between the leftmost and rightmost controls.
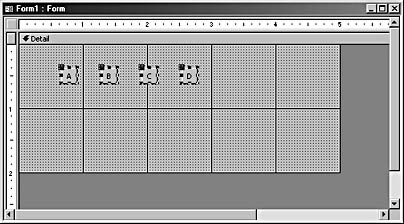
Figure 8-21. Applying the Make Equal setting to the Horizontal Spacing format results in evenly spaced controls.
tip - Adjust the spacing between controls
When the controls are evenly spaced, use the Increase and Decrease options to exercise a bit more influence over the amount of space between each control. When you use these options for vertical alignment, the topmost control doesn’t move; for horizontal alignment, the leftmost control doesn’t move.
Grouping Controls
Control groups can provide a more flexible solution when you need to size, align, or move multiple controls. However, grouping isn’t a direct replacement for working with these controls individually. Grouping creates a type of dependency, or relationship, between the controls.
Within the group, you can adjust individual controls. For instance, you can change the width or height of a control, or you can change property settings for just one control. If you move a control that’s part of a defined group, Access will move the remainingcontrols in that group. For example, if you move one control a half inch to the right, Access will move all the controls in that group a half inch to the right. The following example groups some of the controls shown earlier in Figure 8-21.
To group controls, follow these steps:
- Select any control that you want to add to the group, and then hold down the Shift key and click the remaining controls. (A group must contain more than one control.)
- Choose Format, Group. Click the form’s background to deselect the group, and then move one of the grouped controls. Access will move all the grouped controls accordingly. While you’re working with any control in the group, Access displays a border around the entire group, as shown in Figure 8-22.
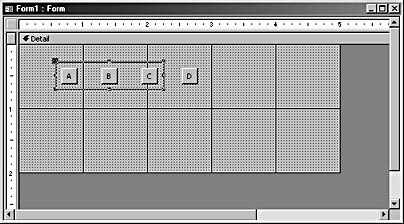
Figure 8-22. Access displays a border around grouped controls.
You can change the dynamics of the group a bit by adjusting this border. Increasing the width or depth of the border will also increase the width or depth of each control. In addition, Access will adjust the position of the controls relative to the new border and the other controls within the group. Figure 8-23 shows the group after the lower right sizing handle was moved down and to the right.
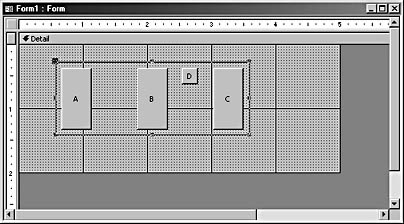
Figure 8-23. You can change the size and position of all the controls in a group by adjusting the group’s border.
You can remove a group by selecting any control in the group and choosing Format, Ungroup. You can’t add a control to a group by simply moving that control inside the border or, as happened in Figure 8-23, by moving the border to encompass the control. You can move the control, but Access won’t recognize it as a member of the group.
tip
In Design view, you can press Tab to cycle through all the controls in your form. This cycle also includes the selection borders for any groups.
Working with Attached Labels
By default, Access attaches a label control to each control that displays text (text boxes, combo boxes, and list boxes). The combination (usually a text box with an attached label) is known as a compound control. Whether you’re moving, aligning, sizing, or grouping your controls, you’ll need to keep these labels in mind. When you position a control for the first time, you’ll need to consider the label’s placement as well as the control’s placement.
For example, let’s say you insert a text box control in the upper left corner of a form, as shown in Figure 8-24.
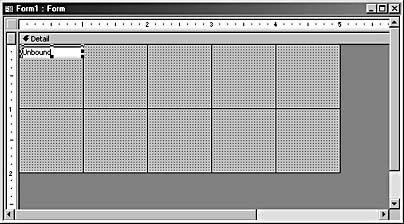
Figure 8-24. If Access can’t position the label in the default position, it will hide the label behind the control.
As you can see, the control has no label—or does it? If you move the control, as shown in Figure 8-25, you can see the outline of the label’s move handle. Simply click this handle and move the label from its hiding spot behind the text box.
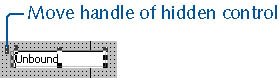
Figure 8-25. To display a control’s label, drag the label from behind the control it’s attached to.
Moving the Control and Label Separately
When you move a control, the label goes with it (and vice versa). You can use the label or the control’s move handle to move either independently of the other, but the components will still be related.
Follow these steps to move one component without the other:
- Position the mouse pointer over the move handle of one of the components.
- The mouse pointer changes to an upward-pointing hand, as shown in Figure 8-26.
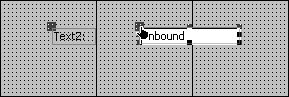
Figure 8-26. When Access displays the upward-pointing hand mouse pointer, you can drag the label and control independently of each other.
- Click the handle, and then drag the control or the label to a new position, as shown in Figure 8-27.
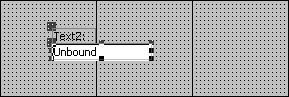
Figure 8-27. The text box is now positioned under the label component.
Troubleshooting - When I try to move attached labels, the controls also move
You can’t use the move handle to drag an attached label to a different section of a form or report without taking along the control. You can, however, use the Cut and Paste commands to detach a component from a compound control. Simply click the move handle of the component you want to move, and press Ctrl+X. Select the title bar of the section where you want to position the previously cut control, and press Ctrl+V. Access will paste the component into the upper left corner of the section. As a result of the cut-and-paste procedure, the components will no longer be related to each other.
Omitting the Label
Compound controls are the default, but you can change that, at least for the form you’re working in. First select the control in the Toolbox, but don’t insert it into the form just yet. Open the properties sheet, and change the AutoLabel property to No. Insert your control as you normally would. Access will insert only the control, omitting the label that usually tags along. Access will continue to insert this particular control without its label until you change the AutoLabel property back to Yes. You can even save the form and close it. The next time you open the form and insert that particular control type, Access will still omit the label. However, all the other forms in your application will continue to default to compound controls.
tip - Change the default properties for a control
You can change many default properties for controls. Simply select the appropriate control tool in the Toolbox (note that the properties sheet title bar changes to Default Text Box, or the relevant control type name), and then reconfigure the properties you want to change in the properties sheet. If you want the changes to be permanent, be sure to save your form.
EAN: 2147483647
Pages: 172