Introducing Jones
This chapter's programming example is the first installment of a program named Jones. Jones starts by loading Segments and exploring all the options and permutations for playing them (see Figure 10-4). As we progress through the book, Jones grows to add functionality, including scripting and AudioPaths, as we dig deeper into DirectX Audio features.

Figure 10-4: Jones demonstrates loading, configuring, and playing Segments.
Let's do a quick walk-through of Jones to get acquainted and then return to look at each operation in detail along with the underlying code.
Starting Jones
You can run Jones by either going to the Unit II\10_Segments directory and building Jones or running ![]() SegmentJones.exe directly from the Bin directory.
SegmentJones.exe directly from the Bin directory.
Loading a Segment
Use the Open… button to read a Segment into Jones. This opens a File dialog, where you can choose a Segment, MIDI, or wave file to load. For the purposes of this walk-through, try ![]() StyleSegment.sgt from the Media directory.
StyleSegment.sgt from the Media directory.

The tree view displays the loaded Segment. To the left of the Segment is a plus sign, indicating that it has children Segments. Go ahead and click on it.
These are also Segments that you can play, and indeed they are designed to be played at the same time as the main Segment. Where did they come from? If the Segment references any Styles (which ![]() StyleSegment.sgt does), then the Style's Bands and motifs are converted into Segments and displayed as additional Segments under the Segment you loaded from a file. You can play any of these Segments. This feature in Jones quickly gets you closer to the inherent interactivity of DirectMusic.
StyleSegment.sgt does), then the Style's Bands and motifs are converted into Segments and displayed as additional Segments under the Segment you loaded from a file. You can play any of these Segments. This feature in Jones quickly gets you closer to the inherent interactivity of DirectMusic.
Styles typically include a series of Bands and motifs, all designed to be played in conjunction with the main Style Segment but with very different intentions. The Bands change the timbre set. In other words, each provides a different set of instruments with a different mix so that by changing Bands you can quickly make strong changes to the music as it plays. The motifs are melodic fragments that are designed with the Style in mind and layer effectively on top of it. By playing the motifs, you add musical elements to the performance. So, by displaying all of the Bands and motifs that come packaged with the Style, Jones immediately gives you a quick way to start interactively jamming and appreciating the layered and interactive approach to delivering music.
Setting Segment Control Parameters
Click on a Segment and all of its control information is displayed on the right, along with Play and Stop buttons.

Use these controls to set up how you want the currently selected Segment to play. Click on the Play button to hear the Segment. You can also double-click on the Segment's name in the tree view to play it.
Viewing the TimeLine
Once the Segment is playing, Jones displays it as a moving rectangle in the timeline view underneath.
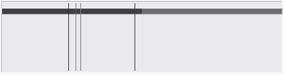
The portion of the Segment that has played or is in the process of playing is painted blue, while the part that is still waiting to play is red.
The four vertical lines, from left to right, represent the current time, the latency time, the queue time, and the prepare time. Each represents a different stage in the process of playing a Segment. We start at the current time and work backward through the sound production process:
-
Current time (black): This is the time at which you hear the sound. Notice that at the very moment that a Segment rectangle hits this, you start hearing it play. It would be simpler if we could use just this for all our timing and ignore latency, queue, and prepare times. But DirectMusic spreads out the different operations both to increase efficiency (some operations can be done in large chunks to reduce overhead) and to provide control opportunities (for example, tools that can adjust the timing of notes in either direction).
-
Latency time (red): This is the time at which the DirectMusic synth, which is implemented in software, actually does its work. Depending on the hardware, this is anywhere from a few milliseconds to 70ms after the current time. The synth wakes up at regular intervals, typically every ten or so milliseconds, and processes another buffer of data to feed out the AudioPath into the effects filters. However, because the MIDI events and waves are all time stamped, the synth places the sounds appropriately in the buffer at sample accurate resolution, even though it processes the audio in relatively large lumps. Latency time is particularly important to understand because it represents the earliest a sound can play. By default, this is used to calculate when to play a new Segment.
-
Queue time (purple): For increased efficiency, the Performance Layer sends notes down in large chunks rather than individually. This is particularly important when hardware acceleration is involved because kernel transitions (i.e., calls down to the core Windows OS) are expensive. So, the Performance queues up MIDI and wave events and sends them down to the synth roughly 50ms ahead of latency time. The starting notes are sent down immediately, bypassing the queue time wait when a new Segment plays. Just as latency time indicates the earliest a Segment can play, queue time indicates the earliest a Segment can be stopped. Pmsgs in the Performance Layer can be yanked by stop invalidations, but once they are sent down to the synth, they are committed for good. The queue time can be adjusted with a call to IDirectMusicPerformance::SetBumperLength().
-
Prepare time (blue): This is the time at which the Segment Tracks dump pmsgs into the queue. This is usually a full half-second ahead of current time. This relatively large delay allows the Tracks to be called infrequently, increasing efficiency. The delay allows Tool processing to alter the time stamping of pmsgs pretty dramatically. However, it doesn't impose a restriction on the start or stop time of a Segment, so it's relatively harmless even though the delay is relatively large. The delay duration can be adjusted with a call to IDirectMusicPerformance:: SetPrepareTime().
Viewing Control Parameters
Below the timeline, the Tempo, Time Sig, Groove, and Chord parameters are displayed.
![]()
These four parameters are called control parameters and are retrieved from the currently playing primary and controlling Segments. The Tracks in all playing Segments use these parameters to determine their behavior (for example, transpose a note to follow the current chord).
When you want to stop the Segment, make sure it is selected in the tree view and then click on the Stop button or just let it play until it is finished.
EAN: 2147483647
Pages: 170