Working with Business Contact Manager
| Business Contact Manager enables you to manage business contacts, accounts, and opportunities.
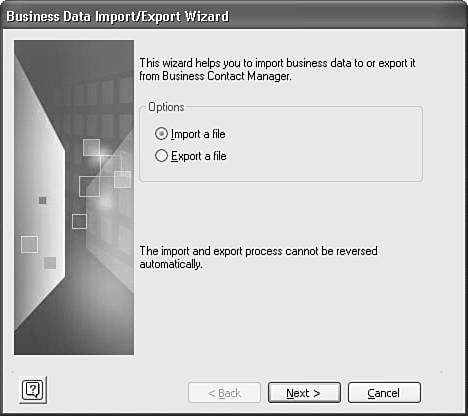
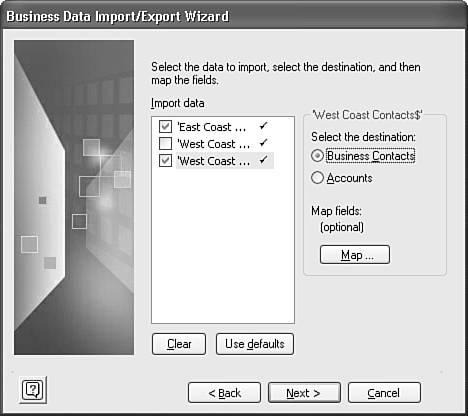
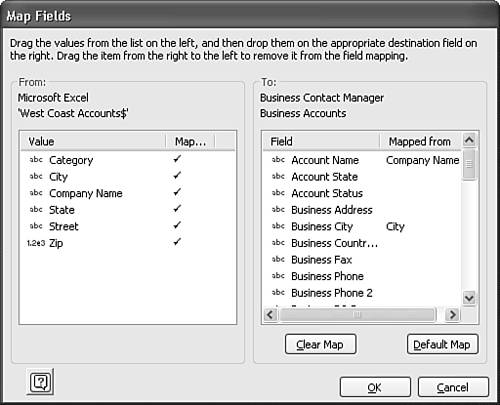
A detailed history is created for all interaction you have with these various items. This section provides a detailed introduction to each of the main components of Business Contact Manager and shows you how you can make these components work for your business. Setting Up Business ContactsThe first component of BCM you'll probably use is business contacts. These contacts are separate from your personal contacts stored in your standard Contacts folder. You can access your business contacts in two ways. You can click Business Tools on the toolbar and select the Business Contacts selection, or you can display the Folder List, expand the Business Contact Manager folders, and select Business Contacts. Importing Contact InformationYou'll need to create new business contacts or import business contacts from another location. If you have an Excel file with your contacts, you can import them directly into Business Contact Manager using the following steps:
NOTE As a general rule, if you want to import from another program or file, you must have the source program on your computer. So, to import business contacts from ACT!, you must have ACT! installed on your computer. CAUTION When using an Excel file as your data source, the first row of data is assumed to be a header row. If you don't have a header row in your worksheet, the first row of data in your worksheet will not be imported, but will be used as column headings in the Import Wizard. In addition to importing and exporting data from data sources such as Excel, ACT!, Access, and QuickBooks, you can also directly import Business Contact Manager data you've received from someone. For example, if your company assigns accounts by territory and you move to a different region of the country, you might need to exchange some accounts or contacts with another BCM user. That user can export her contacts or accounts and send them to you. They arrive as a file with the name of either Contacts.bcm or Accounts.bcm. You can then import that file directly into Business Contact Manager using the Import Wizard. Unlike importing Excel or Access information, when you import BCM data, the Import Wizard knows whether you are importing accounts or contacts. After you select your file, the Import Wizard will import the data into the proper location.
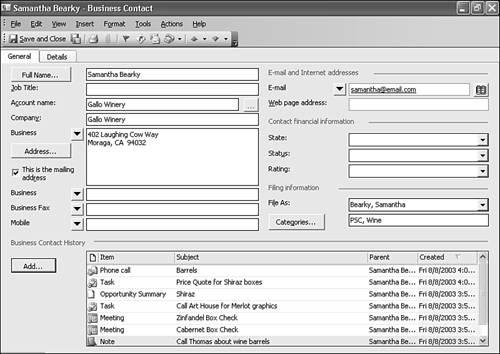
If you have contacts in other Contacts folders that you want to move into your Business Contacts folder, you can navigate to the source Contacts folder, select the contacts you want to copy, and then choose Edit, Copy to Folder. Select your Business Contacts folder as the destination and click OK. Your items will be copied to your Business Contacts folder and updated to reflect the business contact form, as shown in Figure 36.10. Figure 36.10. Copied or imported contacts will be displayed in the business contact form.
CAUTION Attachments aren't supported in the Business Contacts and Accounts folders. If you attempt to copy a contact from your Outlook Contacts folder to your Business Contacts folder, the contact will be copied, but any attachments, including shortcuts to Birthday and Anniversary events in the calendar, will not be copied to the Business Contacts folder. NOTE If you've imported your data from another Contacts folder, you're probably wondering how to manage two separate Contacts folders. Unfortunately, BCM doesn't include any mechanism to synchronize information between the BCM Contacts folder and your standard Outlook Contacts folder. I anticipate that a third-party application or two will come on the market sometime after BCM is released to help with this problem. Using the Business Contact FormYou'll notice that the business contact form looks different than the standard Outlook contact form. On the General tab, you still have the standard Name, Job Title, Company, Address, Telephone Numbers, E-mail, Web Page, and File As fields. However, a business contact has several other available fields. You can associate an account with your business contact, enter financial information, and view the contact's history. History provides a list of all interaction you've had with the contact including appointments, emails, tasks, phone calls, meetings, and documents. The second page of the business contact form, shown in Figure 36.11, contains much of the same information as the standard contact form, such as department, profession, and birthday and anniversary dates. In addition to the standard information, the Details tab of a business contact contains fields for method of contact, source of lead, and last modification information. The Comments field for the Business Contact form is on the Details tab of the form rather than on the General tab in the regular contact form. Figure 36.11. The Details tab of the business contact form contains lead and contact method information.
You'll probably notice that there is no Activities tab on the business contact form. That's because all the activities are listed in the History field on the first page of the business contact form. This enables you to view all information about a contact in a quick glance at the first page of the business contact form. Entering business contacts is, on the surface, just like entering standard Outlook contacts. You can enter the contact's name, address, telephone numbers, email address, and Web page. You can associate an account with each business contact you create. To associate an account with a business contact, click the ellipses (…) button next to the Account field. You can choose to create a new account directly from the business contacts form or select an existing account. If you choose Add Existing Account, you're presented with the dialog box shown in Figure 36.12. Figure 36.12. Choose any existing account from the list and click OK.
You can choose any existing account from the Account dialog box. A variety of account information is included in this dialog box, including account name, primary contact, city, state, business phone, creation date, and modification date. Use the scrollbars to view information not currently shown in the dialog box. Choose the account name and click OK to save your changes. If you want to clear an account from your contact, you can choose to Add Existing Account a second time and click the Clear Selection button. This removes the account from your business contact. If you need to create a new account to associate with your business contact, choose Create New Account to display Figure 36.13. Figure 36.13. Enter the name for an account you want to create.
All you need to do is enter a name for your account and click OK. A new account is created and its name is placed in the Account field on the business contact form. You can edit that account to include more information at a later date. NOTE You can have only one account associated with any business contact. However, you can have multiple business contacts associated with one account. You can enter information about the current state and status of your contact in the Contact Financial Information section. This section enables you to keep track of the payment status of your contact, whether it's an active or inactive contact, and whether it's in good standing. Every Outlook item (even notes) supports categories. You can assign multiple categories to each business contact. Click the Categories button to display the Categories chooser. You can select a category from the Master Category list or type your own new category for the business contact. Click OK to save the category information. The Details tab of the business contact form enables you to enter the source of the contact, the person who referred the contact, and the preferred method of communicating with this particular contact. Some contacts might prefer email to a phone call. Others might not have a fax machine. In addition to choosing a preferred contact method, you can use the check boxes to remind you not to fax a particular contact. Much like a standard Outlook contact, you can enter birthday and anniversary dates for your business contact. When you save your business contact, BCM will ask whether you would like to create an event in your default calendar for the contact's birthday or anniversary. TIP Unlike standard Outlook contacts, the birthday or anniversary event in your calendar is not linked to the business contact. Business contacts do not support attachments, so this sort of linking is not possible. That means if you later go back to the contact and change the birthday, BCM will again ask whether you want to add the new birthday to your personal calendar. If you say yes, the end result is that you will end up with two birthdays for the contact: the right one and the wrong one. However, there's a potential workaround for this problem. After you create the birthday and anniversary for the contact, switch to your Calendar folder. Navigate to the date of the contact's birthday and open the all-day event. Choose to open the entire series. When you have the birthday event open, use the Business Contact Manager toolbar present in every Outlook item to link the birthday back to the contact. After you save and close the birthday event, the item is instantly linked to your business contact. Then if you need to change the contact's birthday, open the business contact. Double-click the linked event in the contact's History field. Change the date of the event and save and close the event. Now you can change the Birthday field in your business contact form. When you save your business contact, do not have BCM add the changed birthday or anniversary to your personal calendar because you've already updated the information. The Business Contact History area of the form enables you to link business notes, email messages, opportunities, tasks, appointments, phone logs, and files to your contact. You can create these items directly from the business contact form. To create a new email to your business contact, select Add, Mail Message. A new email message is created pre-addressed to the currently opened business contact. After you send the email message, that message is linked to the business contact. Select Opportunity_ from the Add button to add a new opportunity to BCM and associate it with the currently open contact. After you've worked with your contact for a while, you will likely have a number of items displayed in the History field. Figure 36.14 shows a business contact with several different types of items linked through the contact history. Figure 36.14. A variety of Outlook items can be stored in the contact's history field.
When you're done entering information for your business contact, click the Save and Close button on the toolbar to save your contact. Creating AccountsAccounts hold information about the companies you work with. An account is very much like a master contact, or parent, for your business contacts. You can create accounts and associate a variety of business contacts with those accounts. You can import accounts in exactly the same way that you can import business contacts: either using the Import/Export Wizard or by copying existing contacts to your Accounts folder. To create a new account, switch to the Accounts folder in Business Contact Manager. Either select Accounts from the Business Tools toolbar or switch to the Folder List view, expand Business Contact Manager, and click on Accounts. You can create a new account by clicking the New button in the toolbar to display Figure 36.15. Figure 36.15. Use this form to create a new account.
The account form has many of the same fields as the standard contact form. All the address and telephone fields are present, as are the email and Web page fields. However, there are account-specific fields present as well:
The details page of the Account form, shown in Figure 36.16, contains the Comments field, as well as additional account-specific fields, including
Figure 36.16. The Details page of the account form contains additional fields and last modification time and user information.
When you create a new account, enter the account name. You can then choose a primary contact to associate with your account. Click the ellipses button (…) next to the Primary Contact box. If you haven't yet saved the account, BCM will prompt you to do so. After you save the account, BCM displays Figure 36.17. Select a business contact and click OK. You cannot create a new contact from this dialog box. Figure 36.17. Choose any existing account from the list and click OK.
You can enter any additional information such as address, telephone, email, and Web information. You can also enter information about the account's state, status, and rating. Click the Categories button to assign categories to an account. You can use categories much like a master account type. For example, in the "Improving Your Outlook" section at the end of this chapter, the box salesman uses categories to designate accounts for different types of business. All accounts that order primarily corrugated boxes are assigned to the corrugated category. All accounts that order laminated boxes are assigned to the Laminated category. Accounts that buy both types of boxes are assigned to both categories. You can associate multiple contacts with one account. To associate additional contacts with your account, click the Add button in the Business Contacts section. You can choose Add Existing Contact or Create New Contact. If you choose to add an existing contact, you'll be presented with the dialog box shown in Figure 36.18. You can see which business contacts are currently associated with the account and add other existing contacts to that account. Figure 36.18. You can associate multiple contacts with one account.
You can also choose to create a new contact to associate with your account. After you choose to create a new contact, you're prompted to enter the contact's full name. Click OK to save the new contact and associate it with your account. You can then edit the newly created business contact at a later time. The Account History area enables you to link other items to your account. Click the Add button to display a pop-up menu of the different types of items you can link to an account. You can link business notes, mail messages, opportunities, tasks, appointments, phone logs, and files to your account. Linking Items to an AccountTo create a new linked item, click the Add button and select the type of item you want to create. A new business note is shown in Figure 36.19. Figure 36.19. A business note is a cross between an Outlook note and a journal entry.
Enter a subject and comments for your note and click Save and Close to save your changes and link your note to the account. You can also link a file to your account. Selecting File from the Add button's pop-up menu enables you to navigate to any location on your hard drive or network share. Select the file you want to link to your account and click Open. NOTE This doesn't actually attach a file to your account. BCM items don't support attachments. Linking a file only creates a journal entry with the name and path of the file. You can double-click the document link to open the linked file as long as the file remains in its original location. If the file is deleted or moved from its original location, BCM won't be able to find it again and will generate an error. As you work with BCM, you'll likely have numerous items added to the history of your accounts and contacts. Figure 36.20 shows an account form with several different items stored in the History field. Use the scrollbars to navigate through the account's history. Figure 36.20. An account can contain a variety of history items.
Creating OpportunitiesOpportunities can be classified as leads or potential revenue generating business. You can create a new opportunity for a particular product, a particular industry, or a particular type of business. To access the Opportunities folder, select Business Tools, Opportunities or click the Opportunities folder while in Folder List view. The Opportunities form, shown in Figure 36.13, enables you to enter information about the opportunity, such as
The middle section of the opportunity form enables you to work with various products that the opportunity might be interested in. You can enter all of your company's products into a product catalog and choose from this product catalog when creating new opportunities. Much like the history for accounts and business contacts, the opportunity form stores a history of everything you've done within Outlook related to that opportunity. You can record business notes, tasks, appointments, phone calls, and link files to your opportunity. To add an item to the history of an opportunity, you must first save the opportunity. After the opportunity is saved, click the Add button. You can add a business note, task, appointment, phone log, or file. Select the item you want to add. If you add an appointment, you'll be presented with a blank appointment form. If you choose to add a phone log, a new business phone log form will appear, as shown in Figure 36.21. Click Start Timer to record the length of your phone call. When the phone call is over, you can click Pause Timer. You can also enter a subject and notes for the phone conversation. When you're done updating the phone log, click Save and Close to save your log and link the item to the opportunity. Figure 36.21. Use the phone log form to record the length and details of a telephone conversation.
The Details tab of the opportunity form contains the last modification information and a general notes field. Setting Up a Product CatalogBusiness Contact Manager enables you to enter information about all the different products you want to sell to various opportunities. You can access the product catalog from within an opportunity by clicking Add to display the Add/Edit Products dialog box. Click the small box icon next to the Product Name to display the Edit Product Master List dialog box. You can also launch this dialog box from the menu by choosing Business Tools, Product List to display Figure 36.22. Figure 36.22. Your product list can store a variety of different products.
To add a new product to your product list, click the Add button to display Figure 36.23. Complete the Product Name, Description, Unit Price, and Default Quantity fields. When you're done entering that information, click OK to return to the Edit Master List dialog box. Figure 36.23. You can add new products to your master product list and specify a price and default quantity.
TIP Business Contact Manager is primarily aimed at the sales market. However, if you're an independent consultant or someone who sells services instead of products, you can still use the product catalog. For example, if you offer consulting, you can enter a product for your consulting time. You might charge different rates depending on the type of consulting. If you are a programmer, you might enter a product for Database Programming and another for Web Programming. Your default quantity would be the smallest unit of time you charge for, and your unit price would be your fee per the unit of time. You can make the same sort of adaptations for other services such as car washing or dog walking. You can also edit any product currently stored in your product list by clicking the Edit button. Your product is displayed in a dialog box identical to Figure 36.23. Edit any aspect of the product and click OK to save your changes. To remove a product from your master product list, select the product and click Delete. If your product list is already in another format, you can use the Import Wizard to import your products directly into Business Contact Manager. Click the Import button from the Edit Product Master List dialog box to launch the Products Import Wizard. Click Browse to select the file that contains your existing product list. This file must be stored in comma-separated values (.csv) format. After you select your source file, you can choose to either replace or append/update the existing product list. Click Import to begin the Import. When the import has completed, Business Contact Manager will display a status screen informing you whether the import was successful. You should now see additional products in your master product list. CAUTION When importing your master product list, BCM doesn't include any mechanism for checking for duplicate products. So, after you've performed an import, you might need to remove duplicate products from your master product list. To add products to your opportunity, click the Add button in the Products section of the opportunity to display Figure 36.24. Figure 36.24. You can enter a product name using this form or click the box icon to display your product catalog.
If you know the product you want to add, you can simply type the information into the Product Name, Description, Unit Price, Adjusted Price, Adjusted Percentage, and Quantity fields directly in the Add/Edit Product Entry dialog box. The unit price represents the price for one unit of product. If you want to quote a different price, enter either the adjusted price or the adjusted percentage. You need to enter only one of these values; the other will be calculated for you. Enter a quantity and BCM will calculate the subtotal for the product. If you want to add only one product to your opportunity, click OK to save your changes and return to your opportunity. If you want to add more products to your opportunity, click the Add Next button to save the current product and clear out the form so that you can enter another product. Any products you enter directly into the Add/Edit Product Entry form don't need to be available in your product catalog. If you want to choose a product from your product catalog to add to the opportunity, click the box icon next to the Product Name box to display the dialog box shown previously in Figure 36.24. You can either type the name of your desired product or select it from the list. After you've selected a product, click OK to return to the Add/Edit Product Entry dialog box. Enter either an adjusted price or an adjusted percentage and confirm the quantity needed. Click OK to return to your opportunity or Add Next to add more products. As you add products to your opportunity, two things happen. The total product value, shown in Figure 36.25, is updated and the expected revenue of the opportunity is recalculated. The expected revenue is the total product value multiplied by the probability percentage entered for the opportunity. Figure 36.25. As you enter products, the product total is constantly updated.
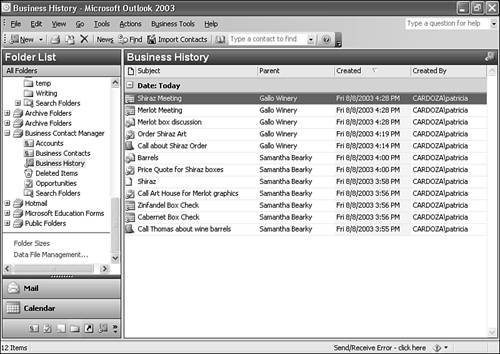
If you need to make changes to the products listed in your opportunity, you can do so easily. Select the product you need to change and click Edit. This displays the product information in the Add/Edit Product Entry dialog box. You can change the product completely or enter a different price or quantity. Click OK to save your changes. To completely remove a product from your opportunity, select the product and click the Delete button on the opportunity form. You cannot remove a product by pressing the Delete key on the keyboard. Working with Business HistoryUnder the Other heading in the Business Tools menu is the Business History option. Selecting this option displays the Business History folder shown in Figure 36.26. You can view all emails, tasks, business notes, appointments, documents, and tasks associated with any business contact, account, or opportunity. The default view is chronological, but you can also view those items by their parent (which is the account, business contact, or opportunity they belong to), by creation date, or in a list (business history view). Figure 36.26. The By Parent view of the business history shows all items listed under their associated account, business contact, or opportunity.
You can open any business history item directly from the Business History folder. Just double-click on the item to open it.
Working with the History Within BCM ItemsIf you've been using Business Contact Manager for a while, you probably have a large number of items in the history for some of your contacts and accounts. Unfortunately, the history dialog within the Account, Contact, and Opportunity forms is a fixed size and short of customizing the form, you can't make it any larger. Even if you did customize the form, you can increase the height of the History control only so far. To better manage the history on accounts, contacts, or opportunities, you can actually customize the view of this control in much the same way that you can customize the view for any of your Outlook folders. The History control on the BCM forms is a modified version of the Outlook View control. It lets you see items as they would appear within a folder. These items can be in multiple folders across your default message store. The simplest customization you can make on a History control is to sort it. You can sort the control by clicking on any of the column headers in the control. To sort the control by subject, click the Subject column. To sort the control by item type, click on the icon column. However, sorting will get you only so far, especially if you have more than 10 or 15 items in the history for an account or contact. You can customize the view of the History control just as you can customize the view for any other Outlook folder. Right-click the History control to display the context menu shown in Figure 36.27. Figure 36.27. You can choose from a variety of ways to customize your view.
Select Customize Current View to display the Customize View dialog box. You can change the fields displayed, change the grouping and sorting, specify a filter, or change automatic formatting rules to display certain items in alternative colors and fonts. CAUTION Any changes you make to the history display for a contact, account, or opportunity are global changes. They affect the history display for all contacts, accounts, and opportunities. So, if you choose to filter out all phone logs for one contact, you're actually filtering out all phone logs for all contacts, accounts, and opportunities.
|

 For more information about exporting your BCM data for backup or transfer purposes,

EAN: 2147483647
Pages: 426