XML Classes in the .NET Framework
Now that you have had an introduction to working with XML data by using the familiar DataSet class, you can look at additional classes in the .NET Framework System.XML namespace that enable you to have programmatic access to XML data. You will learn about working with the XML Document Object Model (DOM). The XML DOM is another W3C standard, which specifies a set of classes and their properties and methods, that provides an object model for programming against XML data structures. The classes in System.Xml are the .NET Framework implementation of this standard. You will also learn how to do validation, how to apply XSLT stylesheets to transform XML from one format to another, and how to locate specific nodes in your XML data with the XPath language. This section will finish with an introduction to the XmlDataDocument class, which enables you to load relational data from a database and work with it as if it were loaded into an XmlDocument.
Using the XMLReader and XMLWriter Classes
The XmlReader class and XmlWriter class are the XML equivalent of the DataReader that you learned about in Chapter 5. XmlReader provides forward-only, read-only access to your data. XmlWriter provides a single output. Both of these classes are abstract base classes that cannot be instantiated directly in your code.
The System.XML namespace also contains the XmlTextReader, XmlNodeReader, and XmlValidatingReader classes that are derived from the XmlReader base class. Each of these implementations provides slightly different functionality. You can also create your own derived class based on XmlReader if you would like to include additional methods for special processing of the incoming XML data that your own application requires.
Table 7.3 lists the properties and methods of the XmlReader base class and its derived classes. The XmlTextReader and XmlValidatingReader each have some extended properties and methods that support their unique behavior; these are noted in the table. Also noted are methods that are not available for some of the derived classes.
| Property | Description |
|---|---|
| AttributeCount | The number of attributes on the current node. |
| BaseURI | The base URI of the current node. |
| CanResolveEntity | Indicates whether this reader can parse and resolve entities. |
| Depth | The depth of the current node in the XML document. |
| Encoding | The encoding of the document (XmlTextReader only). |
| EntityHandling | Indicates how entity references are expanded (XmlValidatingReader only). |
| EOF | Indicates whether the reader is positioned at the end of the stream. |
| HasAttributes | Indicates whether the current node has any attributes. |
| HasValue | Indicates whether the current node can have a value. |
| IsDefault | Indicates whether the current node is an attribute that was generated from the default value defined in the DTD or schema. |
| IsEmptyElement | Indicates whether the current node is an empty element (for example, <element/>). |
| Item | The value of the attribute. |
| LineNumber | The current line number (XmlTextReader only). |
| LinePosition | The current character position on the line (XmlTextReader only). |
| LocalName | The local name of the current node. |
| Name | The qualified name of the current node. |
| Namespaces | Indicates whether to do namespace support (XmlTextReader and XmlValidatingReader only). |
| NamespaceURI | The namespace URI of the node on which the reader is positioned. |
| NameTable | The XmlNameTable associated with this implementation. |
| NodeType | The type of the current node (element, attribute, text, processing instruction, etc.). |
| Normalization | Indicates whether to normalize white space and attribute values (XmlTextReader only). |
| Prefix | The namespace prefix of the current node. |
| QuoteChar | The quotation mark character used to enclose the value of an attribute node. |
| Reader | Reference to the reader used to construct this XmlValidatingReader (XmlValidatingReader only). |
| ReadState | The state of the reader (closed, endoffile, error, initial interactive). |
| Schemas | The collection of schemas to be used for validation (XmlValidatingReader only). |
| SchemaType | The schema type of the current node (simpleType or complexType)(XmlValidatingReader only). |
| ValidationType | The type of validation performed (Auto, DTD, None, Schema, XDR)(XmlValidatingReader only). |
| Value | The text value of the current node. |
| WhitespaceHandling | Indicates how white space is handled (maintained or removed) (XmlTextReader only). |
| XmlLang | The current xml:lang scope. |
| XmlResolver | Used for resolving references to external DTD or schema files (XmlTextReader only). |
| XmlSpace | The current xml:space scope. |
| Close | Sets the ReadState to Closed. |
| GetAttribute | Gets the value of an attribute. |
| IsName | Gets a value indicating whether the string argument is a valid XML name (not available for XmlNodeReader or XmlValidatingReader). |
| IsNameToken | Gets a value indicating whether the string argument is a valid XML name token (not available for XmlNodeReader or XmlValidatingReader). |
| IsStartElement | Returns true if the current content node is a start tag. |
| LookupNamespace | Resolves a namespace prefix in the current element’s scope. |
| MoveToAttribute | Moves to the specified attribute. |
| MoveToContent | Moves to the next content node (non-white space text, CDATA, Element, EndElement, EntityReference, or EndEntity). It skips over ProcessingInstruction, DocumentType, Comment, Whitespace, or SignificantWhitespace nodes. |
| MoveToElement | Moves to the element that contains the current attribute node. |
| MoveToFirstAttribute | Moves to the first attribute. |
| MoveToNextAttribute | Moves to the next attribute. |
| Read | Reads the next node from the stream. |
| ReadAttributeValue | Parses the attribute value into one or more Text, EntityReference, or EndEntity nodes. |
| ReadBase64 | Returns decoded Base64 (XmlTextReader only). |
| ReadBinHex | Returns decoded BinHex (XmlTextReader only). |
| ReadChars | Buffers very long text strings (XmlTextReader only). |
| ReadElementString | Reads simple text-only elements. |
| ReadEndElement | If the current content node is an end tag, moves to the next node. |
| ReadInnerXml | Reads all node content, including markup, as a string. |
| ReadOuterXml | Reads the content, including markup, representing this node and all its children. |
| ReadStartElement | If the current node is an element, moves to the next node. |
| ReadString | Reads the contents of an element or text node as a string. |
| ResetState | Resets the reader to ReadState.Initial (XmlTextReader only). |
| ResolveEntity | Resolves the entity reference for EntityReference nodes. |
| Skip | Skips over the children of the current node. |
When working with data in a DataSet, we are used to thinking about moving through data one row at a time, with a row consisting of a set of columns. Relational data tables have a symmetrical row and column structure, and all rows in a given table have the same number of columns. The structure of XML data is not limited to a simple row and column format. XML data is best thought of as a hierarchical, or tree, structure. Each XML document has a root. Each element that is a direct child of the root can, in turn, have its own child elements, a set of attributes, and text content. This nesting of child elements (each containing their own child elements, attributes, and text content) can continue as many levels deep as required by the complexity of the data you are working with.
The XmlReader classes work by moving through the data one node at a time (rather than one row at a time, the way a DataReader does). XmlReader classes are typically used by setting up a loop. Each time through the loop, you have access to a single node. It is usually desirable to test the NodeType property to know whether you are currently processing an element, attribute, or text node. All other valid items in an XML data file, such as processing instructions and comments, also have a specific node type. After you have identified the type of node you are currently processing, you can retrieve its data (such as its name and value) or do other work with it (such as checking to see whether an element node has attributes or further levels of child elements).
Listing 7.6 creates and loads an XmlTextReader and then loops through the data, looking for a specific element and retrieving its data. You will learn about using the XmlValidatingReader later in this chapter, in the section titled “Validating XML Data.”
List 7.6: Using an XmlTextReader
Private Sub GetJobTitles() Dim jobReader As XmlTextReader = New _ XmlTextReader("C:\path\job-list.xml") While jobReader.Read() If jobReader.NodeType = XmlNodeType.Element Then If jobReader.Name = "job_desc" Then lstJobTitle.Items.Add(jobReader.ReadInnerXml()) End If End If End While End Sub The base class of XmlWriter and its derived class, XmlTextWriter, enable you to create a new XML data file (or Stream object) by explicitly writing each item that should appear in the file. As you review the list of methods for these classes in Table 7.4, you will notice many of the methods begin with the verb “Write.”
| Property | Description |
|---|---|
| BaseStream | Gets the underlying Stream object (XmlTextWriter only). |
| Formatting | Indicates how the output is formatted (XmlTextWriter only). |
| Indentation | The number of IndentChars to write for each level in the hierarchy when Formatting is set to Formatting.Indented (XmlTextWriter only). |
| IndentChar | The character to use for indenting when Formatting is set to Formatting.Indented (XmlTextWriter only). |
| Namespaces | Indicates whether to provide namespace support (XmlTextWriter only). |
| QuoteChar | The character to use to quote attribute values (XmlTextWriter only). |
| WriteState | The state of the writer. |
| XmlLang | The current xml:lang scope. |
| XmlSpace | An XmlSpace representing the current xml:space scope. |
| Close | Closes this stream and the underlying stream. |
| Flush | Flushes whatever is in the buffer to the underlying streams and also flushes the underlying stream. |
| LookupPrefix | Returns the closest prefix defined in the current namespace scope for the namespace URI. |
| WriteAttributes | Writes all the attributes found at the current position in the XmlReader. |
| WriteAttributeString | Writes an attribute with the specified value. |
| WriteBase64 | Encodes the specified binary bytes as Base64 and writes the resulting text. |
| WriteBinHex | Encodes the specified binary bytes as BinHex and writes the resulting text. |
| WriteCData | Writes a <![CDATA[...]]> block containing the specified text. |
| WriteCharEntity | Creates a character entity for the specified Unicode character value. |
| WriteChars | Writes text a buffer at a time. |
| WriteComment | Writes a comment <!--...--> containing the specified text. |
| WriteDocType | Writes the DOCTYPE declaration with the specified name and optional attributes. |
| WriteElementString | Writes an element containing a string value. |
| WriteEndAttribute | Closes the previous WriteStartAttribute call. |
| WriteEndDocument | Closes any open elements or attributes and puts the writer back in the Start state. |
| WriteEndElement | Closes one element and pops the corresponding namespace scope. |
| WriteEntityRef | Writes an entity reference as follows: & name;. |
| WriteFullEndElement | Closes one element and pops the corresponding namespace scope. |
| WriteName | Writes the specified name. |
| WriteNmToken | Writes the specified name, ensuring it is a valid NmToken. |
| WriteNode | Copies everything from the reader to the writer and moves the reader to the start of the next sibling. |
| WriteProcessingInstruction | Writes a processing instruction with a space between the name and text as follows: <?name text?>. |
| WriteQualifiedName | Writes the namespace-qualified name. This method looks up the prefix that is in scope for the given namespace. |
| WriteRaw | Writes raw markup manually. |
| WriteStartAttribute | Writes the start of an attribute. |
| WriteStartDocument | Writes the XML declaration. |
| WriteStartElement | Writes the specified start tag. |
| WriteString | Writes the given text content. |
| WriteSurrogateCharEntity | Creates and writes the surrogate character entity for the surrogate character pair. |
| WriteWhitespace | Writes the given white space. |
You can begin creating a new XML data file by calling the WriteDocumentStart method and can continue calling the appropriate Writexxx method for each element, attribute, text node, comment, or processing instruction that will appear in your data file. The WriteAttributeString and WriteElementString methods provide a shortcut by enabling you to create an attribute or simple element by using one method call, rather than three calls (WriteStartElement, WriteString, WriteEndElement).
Listing 7.7 shows an example of using an XmlTextWriter.
| Tip | To create formatted data files, set the XmlTextWriter.Formatting property to Indented. The data file will have line breaks after each item, and nested elements indented below their parent elements. This is useful when the XML data will be displayed to end users. In other situations, it’s not necessary—for example, if you are creating an XML Stream object that will be passed to another procedure. |
Listing 7.7: Creating an XML Data File with an XmlTextWriter
Private Sub CreateXMLFile() Private newWriter As XmlTextWriter = New _ XmlTextWriter("C:\path\new-employees.xml", Nothing) newWriter.Formatting = Formatting.Indented newWriter.WriteStartDocument(True) newWriter.WriteStartElement("newemployees") newWriter.WriteStartElement("employee") newWriter.WriteAttributeString( _ "emp_id", CType(counter, String)) newWriter.WriteStartElement("jobtitle") newWriter.WriteString( _ lstJobTitle.SelectedItem.ToString) newWriter.WriteEndElement() newWriter.WriteElementString( _ "firstname", txtFirst.Text) newWriter.WriteElementString( _ "lastname", txtLast.Text) newWriter.WriteEndElement() 'close the root element newWriter.WriteEndElement() newWriter.Close() End Sub Exercise 7.4 demonstrates how to instantiate an XMLTextReader and load it from an XML data file. You will also read through the data, identify node types and names, and retrieve data. Then you will use the XmlTextWriter to create unique XML output.
Exercise 7.4: Using the XmlTextReader and XmlTextWriter
-
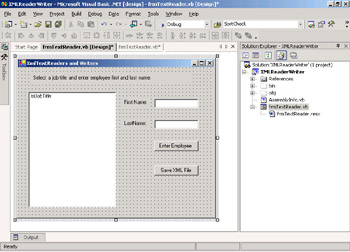
Start Visual Studio .NET and create a new Windows Application project called XMLReaderWriter. Name the form frmTextReader.
-
Add a ListBox, two TextBoxes, and two Command Button controls to the form. Name them lstJobTitle, txtFirst, txtLast, btnEnterEmp, and btnSaveFile, respectively. Your form should look like this:
-
Add an Imports statement for System.Xml at the top of the form’s code module:
Imports System.Xml
-
Add a module-level counter variable:
Private counter As Integer = 1
Using an XmlTextReader:
-
In the Form_Load event procedure, instantiate an XmlTextReader and set up a loop to read data. Your code will also test each node to see whether it is an XmlNodeType.Element and then test to see whether the element node’s name is job_desc. When a matching element node is found, the text will be added to the ListBox control.
-
Here is the code to do this (substitute the correct path and filename for your computer):
Private Sub frmTextReader_Load(ByVal sender As System.Object, _ ByVal e As System.EventArgs) Handles MyBase.Load Dim jobReader As XmlTextReader = New _ XmlTextReader("C:\path\job-list.xml") While jobReader.Read() If jobReader.NodeType = XmlNodeType.Element Then If jobReader.Name = "job_desc" Then lstJobTitle.Items.Add(jobReader.ReadInnerXml()) End If End If End While End Sub -
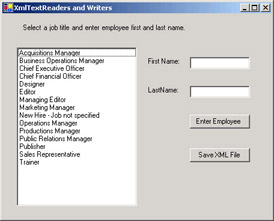
Save and test your work. The application should display a list of job titles in the ListBox control.
Using the XmlTextWriter:
-
Instantiate a module level XmlTextWriter to create a new XML file based on user input (use an appropriate path and filename for your computer):
Private newWriter As XmlTextWriter = New _ XmlTextWriter("C:\path\new-employees.xml", Nothing) -
Create an event procedure for the btnEnterEmp_Click event procedure. This code will write XML elements and attributes with the data values taken from user input. If the counter variable has a value of 1, then you will start a new document and create an XML entry. If the counter is greater than 1, you will create another XML entry. Increment the counter variable at the end of the procedure.
-
Here is the code to do this:
Private Sub btnEnterEmp_Click(ByVal sender As System.Object, _ ByVal e As System.EventArgs) Handles btnEnterEmp.Click If counter = 1 Then newWriter.Formatting = Formatting.Indented newWriter.WriteStartDocument(True) newWriter.WriteStartElement("newemployees") End If newWriter.WriteStartElement("employee") newWriter.WriteAttributeString("emp_id", _ CType(counter, String)) newWriter.WriteStartElement("jobtitle") newWriter.WriteString(lstJobTitle.SelectedItem.ToString) newWriter.WriteEndElement() newWriter.WriteElementString("firstname", txtFirst.Text) newWriter.WriteElementString("lastname", txtLast.Text) newWriter.WriteEndElement() counter += 1 End Sub -
Create an event procedure for the btnSaveFile_Click event procedure. This code will write the final closing tag for the XML file and close the XmlTextWriter. At the end of the procedure, reset the counter variable to 1.
-
Here is the code to do this:
Private Sub btnSaveFile_Click(ByVal sender As System.Object, _ ByVal e As System.EventArgs) Handles btnSaveFile.Click newWriter.WriteEndElement() newWriter.Close() counter = 1 End Sub
-
Save and test your work. Select a job title from the list box, type a first and last name into the text boxes, and click the Enter Employee button. Type two or three more names and then click the Save XML File button. Use Windows Explorer to locate the new-employees.xml file that your application just created. Examine the contents. The format of XML that was created should look like this:
<?xml version="1.0" standalone="yes"?> <newemployees> <employee emp_> <jobtitle>Editor</jobtitle> <firstname>John</firstname> <lastname>Smith</lastname> </employee> <employee emp_> <jobtitle>Productions Manager</jobtitle> <firstname>Liz</firstname> <lastname>Jones</lastname> </employee> <employee emp_> <jobtitle>Marketing Manager</jobtitle> <firstname>Susan</firstname> <lastname>Wilson</lastname> </employee> </newemployees>
The XmlReader and XmlWriter classes are useful when your goal is simple input and output of XML data. When you need to perform more complex operations with XML data in your program code, you will need to use the .NET Framework classes that implement the W3C XML Document Object Model (DOM). These are discussed in next.
Programming with the XML Document Object Model
The XML Document Object Model (DOM) offers complete programmatic access to XML data. When working with the DOM, you approach your XML data as a tree of nodes, which starts from the root element and continues for as many levels of depth as your data structure requires. In this section, you will learn about the properties and methods of the DOM that enable you to navigate the DOM tree structure, read and change data, and also generate new XML structures in your application code. XML documents consist of a tree of nodes.
There are two ways to navigate the XML document hierarchy. One option is to move through the node hierarchy from parent node to child nodes, for as many levels of nesting as the data contains. The other option is to use methods such as GetElementsByTagName, SelectNodes, or SelectSingleNode to directly locate nodes that match a selection criteria. SelectNodes and SelectSingleNode use XPath expressions to specify selection criteria. This is covered later in this chapter, in the section titled “Selecting Nodes with XPath.”
Each node in a document is one of the specialized types of nodes defined by the DOM. A node can represent the document itself, or an element, an attribute, text content, a processing instruction, a comment, or any of the other items that are valid in an XML file. The base class of XmlNode defines the basic set of properties and methods for all types of nodes. Each specialized type of node, which is a class derived from the XmlNode base class, has some additional properties and methods that are unique to that node type’s characteristics.
Also important in the XML DOM are two collection classes: the NodeList collection class and the XmlNamedNodeMap collection class. The NodeList collection class can be used to iterate through a set of related nodes. A set of related nodes can be based on the hierarchy—for example, all the child nodes of a selected element. A NodeList collection can also consist of a set of nodes that match a selection criteria, such as all nodes with a specific element tag name or matching value. The NodeList collection can be navigated by index value in an ordered fashion. The XmlNamedNodeMap collection class is a collection of name/value pairs and is typically used to access sets of XML attributes. The .NET Framework has a class called XmlAttributeCollection that extends the base class XmlNamedNodeMap’s functionality.
Table 7.5 lists the properties and methods of the XmlNode base class. Table 7.6 through Table 7.9 list the extended properties and methods of the classes that inherit from XmlNode.
| Note | The next set of Tables (Table 7.5 through Table 7.9) show the properties and methods of classes that implement the XML DOM. Table 7.5, which lists the properties and methods of the XmlNode base class and is, of course, the longest list. The rest of the tables show the extended properties and methods of each of the classes that inherit from XmlNode. The derived classes also support all of the base class properties and methods. In some of the derived classes, the base class methods have been overridden to customize the behavior of the derived class. |
| Property | Description |
|---|---|
| Attributes | An XmlAttributeCollection containing the attributes of this node |
| BaseURI | The base URI of the current node |
| ChildNodes | A collection of the children of the node |
| FirstChild | References the first child of the node |
| HasChildNodes | Indicates whether this node has any child nodes |
| InnerText | The concatenated values of the node and all its children |
| InnerXml | The markup representing just the children of this node |
| IsReadOnly | Indicates whether the node is read-only |
| Item | References the specified child element |
| LastChild | References the last child of the node |
| LocalName | The local name of the node |
| Name | The qualified name of the node |
| NamespaceURI | The namespace URI of this node |
| NextSibling | References the node immediately following this node |
| NodeType | The type of the current node |
| OuterXml | The markup representing this node and all its children |
| OwnerDocument | References the XmlDocument to which this node belongs |
| ParentNode | References the parent of this node (for nodes that can have parents) |
| Prefix | The namespace prefix of this node |
| PreviousSibling | References the node immediately preceding this node |
| Value | The value of the node |
| AppendChild | Adds the specified node to the end of the list of children of this node |
| Clone | Creates a duplicate of this node |
| CloneNode | Creates a duplicate of the node |
| CreateNavigator | Creates an XPathNavigator for navigating this object |
| GetEnumerator | Provides support for each style iteration over the nodes in the XmlNode |
| GetNamespaceOfPrefix | Looks up the closest xmlns declaration for the given prefix that is in scope for the current node and returns the namespace URI in the declaration |
| GetPrefixOfNamespace | Looks up the closest xmlns declaration for the given namespace URI that is in scope for the current node and returns the prefix defined in that declaration |
| InsertAfter | Inserts the specified node immediately after the specified reference node |
| InsertBefore | Inserts the specified node immediately before the specified reference node |
| Normalize | Puts all XmlText nodes in the full depth of the subtree underneath this XmlNode into a "normal" form, where only markup (that is, tags, comments, processing instructions, CDATA sections, and entity references) separates XmlText nodes, that is, there are no adjacent XmlText nodes |
| PrependChild | Adds the specified node to the beginning of the list of children of this node |
| RemoveAll | Removes all the children and/or attributes of the current node |
| RemoveChild | Removes the specified child node |
| ReplaceChild | Replaces the child node oldChild with newChild node |
| SelectNodes | Selects a list of nodes matching the XPath expression |
| SelectSingleNode | Selects the first XmlNode that matches the XPath expression |
| Supports | Tests whether the DOM implementation implements a specific feature |
| WriteContentTo | Saves all the children of the node to the specified XmlWriter |
| WriteTo | Saves the current node to the specified XmlWriter |
The XmlDocument class has functionality that governs the document as a whole.
| Property | Description |
|---|---|
| DocumentElement | References the root XmlElement for the document |
| DocumentType | References the node containing the DOCTYPE declaration |
| Implementation | The XmlImplementation object for the current document |
| NameTable | The XmlNameTable associated with this implementation |
| PreserveWhitespace | Indicates whether to preserve white space |
| XmlResolver | Sets the XmlResolver to use for resolving external resources |
| CreateAttribute | Creates an XmlAttribute with the specified name |
| CreateCDataSection | Creates an XmlCDataSection containing the specified data |
| CreateComment | Creates an XmlComment containing the specified data |
| CreateDocumentFragment | Creates an XmlDocumentFragment |
| CreateDocumentType | Returns a new XmlDocumentType object |
| CreateElement | Creates an XmlElement |
| CreateEntityReference | Creates an XmlEntityReference with the specified name |
| CreateNode | Creates an XmlNode |
| CreateProcessingInstruction | Creates an XmlProcessingInstruction with the specified name and data |
| CreateSignificantWhitespace | Createsan XmlSignificantWhitespace node |
| CreateTextNode | Creates an XmlText with the specified text |
| CreateWhitespace | Creates an XmlWhitespace node |
| CreateXmlDeclaration | Creates an XmlDeclaration node with the specified values |
| GetElementById | Gets the XmlElement with the specified ID |
| GetElementsByTagName | Returns an XmlNodeList containing a list of all descendant elements that match the specified name |
| ImportNode | Imports a node from another document to the current document |
| Load | Loads the XML documents from an object or stream |
| LoadXml | Loads the XML document from a string |
| ReadNode | Creates an XmlNode object based on the information in the XmlReader. The reader must be positioned on a node or attribute |
| Save | Saves the XML document to the specified location—a file, stream, or object |
An important property of the XmlDocument class is DocumentElement, which gets a reference to the root element of the document. This is a common starting point for procedures that navigate the tree structure. The XmlDocument also supports methods such as CreateElement and CreateAttribute to programmatically create new sections of XML data that can be appended or inserted into the document’s tree structure. Also important is the Load method for populating your XmlDocument from a disk file or other object, and the LoadXML method for populating your XmlDocument from a string. The Save method enables you to persist your XmlDocument to disk or to a Stream object that can be passed to another procedure.
Listing 7.8 shows two ways to load an XmlDocument: first from a disk file and then by using a string variable that you have created in your application code.
Listing 7.8: Loading an XmlDocument
Private Sub LoadDoc() Dim empDocument As XmlDocument = New XmlDocument() Dim newDocument As XmlDocument = New XmlDocument() Try 'load the first XmlDocument from a disk file empDocument.PreserveWhitespace = True empDocument.Load("C:\path\new-employees.xml") txtDisplay.Text = empDocument.InnerXml 'load the second XmlDocument from a string newDocument.PreserveWhitespace = True newDocument.LoadXml(("<employeelist>" & _ "<employee id='1' job='Editor'>" & _ "<name>John Smith</title>" & _ "</employee></employeeelist>")) 'Save the document to a file. newDocument.Save("C:\path\new-data.xml") Catch xex As XmlException MessageBox.Show(xex.Message) Catch ex As Exception MessageBox.Show(ex.Message) End Try End Sub Another important function of the XmlDocument is to create new items of XML data that can be added into an existing XML tree structure. After the new items are created, they must be added to a specific place in the tree structure by using the AppendChild, PrependChild, InsertBefore, InsertAfter, or ReplaceChild methods. Listing 7.9 shows an example of adding a new element and data to an XmlDocument.
Listing 7.9: Creating a New Element
Private Sub AddElement() Try Dim newElement As XmlElement = _ newDocument.CreateElement("salary") Dim newText As XmlText = _ newDocument.CreateTextNode(txtSalary.Text) Dim empList As XmlNodeList Dim empnode As XmlElement empList = _ newDocument.GetElementsByTagName("employee") empnode = CType(empList(0), XmlElement) empnode.AppendChild(newElement) empnode.LastChild.AppendChild(newText) newDocument.Save("C:\path\new-data.xml") Catch xex As XmlException MessageBox.Show(xex.Message) Catch ex As Exception MessageBox.Show(ex.Message) End Try End Sub Table 7.7 lists the extended properties and methods of the XmlElement class mostly have to do with working with an element’s attributes collection. There are methods to add, remove, and change the value of attributes.
| Property | Description |
|---|---|
| HasAttributes | Indicates whether or not the current node has any attributes. |
| IsEmpty | Indicates the tag format of the element. |
| GetAttribute | Indicates the attribute value for the specified attribute. |
| GetAttributeNode | References the specified XmlAttribute. |
| GetElementsByTagName | Returns an XmlNodeList containing a list of all descendant elements that match the specified name. |
| HasAttribute | Indicates whether the current node has the specified attribute. |
| RemoveAllAttributes | Removes all specified attributes from the element. Default attributes are not removed. |
| RemoveAttribute | Removes the specified attribute. |
| RemoveAttributeAt | Removes the attribute node with the specified index from the element. |
| RemoveAttributeNode | Removes an XmlAttribute. |
| SetAttribute | Sets the value of the specified attribute. |
| SetAttributeNode | Adds a new XmlAttribute. |
Listing 7.10 shows how to change an attribute value by using the SetAttribute method. The listing also provides an example of changing the text value of an XmlElement.
Listing 7.10: Changing Attribute and Element Values by Using the XmlElement Class
Private Sub ChangeValues() Dim empList As XmlNodeList Dim empNode As XmlElement Dim nameNode As XmlElement Dim nameList As XmlNodeList 'get a reference to the first employee element empList = newDocument.GetElementsByTagName("employee") empNode = CType(empList(0), XmlElement) 'change the attribute value, based on user input If txtID.Text <> "" Then empNode.SetAttribute("id", txtID.Text) End If 'get a reference to the name element, change the InnerText property If txtName.Text <> "" Then nameList = empNode.GetElementsByTagName("name") nameNode = CType(nameList(0), XmlElement) nameNode.InnerText = txtName.Text End If 'Save the document to a file. newDocument.Save("C:\path\new-data.xml") End Sub The XmlAttribute class has little in the way of extended properties. These are listed in Table 7.8.
| Property | Description |
|---|---|
| OwnerElement | References the XmlElement to which the attribute belongs |
| Specified | Indicates whether the attribute value was explicitly set |
The OwnerElement property returns a reference to the parent element. The Specified property indicates whether the attribute value was supplied when the attribute was created or whether it is a default value supplied in a DTD or schema.
The XmlText class inherits many of its extended properties and methods from the XmlCharacterData class, which stands in the inheritance chain between XmlNode and XmlText. These properties and methods (listed in Table 7.9) are useful for manipulating the data of the XmlText node.
| Property | Description |
|---|---|
| Data | The data of the node |
| InnerText | The concatenated values of the node and all the children of the node |
| Length | The length of the data, in characters |
| AppendData | Appends the specified string to the end of the character data of the node |
| DeleteData | Removes a range of characters from the node |
| InsertData | Inserts the specified string at the specified character offset |
| ReplaceData | Replaces the specified number of characters, starting at the specified offset with the specified string |
| SplitText | Splits the node into two nodes at the specified offset, keeping both in the tree as siblings |
| Substring | Retrieves a substring, of the full string, from the specified range |
Although there are many other related classes that represent the other items that you can find in an XML document, the XmlDocument, XmlElement, XmlAttribute, and XmlText classes are likely to be the ones that you will work with most frequently. After you understand how to use these classes, you can use the Visual Studio .NET documentation to find information about other classes that you might need to use from time to time.
You have looked at several of the most commonly used functions of XML DOM programming. Exercise 7.5 will put this all together in an application that loads XML data from a file, creates a new XmlDocument, loads it with a string that is created by incorporating user input, and then saves that file to disk. You will also learn about parsing errors that can occur when loading XmlDocuments, how to edit the data in an XmlDocument, and how to add new elements and attributes to existing XmlDocuments.This exercise uses the XML data file new-employees.xml that you created in Exercise 7.4.
Exercise 7.5: XML DOM Programming
-
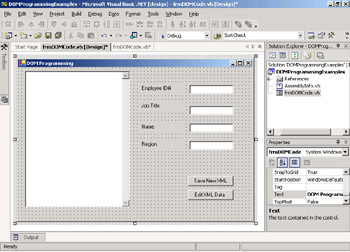
Start Visual Studio .NET and create a new Windows Application project called DOMProgrammingExamples. Rename the default form to frmDOMCode.
-
Add a TextBox control to the form named txtDisplay, and set its Multiline property to True and its ScrollBars property to Both.
-
Add four more TextBox controls and name them txtID, txtJobTitle, txtName, and txtRegion.
-
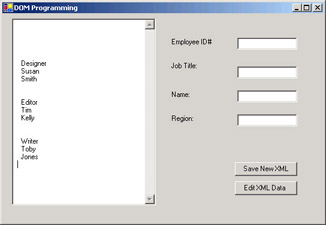
Add two Command Button controls to the form. Name them btnSaveXML and btnEditXML. Your form should look like the following one.
-
Add an Imports statement to the top of the form’s code module:
Imports System.Xml
-
Add two module-level variables for XmlDocuments:
Private empDocument As XmlDocument = New XmlDocument() Private newDocument As XmlDocument = New XmlDocument()
Loading XML Data:
-
In the frmDomCode_Load event procedure, add code to load the XmlDocument from a text file. Display the markup and data from the XmlDocument in txtDisplay. Also, add some simple error handling. Your code should look like this (use an appropriate drive and filename path for your computer):
Private Sub frmDOMCode_Load(ByVal sender As System.Object, _ ByVal e As System.EventArgs) Handles MyBase.Load Try empDocument.PreserveWhitespace = True empDocument.Load("C:\path\new-employees.xml") txtDisplay.Text = empDocument.InnerXml Catch xex As XmlException MessageBox.Show(xex.Message) Catch ex As Exception MessageBox.Show(ex.Message) End Try End Sub -
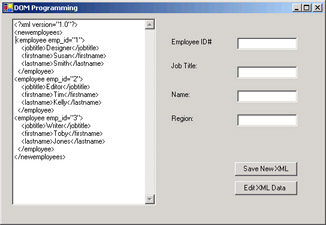
Save and test your work. When you run the application, you should see the entire XML data file, with both markup and data.
-
Change the line of code that displays the data to use the InnerText property:
txtDisplay.Text = empDocument.InnerText
-
Test the application again. You will see only data, and no markup in the text box.
Creating New XML Data in Your Application:
Create a new XmlDocument and load it with XML that you will build manually in code combining XML tags with data from user input. Use a StringBuilder object to create the XML data string.
-
Add another Imports statement to the top of the module for the StringBuilder object:
Imports System.Text
-
In the btnSaveXml_Click event procedure, write code to create the StringBuilder, and append XML markup and user input values from the TextBoxes. Use the LoadXML method to load the string data into the new XmlDocument, save the document, and display it.
-
Here is what your code should look like (use an appropriate path and filename for your computer):
Private Sub btnSaveXML_Click(ByVal sender As System.Object, _ ByVal e As System.EventArgs) Handles btnSaveXML.Click Dim xmlBuilder As StringBuilder = _ New StringBuilder("<employees>") Try xmlBuilder.Append(Environment.NewLine) xmlBuilder.Append("<employee id='") xmlBuilder.Append(txtID.Text) xmlBuilder.Append("' job='") xmlBuilder.Append(txtJobTitle.Text) xmlBuilder.Append("'>") xmlBuilder.Append(Environment.NewLine) xmlBuilder.Append("<name>") xmlBuilder.Append(txtName.Text) xmlBuilder.Append("</name>") xmlBuilder.Append(Environment.NewLine) xmlBuilder.Append("<region>") xmlBuilder.Append(txtRegion.Text) xmlBuilder.Append("</region>") xmlBuilder.Append(Environment.NewLine) xmlBuilder.Append("</employee>") xmlBuilder.Append(Environment.NewLine) xmlBuilder.Append("</employees>") newDocument.PreserveWhitespace = True newDocument.LoadXml(xmlBuilder.ToString) 'Save the document to a file. newDocument.Save("C:\path\new-data.xml") txtID.Clear() txtJobTitle.Clear() txtRegion.Clear() txtName.Clear() txtDisplay.Clear() txtDisplay.Text = newDocument.InnerXml Catch xex As XmlException MessageBox.Show(xex.Message) Catch ex As Exception MessageBox.Show(ex.Message) End Try End Sub -
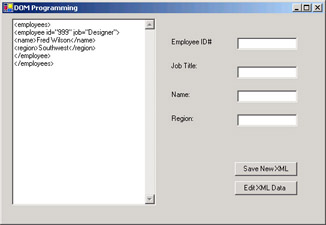
Save and test your work. Fill in a value in each of the four text boxes and then click the Save New XML button. You should see the newly created XML data displayed. Use Windows Explorer to verify that the disk file has also been saved.
Editing XML Data:
Next, implement code to change the data in the newDocument XmlDocument.
-
Add code to the btnEditXML_Click event procedure that will use the GetElementsByTagName method to identify the first <employee> element. You can then change the values for the id and job attributes by using the SetAttribute method. Change the values of the <name> and <region> elements by navigating to the node and then changing the InnerText property.
-
Here is what your code should look like (use an appropriate path and filename for your computer):
Private Sub btnEditXML_Click(ByVal sender As System.Object, _ ByVal e As System.EventArgs) Handles btnEditXML.Click Dim empList As XmlNodeList Dim empNode As XmlElement Dim nameNode As XmlElement Dim nameList As XmlNodeList Dim regionNode As XmlElement Dim regionList As XmlNodeList Try empList = newDocument.GetElementsByTagName("employee") empNode = CType(empList(0), XmlElement) If txtID.Text <> "" Then empNode.SetAttribute("id", txtID.Text) End If If txtJobTitle.Text <> "" Then empNode.SetAttribute("job", txtJobTitle.Text) End If If txtName.Text <> "" Then nameList = empNode.GetElementsByTagName("name") nameNode = CType(nameList(0), XmlElement nameNode.InnerText = txtName.Text End If If txtRegion.Text <> "" Then regionList = empNode.GetElementsByTagName("region") regionNode = CType(regionList(0), XmlElement) regionNode.InnerText = txtRegion.Text End If newDocument.Save("C:\path\new-data.xml") txtDisplay.Clear() txtDisplay.Text = newDocument.InnerXml Catch xex As XmlException MessageBox.Show(xex.Message) Catch ex As Exception MessageBox.Show(ex.Message) End Try End Sub -
Save and test your application. Run the application and type values into the four text boxes. Click the Save New XML button.
-
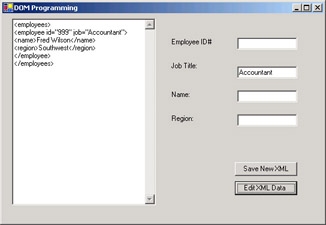
Change one or more of the text box values and click the Edit XML Data button. You should see the data in the XML display. Use Windows Explorer to verify that the disk file was saved and that it contains your changes.
Now you are going to create a brand new element (<salary>) to change the format of the XML file that you created in step 12 of this exercise.
-
Update the user interface by adding another TextBox named txtSalary and another Command Button named btnAddElement.

-
Add code to the btnAddElement_Click event procedure that will use XmlDocument’s CreateElement and CreateTextNode to create the new nodes. Then add the AppendChild method to add the new element as the last item in the <employee> element, and again to append the value from the TextBox to the element.
-
Your code should look like this (use an appropriate path and filename for your computer):
Private Sub btnAddElement_Click(ByVal sender As System.Object, _ ByVal e As System.EventArgs) Handles btnAddElement.Click Dim empList As XmlNodeList Dim empnode As XmlElement Try 'Create new element and text nodes Dim newElement As XmlElement = _ newDocument.CreateElement("salary") Dim newText As XmlText = _ newDocument.CreateTextNode(txtSalary.Text) 'identify the node we want to append to empList = newDocument.GetElementsByTagName("employee") empNode = CType(empList(0), XmlElement) 'append the new nodes empnode.AppendChild(newElement) empnode.LastChild.AppendChild(newText) txtDisplay.Clear() txtDisplay.Text = newDocument.InnerXml newDocument.Save("C:\path\new-data.xml") Catch xex As XmlException MessageBox.Show(xex.Message) Catch ex As Exception MessageBox.Show(ex.Message) End Try End Sub -
Save and test your application. Run the application and type values into the four text boxes. Click the Save New XML button.
-
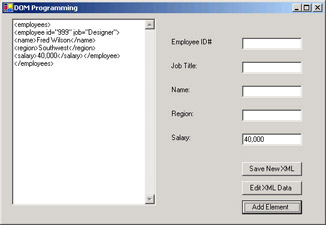
Type a value into the Salary text box and click the Add Element button. You should see the new data in the XML display. Use Windows Explorer to verify that the disk file was saved and that it contains your changes.
Now you have had a chance to work with the XML DOM to programmatically create and change both the data values and the structure of your XML data files. As you have seen in the tables in this section, many more methods can be explored. Exercise 7.5 demonstrated some of the most common operations.
In the rest of this section, you will learn about other tools that are used to manipulate XML data. First, you will look at XPath expressions.
Selecting Nodes with XPath
The XPath language enables you to locate nodes in your XML data that match specific criteria you are searching for. An XPath expression can specify criteria by evaluating either the position of a node in the document hierarchy, data values of the node, or a combination of both. For example, this expression will locate all last-name nodes:
//employee/lastname
But this expression will match only a node with the specific emp_id attribute value of 1:
//employee[@emp_id=1]/lastname
| Note | XPath queries can be quite complex. This is a simple introduction to creating XPath expressions; there is much more to the language. For more information, consult the Microsoft Developer Network (MSDN) Library, Microsoft XML SDK 3.0 documentation. Remember that XPath expressions are used with many different XML processing tools. The examples shown in Exercise 7.6 use the special classes in System.Xml.XPath, but you can use the same expression language with DOM programming and XSLT stylesheets. |
The SelectNodes method and the SelectSingleNode method of the XmlNode class use XPath instructions to locate a node or nodeset in your XML data. You can use these methods interchangeably with the GetElementsByTagName method that was demonstrated in Exercise 7.5.
Listing 7.11 shows how to use these methods. SelectNodes will return a NodeList collection of all nodes in the document that match your criteria. You can then iterate through the collection to retrieve data. SelectSingleNode returns a reference to a single node, the first match that is located.
Listing 7.11: Using the DOM Methods SelectNodes and SelectSingleNode
Private Sub FindXML() Dim doc As XmlDocument = New XmlDocument() Dim myNode As XmlNode Dim myNodeList As XmlNodeList Try doc.Load("C:\path\new-employees.xml") myNode = doc.SelectSingleNode( _ "//employee[@emp_id=1]/lastname") txtSingleNode.Text = myNode.InnerXml Dim node As XmlNode Dim nameString As String = _ "Employee Names: " & Environment.NewLine myNodeList = doc.SelectNodes("//employee/lastname") For Each node In myNodeList nameString &= node.InnerText & _ Environment.NewLine Next txtNodeList.Text = nameString Catch ex As Exception MessageBox.Show(ex.Message) End Try End Sub Another way to use XPath to query your XML data is to create and use an XPathNavigator object. This object is instantiated by calling the XmlDocument.CreateNavigator method. The XPathNavigator class has methods such as Select, Compile, and Evaluate to perform queries on your XML data by using XPath expressions.
The System.Xml.XPath namespace includes the XPathNavigator class and several other classes that you can use along with the XPathNavigator to optimize performance when you are working with XPath queries. These classes are the XPathDocument class, XPathExpression class, and the XPathNodeIterator class. Table 7.10 lists all the XPathNavigator class’s properties and methods.
| Property | Description |
|---|---|
| BaseURI | The base URI for the current node |
| HasAttributes | Indicates whether the element node has any attributes |
| HasChildren | Indicates whether the current node has child nodes |
| IsEmptyElement | Indicates whether the current node is an empty element (for example, <MyElement/>) |
| LocalName | The name of the current node without the namespace prefix |
| Name | The qualified name of the current node |
| NamespaceURI | The namespace URI (as defined in the W3C Namespace Specification) of the current node |
| NameTable | The XmlNameTable associated with this implementation |
| NodeType | The type of the current node |
| Prefix | The prefix associated with the current node |
| Value | The text value of the current node |
| XmlLang | The xml:lang scope for the current node |
| Clone | Creates a new XPathNavigator positioned at the same node as this XPathNavigator |
| ComparePosition | Compares the position of the current navigator with the position of the specified XPathNavigator |
| Compile | Compiles a string representing an XPath expression and returns an XPathExpression |
| Evaluate | Evaluates the given expression and returns the typed result |
| GetAttribute | Gets the value of the attribute with the specified LocalName and NamespaceURI |
| GetNamespace | Returns the value of the namespace node corresponding to the specified local name |
| IsDescendant | Determines whether the specified XPathNavigator is a descendant of the current XPathNavigator |
| IsSamePosition | Determines whether the current XPathNavigator is at the same position as the specified XPathNavigator |
| Matches | Determines whether the current node matches the specified XSLT pattern |
| MoveTo | Moves to the same position as the specified XPathNavigator |
| MoveToAttribute | Moves to the attribute with matching LocalName and NamespaceURI |
| MoveToFirst | Moves to the first sibling of the current node |
| MoveToFirstAttribute | Moves to the first attribute |
| MoveToFirstChild | Moves to the first child of the current node |
| MoveToFirstNamespace | Moves the XPathNavigator to the first namespace node of the current element |
| MoveToId | Moves to the node that has an attribute of type ID whose value matches the specified string |
| MoveToNamespace | Moves the XPathNavigator to the namespace node with the specified local name |
| MoveToNext | Moves to the next sibling of the current node |
| MoveToNextAttribute | Moves to the next attribute |
| MoveToNextNamespace | Moves the XPathNavigator to the next namespace node |
| MoveToParent | Moves to the parent of the current node |
| MoveToPrevious | Moves to the previous sibling of the current node |
| MoveToRoot | Moves to the root node to which the current node belongs |
| Select | Selects a node set by using the specified XPath expression |
| SelectAncestors | Selects all the ancestor element nodes of the current node matching the selection criteria |
| SelectChildren | Selects all the child nodes of the current node matching the selection criteria |
| SelectDescendants | Selects all the descendant nodes of the current node matching the selection criteria |
Listing 7.12 shows how to create an XPathDocument and load data into it, compile an XPath expression string into an XPathExpression object, and use the XPathNodeIterator when your XPath expression returns an XmlNodelList collection.
Listing 7.12: Creating an XPathNavigator
Private Sub ListJobs() Dim xpDoc As XPathDocument = _ New XPathDocument("C:\path\job-list.xml") Dim xpNav As XPathNavigator = xpDoc.CreateNavigator() Dim xpExpr As XPathExpression xpExpr = xpNav.Compile("//job_desc") Dim xpIterator As XPathNodeIterator = _ xpNav.Select(xpExpr) While (xpIterator.MoveNext()) Dim xpNav2 As XPathNavigator = _ xpIterator.Current.Clone() xpNav2.MoveToFirstChild() MessageBox.Show("Job title: " & xpNav2.Value) End While End Sub As Table 7.10 points out, the XPathNavigator also has a set of MoveToxx methods—such as MoveToFirstChild, MoveToNext, MoveToParent—which give you to opportunity to explicitly position the XPathNavigator at a specific node. For example, you might use an XPath expression to locate a particular employee node by matching the job_id attribute value. After you have located the node you are interested in, you can use the MoveToFirstChild method to get to a particular data item.
Exercise 7.6 shows you how to use the objects in the System.Xml.XPath namespace. You will create an XPathDocument and XPathNavigator. You will use an XPath expression to identify all matching nodes in the data file and then use an XPathNodeIterator to process each matching node. You will be using the file new-employees.xml that you created in Exercise 7.5.
Exercise 7.6: Using XPath Expressions and the XPathNavigator
-
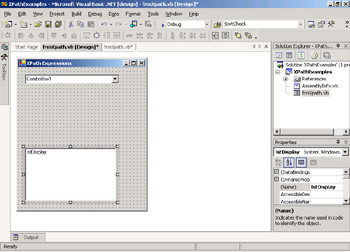
Start Visual Studio .NET and create a new Windows Application project called XPathExamples. Rename the default form to frmXPath.
-
Add a ComboBox control and a ListBox to the form named frmXPath. Name them cboSelect and lstDisplay. Your form should look like the following.
-
Add Imports statements to the top of the form’s code module:
Imports System.Xml Imports System.Xml.XPath
-
Add two module-level variables for an XPathDocument and an XPathNavigator (use the appropriate path and filename for your computer):
Private navDocument As XPathDocument = New _ XPathDocument("C:\path\new-employees.xml") Dim xpNav As XPathNavigator -
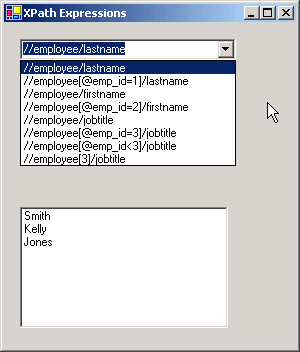
In the frmXPath_Load event procedure, add code to create the XPathNavigator and to fill the ComboBox with a set of different XPath expressions for testing:
Private Sub frmXPath_Load(ByVal sender As System.Object, _ ByVal e As System.EventArgs) Handles MyBase.Load xpNav = navDocument.CreateNavigator() cboSelect.Items.Add("//employee/lastname") cboSelect.Items.Add("//employee[@emp_id=1]/lastname") cboSelect.Items.Add("//employee/firstname") cboSelect.Items.Add("//employee[@emp_id=2]/firstname") cboSelect.Items.Add("//employee/jobtitle") cboSelect.Items.Add("//employee[@emp_id=3]/jobtitle") cboSelect.Items.Add("//employee[@emp_id<3]/jobtitle") cboSelect.Items.Add("//employee[3]/jobtitle") cboSelect.SelectedIndex = 0 End Sub -
In the cboSelect_SelectedIndexChanged event procedure, add code to retrieve the text of the selected XPath expression from the ComboBox. Then compile the expression and create an XpathNodeIterator to move through the set of nodes that match your XPath query. A second XPathNavigator is used to move from the matching element node to its first child node, which is a text node. The value of the text node is then displayed in the ListBox.
-
Your code should look like this:
Private Sub cboSelect_SelectedIndexChanged( _ ByVal sender As System.Object, _ ByVal e As System.EventArgs) _ Handles cboSelect.SelectedIndexChanged Dim selectString As String = cboSelect.Text Dim xpExpr As XpathExpression xpExpr = xpNav.Compile(selectString) Dim xpIterator As XPathNodeIterator = xpNav.Select(xpExpr) lstDisplay.Items.Clear() While (xpIterator.MoveNext()) Dim xpnav2 As XPathNavigator = xpIterator.Current.Clone() xpnav2.MoveToFirstChild() lstDisplay.Items.Add(xpnav2.Value) End While End Sub
-
Save and test your work. When the application starts, you will see a list of last names. These match the first item in the ComboBox list. Try the other combo box selections to see what data is returned.
Next, you will learn how to validate XML data with a schema.
Validating XML Data
In the beginning of this chapter, you learned the basics of creating an XSD schema document to describe the exact format for an XML data file. Although XML data files must be well formed to be used by any of the XML-aware classes in the .NET Framework, validating your XML data file against a specified schema adds another level of confidence that the data is going to be of the appropriate types and in the correct format. After you have validated your data file, you can use it in your application and you will be far less likely to encounter errors caused by using data types incorrectly. Validation is especially important when you are receiving XML data files from outside sources.
To perform validation while working with XML data in your application, you will use the XmlValidatingReader, one of the derived classes of the XmlReader base class that was discussed earlier in this chapter. The XmlValidatingReader class can be used to validate XML data that you are processing either with an XmlTextReader or with an XmlDocument.
To validate data in an XmlTextReader, create the XmlTextReader and load the XML data from a disk file or Stream object. Then create the XmlValidatingReader class and pass it a reference to the XmlTextReader. If your XML data has an in-line schema, that is all you have to do. If you are using a schema that is stored in a separate location, then you must create an object from the XmlSchemaCollection class and load the schema file into the collection.
| Note | Although XSD Schema is the most current technology available for validating your XML data, the .NET Framework classes also support validation against older DTD and XDR technologies. Set the XmlValidatingReader.ValidationType property to specify which version should be used. |
If you would like to use the XML DOM to programmatically access the data after it has been validated, you will still need to use the XmlTextReader to load the data from its original source (disk file or Stream object). Then pass the reference to the XmlTextReader to a new instance of the XmlValidatingReader. If validation is successful, then you can use the XmlDocument.Load method to populate the XmlDocument object, as shown in this code snippet:
Dim xmlDoc as XmlDocument = New XmlDocument() Dim txtReader as XmlTextReader = _ New XmlTextReader("C:\path\data.xml") Dim valReader as XmlValidatingReader = _ New XmlValidatingReader(tr) xmlDoc.Load(valReader) If a validation error occurs, an XmlException (for parsing errors) or an XmlSchemaException (validation error) will be fired. You can write error-handling code to processes these errors.
Listing 7.13 shows how to validate XML data by using an XmlTextReader and XmlValidatingReader, how to add an external schema file to the XmlSchemaCollection, and how to set up an error handler in case validation is not successful.
Listing 7.13: Validating by Using an XmlValidatingReader
Private Sub ValidateData() Dim valReader As XmlValidatingReader Dim txtReader As XmlTextReader Dim xscSchemas As New XmlSchemaCollection() Try xscSchemas.Add(Nothing, _ New XmlTextReader("C:\path\title-schema.xsd")) txtReader = New XmlTextReader( _ "C:\path\title-list.xml") valReader = New XmlValidatingReader(txtReader) valReader.Schemas.Add(xscSchemas) valReader.ValidationType = ValidationType.Schema While valReader.Read() If valReader.NodeType = XmlNodeType.Element Then If valReader.Name = "title" Then lstTitles.Items.Add( _ valReader.ReadInnerXml()) End If End If End While Catch e As Exception MessageBox.Show(e.ToString()) Finally valReader.Close() txtReader.Close() End Try End Sub In Exercise 7.7, you will set up an XmlValidatingReader to test the validity of an XML data file.
| Note | Exercise 7.7 uses an XML file called title-list.xml and a schema called title-schema.xml that can be found on the CD included with this book. |
Exercise 7.7: Validating with the XmlValidatingReader and XSD Schema
-
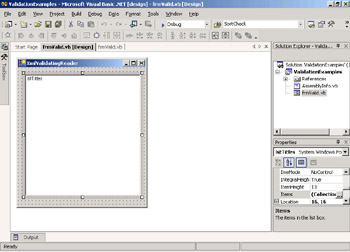
Start Visual Studio .NET and create a new Windows Application project called ValidationExamples. Rename the default form to frmValid.
-
Add a ListBox control and name it lstTitles. Your form should look like this:
-
Add Imports statements to the top of the form’s code module:
Imports System.Xml Imports System.Xml.Schema
-
In the frmValid_Load event procedure, add code to add the schema file to the schema collection, create the readers, and read through the data. Also, add error handling to catch any schema validation errors. Here is the code to do this (use the appropriate path and filename for your computer):
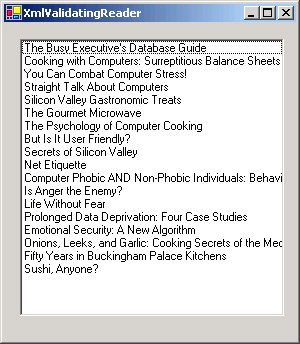
Private Sub frmValid_Load(ByVal sender As System.Object, _ ByVal e As System.EventArgs) Handles MyBase.Load Dim valReader As XmlValidatingReader Dim txtReader As XmlTextReader Dim xscSchemas As New XmlSchemaCollection() Try xscSchemas.Add(Nothing, New _ XmlTextReader("C:\path\title-schema.xsd")) txtReader = New XmlTextReader("C:\path\title-list.xml") valReader = New XmlValidatingReader(txtReader) valReader.Schemas.Add(xscSchemas) valReader.ValidationType = ValidationType.Schema While valReader.Read() If valReader.NodeType = XmlNodeType.Element Then If valReader.Name = "title" Then lstTitles.Items.Add(valReader.ReadInnerXml()) End If End If End While Catch schemaExp As XmlSchemaException MessageBox.Show(schemaExp.ToString()) Catch ex As Exception MessageBox.Show(ex.ToString()) Finally valReader.Close() txtReader.Close() End Try End Sub -
Save and test your work. The first time, this application should not throw any exceptions and a list of book titles should be displayed.
-
Open the file title-schema.xsd in Notepad or any other text editor. Here is what the schema file looks like:
<?xml version="1.0" standalone="yes"?> <xs:schema xmlns="" xmlns:xs="http://www.w3.org/2001/XMLSchema" xmlns:msdata="urn:schemas-microsoft-com:xml-msdata"> <xs:element name="NewDataSet" msdata:IsDataSet="true"> <xs:complexType> <xs:choice> <xs:element name="titles" maxOccurs="unbounded"> <xs:complexType> <xs:sequence> <xs:element name="title_id" type="xs:string" minOccurs="1" /> <xs:element name="title" type="xs:string" minOccurs="1" /> <xs:element name="type" type="xs:string" minOccurs="1" /> <xs:element name="pub_id" type="xs:string" minOccurs="1" /> <xs:element name="price" type="xs:decimal" minOccurs="0" /> <xs:element name="advance" type="xs:decimal" minOccurs="0" /> <xs:element name="royalty" type="xs:int" minOccurs="0" /> <xs:element name="ytd_sales" type="xs:int" minOccurs="0" /> <xs:element name="notes" type="xs:string" minOccurs="0" /> <xs:element name="pubdate" type="xs:dateTime" minOccurs="0" /> </xs:sequence> </xs:complexType> </xs:element> </xs:choice> </xs:complexType> </xs:element> </xs:schema>
-
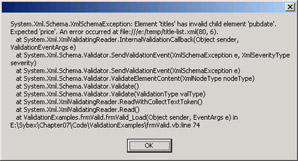
Change the minOccurs="0" attribute (highlighted in bold in the preceding code) for the price element to minOcccurs="1".Save the schema file and run the application again. You should see the following error message.
Here is an example for the format of XML in the title-list.xml file.
<?xml version="1.0" standalone="yes"?> <NewDataSet> <titles> <title_id>BU1032</title_id> <title>The Busy Executive's Database Guide</title> <type>business</type> <pub_id>1389</pub_id> <price>29.2674</price> <advance>5000</advance> <royalty>10</royalty> <ytd_sales>4095</ytd_sales> <notes>An overview of available database systems with emphasis on common business applications. Illustrated.</notes> <pubdate>1991-06-12T00:00:00.0000000-07:00</pubdate> </titles> </NewDataSet>
-
Open the file in Notepad and remove the first <title_id> element. Save the file and test the application again. You will now see the following error message.
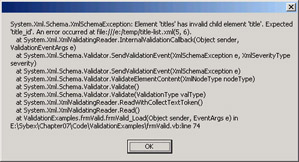
Experiment with other changes to the files and see what other types of error messages you receive.
Performing XSLT Transformations
Extensible Stylesheet Language (XSL) and XSL Transformations (XSLT) is a technology that can be applied to XML data files when you need to take an existing format of XML data and change it into a new format of output. The two primary uses for this are to take XML data and apply HTML formatting tags so that the data can be displayed on a web page and to change the format of the XML markup (while retaining the data values) so that the XML file can be sent to another application or consumer that requires the new format.
These are only the most commonly used scenarios. You can use XSLT to produce any application-specific output that you require.
| Note | Designing XSLT stylesheets is a complex topic and is outside the scope of the 70-310 exam and therefore this book. A sample stylesheet and accompanying XML data file (title-list.xml and title-style.xsl) are included on the CD that comes with this book so that you can complete Exercise 7.8. |
XSLT stylesheets have some things in common with XSD schemas in that they are also valid and well-formed XML documents, and the elements and attributes that make up a stylesheet must adhere to a standard that is recommended by the W3C. XSLT stylesheets consist of a set of templates describing the output that is produced when each node in the source XML data file is processed. XSLT stylesheets are used in conjunction with an XSLT processor. Microsoft Internet Explorer (version 5 and later) is capable of performing XSLT processing. If you open an XML data file that contains an XSL processing instruction, Internet Explorer will process the stylesheet and display the formatted data.
When working with classes in the System.Xml namespace (XmlDocument, XmlDataDocument, and the XPathDocument), you can use the XslTransform class from the System.Xml.Xsl namespace to perform the stylesheet processing. If you are concerned only with XSLT processing—and do not need to do other processing on the data—the XPathDocument is optimized for the best performance during XSLT processing.
The XslTransform class has a simple interface. Its single property, XmlResolver, is used to locate external stylesheet files. The Load method is used to read the XSLT file into the object, and the Transform method is used to perform the stylesheet processing. An XmlReader object is used to hold the results of the XSLT transformation. You can then use the methods of the XmlReader to access your data.
Listing 7.14 shows you how to use the XslTransform class to do stylesheet processing in your code.
Listing 7.14: Performing XSLT Transformations
Dim objTransform As XslTransform = New XslTransform() objTransform.Load(Server.MapPath("title-style.xsl")) Dim objData As New XPathDocument( _ Server.MapPath("title-list.xml")) Dim objReader As XmlReader objReader = objTransform.Transform(objData, Nothing) Exercise 7.8 shows you how to take an XML data file and apply stylesheet transformation to produce a nicely formatted HTML page. You can do this in an ASP.NET page and send XML data directly to the browser.
Exercise 7.8: Displaying XML Data as HTML
-
Start Visual Studio .NET and create a new ASP.NET Web Application project called TransformationExample.
-
In the Form Designer for WebForm1.aspx, click the HTML tab near the bottom left of the screen to display the HTML for the page. Inside the <form> tags, type in a <div> tag that will be used to display the data:
<div runat="server"></div>
-
Your HTML should look like this graphic:

-
Right-click WebForm2.aspx in the Solution Explorer and choose View Code from the menu.
-
Add Imports statements to the top of the form’s code module:
Imports System.Xml Imports System.Xml.XPath Imports System.Xml.Xsl
-
In the Page_Load event procedure, add code to do the following:
-
Create an XslTransform object and load an XSLT stylesheet file
-
Create an XPathDocument and load an XML data file
-
Create an XmlReader object to hold the results of the transformation
-
Call the Transform method
-
Display the results in a <div> control
Your code should look like this:
Private Sub Page_Load(ByVal sender As System.Object, _ ByVal e As System.EventArgs) Handles MyBase.Load Dim objTransform As XslTransform = New XslTransform() objTransform.Load(Server.MapPath("title-style.xsl")) Dim objData As New XPathDocument( _ Server.MapPath("title-list.xml")) Dim objReader As XmlReader objReader = objTransform.Transform(objData, Nothing) objReader.MoveToContent() divOutput.InnerHtml = objReader.ReadOuterXml End Sub
-
-
Locate the files title-list.xml and title-style.xsl in the Chapter 7 folder on the CD that is included with this book. Copy these files to the project directory, which should be located at C:\Inetpub\wwwroot\TransformationExample (or the appropriate path and directory for your web server). Use Notepad to review the contents of these files.
-
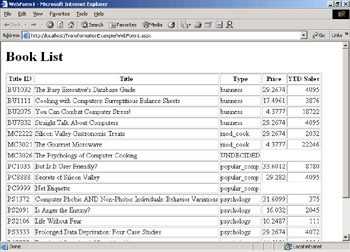
Save and test your work. Run the application. Your web page should look like the following one.
Synchronizing XMLDataDocuments and DataSets
The XmlDataDocument class is a member of the System.Xml namespace that brings the best capabilities of a DataSet and an XmlDocument together. You can create a DataSet by retrieving data from a database and then create the XmlDataDocument by referencing the DataSet. This is called synchronizing the DataSet and the XmlDataDocument.
After you have established that these two objects should remain synchronized, you can use the properties and methods of the DataSet to work with the data as relational tables and, when needed, use the properties and methods of the XmlDocument to work with the data as a hierarchy of nodes.
The XmlDataDocument inherits most of its properties and methods from either the XmlNode base class or the XmlDocument class, all of which have already been explained in this chapter. Following are some code examples that show how to synchronize the two objects.
The following shows how to start with a DataSet created from database data, and then create and synchronize the XmlDataDocument:
Dim myDataSet As DataSet = New DataSet MyDataAdapter.Fill(myDataSet) Dim xmlDoc As XmlDataDocument = _ New XmlDataDocument(myDataSet)
This code shows how to start with an XmlDataDocument and load it with an XML data file, and then create and synchronize the DataSet:
Dim xmlDoc As XmlDataDocument = New XmlDataDocument Dim myDataSet As DataSet = xmlDoc.DataSet MyDataSet.ReadXmlSchema("schema.xsd") xmlDoc.Load("XMLDocument.xml") One constraint of working with XMLDataDocuments is that the DataSet you are synchronizing with must have a schema established. In the first example, this could be accomplished by allowing the DataSet to infer a schema when data is loaded from the database. In the last example, you should explicitly load a schema file into the DataSet before synchronizing with the XmlDataDocument.
Now that you have the seen major classes in the .NET Framework that work with XML data in your applications, the final section of this chapter will deal with some special capabilities of Microsoft SQL Server 2000 for handling XML data.
EAN: 2147483647
Pages: 153