Deploying XML Web Services
There are two techniques for deploying an XML Web service: using XCOPY deployment or adding a Web Setup project to the solution containing the XML Web service that you would like to deploy. This section shows you the steps required in creating a setup program for your service. After you’ve learned how to create the setup program, you will learn how to publish your XML Web service to the UDDI registry.
Creating a Setup Program
One of the goals of the .NET Framework is the zero-impact install, which means you can install an application simply by copying the application folder and contents to the destination computer. This type of install is usually referred to as XCOPY deployment; on many occasions, you might not be able to use this type of deployment strategy. You might have an application that is dependent on a COM component, that needs to add an assembly to the global assembly cache (GAC), or you just desire a user interface for the installation process. For these reasons, you would create a setup program for your application. In Chapter 10, you built setup programs for different types of projects and application types.
In Exercise 11.1, you will see that creating a setup program for an XML Web service is not much different from any of the other setup projects that you have built.
Exercise 11.1: Creating a Setup Program
-
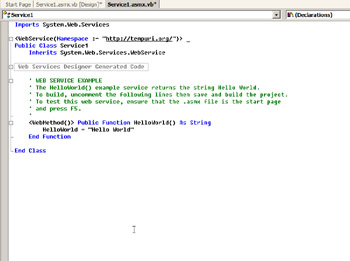
Create a new Visual Basic .NET ASP.NET Web service project named WebServiceSetup.
-
Switch to the Code view and remove the commenting from the sample HelloWorld() function.
-
In the Solution Configurations drop-down list, switch the build output to Release.
-
Build and test the project to make sure that it works.
-
From the Solution Explorer, right-click the WebServiceSetup solution and choose Add Ø New Project.
-
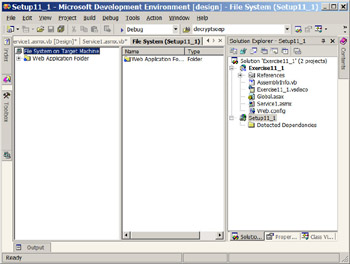
From the Add New Project dialog box, select the Web Setup project from the Setup And Deployment Project list. Name the Web Setup project Setup11_1. Your screen should be similar to the following one.
-
Right-click Web Application Folder and choose Add Ø Project Output.
-
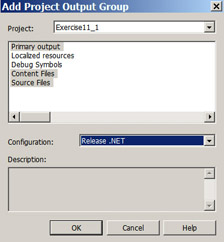
From the Add Project Output Group dialog box, hold down the Ctrl key and select Primary Output, Content Files, and Source Files to include the selected types in the setup package.
-
Build the Setup11_1 project, save all the files, and exit Visual Studio .NET.
-
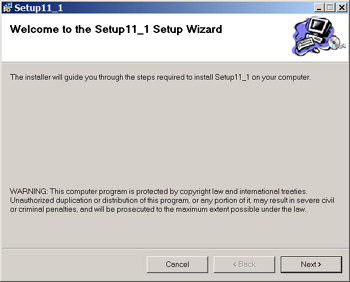
Navigate to the Release folder for this project and double-click the Setup11_1.msi file to launch the Installation Wizard.
-
Click the Next button to view the Select Installation Address page.

-
Verify that the address and port information are as desired and click Next to confirm the installation.
-
Click Next to install the XML Web service.
-
Click the Close button to close the Installation Wizard.
-
Test the newly installed XML Web service by browsing to http://localhost/Setup11_1/Service1.asmx.
-
Save and close.
Publishing XML Web Services
Now that you have built your XML Web services, you’ll want a way for your customers to learn about and hopefully consume them. To make the information available to potential customers, you will typically publish information about your Web service either within your site or to a public directory. The process by which potential consumers locate available Web services is called XML Web service discovery.
XML Web service discovery is the process of finding and reading XML Web service descriptions (WSDL documents). This is an important first step in consuming a Web service. By taking advantage of the discovery process, a Web service consumer can learn how to interact with a particular service.
There are two kinds of discovery: static and dynamic. Static discovery is accomplished by creating an XML .disco file that contains links to other discovery documents, XML schemas, and WSDL documents. ASP.NET automatically exposes the contents of .disco documents that can be viewed by appending ?DISCO to the URI of the Web service file (.asmx). For example, if you wanted to view the discovery document for a Web service at http://myServer/service1.asmx, you would navigate to http://myServer/service1.asmx?DISCO. Dynamic discovery occurs when ASP.NET iterates through the folders of a web server to search for available XML Web services.
In addition to publishing information about your XML Web service within your site, you will probably want it published to a central directory of Web services. Next, you will learn how to enable both static and dynamic discovery, as well as how to create the necessary documents to send to the UDDI for publication.
Manually Enabling Static Discovery
The static discovery, or .disco, file is an XML document containing links to the documents that contain information about the service(s). The purpose of the .disco file is to have a single location to learn about the services exposed from a particular source.
The discovery file, typically named with the .disco extension, is an XML file that should contain a <discovery> element as its root, as in the following example:
<?xml version="1.0" ?> <discovery xmlns:="http://schemas.xmlsoap.org/disco"> </discovery>
Add all of the references that you prefer to publicly expose to the <discovery> element. Service description references are specified by adding a <contractRef> with the http://schemas.xmlsoap.org/disco/scl namespace referenced. The <contractRef>element should have a ref attribute and a docRef attribute. The ref attribute should point to the WSDL of the service, and the docRef attribute should reference the service file (.asmx) itself. You can also include references to other discovery files by adding a <discoveryRef> element. The ref attribute of the <discoveryRef> element should point to another discovery file. The following example represents these settings:
<?xml version="1.0" ?> <discovery xmlns:="http://schemas.xmlsoap.org/disco"> <discoveryRef ref="http://www.myserver.com/myServices/Service2.disco" /> <contractRef ref="http://www.myserver.com/myServices/Service1.asmx?WSDL" docRef="http://www.myserver.com/myServices/Service1.asmx" xmlns:="http://schemas.xmlsoap.org/disco/scl" /> </discovery>
Enabling Dynamic Discovery
Dynamic discovery is enabled by including a file named default.vsdisco from the root folder of the website. IIS will map the .vsdisco file to the aspnet_isapi.dll and the System.Web.Services.Discovery.DiscoveryRequestHandler. This handler will search the folder that the .vsdisco file is located in and all of its subfolders for XML Web service (.asmx) files, dynamic discovery (.vsdisco) files, and static discovery (.disco) files.
Similar to the static discovery file, the dynamic discovery file is also formatted as XML. The root element is named <dynamicDiscovery> and can contain one or more <exclude> elements with a path attribute that specifies the relative paths that are not to be searched. Visual Studio .NET will create a .vsdisco file automatically when you create an XML Web service project. The following code is an example of the contents of the .vsdisco file generated by Visual Studio:
<?xml version="1.0" encoding="utf-8" ?> <dynamicDiscovery xmlns="urn:schemas-dynamicdiscovery:disco.2000-03-17"> <exclude path="_vti_cnf" /> <exclude path="_vti_pvt" /> <exclude path="_vti_log" /> <exclude path="_vti_script" /> <exclude path="_vti_txt" /> <exclude path="Web References" /> </dynamicDiscovery>
Publishing Web Service Descriptions to UDDI
Universal Description, Discovery, and Integration (UDDI) is a collection of specifications for distributed Web-based registries of XML Web services. UDDI provides details about the XML Web services that a particular company exposes. In addition, it supplies Web service consumers with the location of endpoints for a given service as well as the binding information for a specific endpoint.
The UDDI Data Structure Specification defines the XML schema that must be used to describe types in the UDDI. Five data types are defined by the specification: <businessEntity>, <businessService>, <bindingTemplate>, <tModelInstanceDetails>, and <tModel>.
The <businessEntity> Element
The businessEntity element describes the business that is the responsible party for registering the XML Web service in the UDDI. This element contains details about the business, such as its name and contact information. The following XML shows a sample <businessEntity>:
<businessEntity businessKey="7F468458-1214-49BE-996E-F44622BAF924" operator=""> <name>Weather Incorporated</name> <description xml:lang="en"> Weather Forecast Service </description> <contacts> <contact> <description xml:lang="en"> Service Administrator </description> <personName>Thomas Anderson</personName> <phone>302-555-1212</phone> <email>neo@WeatherInc.com</email> <address> <addressLine>1313 Mockingbird Lane</addressLine> <addressLine>Wilmington, DE</addressLine> </address> </contact> </contacts> </businessEntity>
The <businessService> Element
The businessService element describes the XML Web service that the business entity is exposing. This element names the service, as well as associates it with a business entity and binding information. You can also assign categories to the Web service, such as industry, product, and so on. The following XML shows a sample <businessService>:
<businessService businessKey="7F468458-1214-49BE-996E-F44622BAF924" serviceKey="3520889E-918E-4d78-AEF2-666334819141"> <name>Business Service</name> <description xml:lang="en">Description goes here</description> <bindingTemplates> <!-- zero or more binding templates --> <bindingTemplate> Elements go here </bindingTemplate> </bindingTemplates> </businessService>
The <bindingTemplate> Element
The binding Template element describes the technical specifications that are required to bind to a particular XML Web service. The binding information is either an access point or a hosting redirector.
The <accessPoint> element describes the entry point. It contains an attribute named URLType, which is used to specify one of the seven types of entry points. These types are listed in Table 11.1.
| Entry Point | Description |
|---|---|
| Mailto | The access point is an e-mail address. |
| Http | The access point is an HTTP-compatible URL. |
| Https | The access point is an HTTP Secure (HTTPS)–compatible URL. |
| Ftp | The access point is a File Transfer Protocol (FTP)–compatible URL. |
| Fax | The access point is a fax telephone number. |
| Phone | The access point is a voice telephone number. |
| Other | The access point is in some other format. |
The following sample shows an <accessPoint> element:
<accessPoint URLType="http"> http://www.abcinc.com/weather/weatherService.asmx </accessPoint>
The following sample demonstrates a <bindingTemplate> element using an <accessPoint> element:
<bindingTemplate bindingKey="" serviceKey=""> <description xml:lang="en"> Weather Service binding template </description> <accessPoint URLType="http"> http://www.abcinc.com/weather/weatherService.asmx </accessPoint> <tModelInstanceDetails> <!-- zero or more --> <tModelInstanceInfo/> </tModelInstanceDetails> </bindingTemplate>
Instead of providing an <accessPoint> element, you can use the <hostRedirectory> element to point to another <bindingTemplate> for the specific binding information. The <hostRedirectory> element can also be used to allow for multiple binding templates to be associated with a single XML Web service.
The <tModelInstanceDetails> Element
The tModelInstanceDetails element contains zero or more <tModelInstanceInfo> elements. The <tModelInstanceInfo> element has an attribute named tModelKey, which identifies a specific tModel (explained in the next section). Also included in the <tModelInstanceDetails> element are a description of the Web method a reference to the overview document, and instance parameters. The following sample shows a <tModelInstanceInfo> element:
<tModelInstanceInfo tModelKey="uuid:F3CD9457-9669-4E36-90E7-DEC7F512B8F3"> <description xml:lang="en"> Weather tModel </description> <instanceDetails> <description xml:lang="en"> Weather instance details description </description> <overviewDoc> <description xml:lang="en"> Weather service overview </description> <overviewURL> http://www.abcinc.com/weather/weatherService.asmx </overviewURL> <instanceParms> http://www.abcinc.com/weather/params.aspx </instanceParms> </overviewDoc> </instanceDetails> </tModelInstanceInfo>
The <tModel> Element
One of the major goals of UDDI is that XML Web service descriptions are thorough enough to enable a developer to easily interact with a service that they don’t know much about. To accomplish this goal, metadata must be attached to an XML Web service. The metadata could define how the service behaves, or what standards it complies to. The tModel element contains the information used to describe compliance with a specification, concept, or shared design. The <tModel> element contains a key, a name, an optional description, and a URL where you can find more information about the XML Web service. The following XML sample shows a document that can be used to register a <tModel>:
<tModel tModelKey="uuid:FD725AA4-A623-4372-A25E-4276FE7E7776"> <name>Weather tModel</name> <description xml:lang="en">A TModel for the Weather Web service</description> <overviewDoc> <description xml:lang="en">The Weather XML Web service tModel</description> </overviewDoc> <overviewURL>http://www.abcinc.com/Weather/overview.htm</overviewURL> </tModel>
The <publisherAssertion> Element
It is not uncommon for a given business entity to represent a department or business unit from a large organization. To maintain a relationship between business entities, you would include the <publisherAssertion> element. The following example represents the <businessEntity>. The businessKey value of E510D323-4DAB-4DD6-84C0-00F3D3CF2F34 represents the parent company of the <businessEntity> and the toKey value of 5F246BD1-1B4F-4182-B9C6-5D3CAF0ED3A6 represents the department or business unit:
<publisherAssertion> <fromKey>E510D323-4DAB-4DD6-84C0-00F3D3CF2F34</fromKey> <toKey>5F246BD1-1B4F-4182-B9C6-5D3CAF0ED3A6</toKey> <keyedReference tModelKey="uuid:FD725AA4-A623-4372-A25E-4276FE7E7776" keyName="Parent Company" keyValue="parent-child" /> </publisherAssertion>
In order to publish your business entity and XML Web services to a UDDI registry, such as http://www.uddi.org, you will provide the XML documents that you have created to a UDDI node. Microsoft and IBM have their own nodes: http://uddi.microsoft.com and http://uddi.ibm.com, respectively. You can also use the UDDI Programmer’s Application Programming Interface (API) that is a part of the UDDI Software Developer’s Kit (SDK).
| Note | At the time of this writing, there is no private UDDI registry solution that can be used within a company’s infrastructure. Windows 2003 Server is slated to include a UDDI registry service that companies can use as their own registry for both internal and external services. |
EAN: 2147483647
Pages: 153