Editing Pages Based on a Template
|
| < Day Day Up > |
|
Editing pages that are template-based is straightforward. You will not be able to edit locked regions, and a red, circle-slash lets you know it. You can modify editable, as set up by the selectors you chose when you added the region in the template. Optional regions are controlled from Code view.
Habitat Alert site Follow these steps to edit the four new pages based on the Habitat Alert template.
-
In the Site panel, select each of the index pages in the act, find, learn, and support folders.
Tip Shift+clicking non-contiguous files results in selecting unwanted files. Use Ctrl+click (Command+click) instead.
-
Right-click (Control+click) and choose Open or choose File ® Open. All four documents open.
The way the documents are arranged depends on your workspace preferences. All open documents will be listed and are accessible in the Window menu. Because all the documents are named
 index.htm, it might seem hard to tell which page you are editing; you can tell which document you are working on by looking at the path structure at the top of the document.
 -
Choose the act/index.htm page. The most obvious edit needed is the location image. Choose Modify ® Template Properties.
-
In the Template Properties dialog box, select the locationsrc attribute. You must hand-edit the path to display the proper image. Change the existing path to: ../sharedimages/ locations/location_act.gif (change home to act); then click OK.
-
Save and preview the page. The new image is displayed. Close the page.
-
Repeat the process (Steps 3–5) for each of the section pages. The paths are the same for each except that the ending matches the sections, as shown in the following table.
Section/Page
locationsrc path
act/index.htm
../sharedimages/locations/location_act.gif
find/index.htm
../sharedimages/locations/location_find.gif
learn/index.htm
../sharedimages/locations/location_learn.gif
support/index.htm
../sharedimages/locations/location_support.gif
-
In the find/index.htm page, choose Modify ® Template Properties, and select Sidebar Image. Uncheck Show Sidebar Image. Select Other Jump Menus and check the Show Other Jump Menus box.
-
Click the What's New listing and uncheck its Show box. Click OK.
-
The circle area in your page has probably collapsed in Dreamweaver view. Preview in a browser and you'll see that all is well. It will look like Figure 37-10 somewhat. Don't worry, you'll fix that now. If it is totally collapsed, place your cursor into the Main Content area and select its <td> tag. Switch to Code view. Click the <td> tag again. Now look above this cell's code to the cell that used to display the circle Sidebar image, which is no longer there!
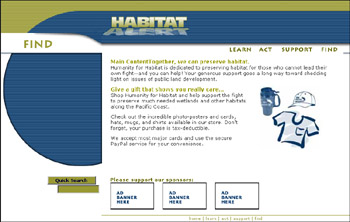
Figure 37-10: The image is no longer visible but the background of the circle is.Note The need to click twice is a bug in the program that will likely be fixed for future releases. Meanwhile, clicking twice is a good workaround.
-
Scroll in Code view and place your cursor between the editable region tags to <!-- InstanceBeginEditable name="EditRegion5" -->place cursor here<!-- InstanceEndEditable -->. Then return to Design view.
-
Use the Image Assets to add a spacer image, setting its width to 231px. Leave the height at 1px. Press Enter to update and save the page. Figure 37-11 shows the new, empty blue circle area. Save this page. In the next chapter, you edit it to add more form content.
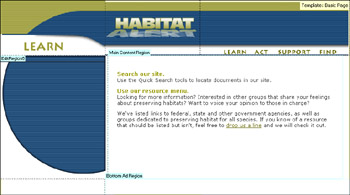
Figure 37-11: Look! No picture! The blue circle area is created by the background image for this cell.
|
| < Day Day Up > |
|
EAN: 2147483647
Pages: 491