Chapter 32: Starting a Web Site with Dreamweaver
|
| < Day Day Up > |
|
The basic approach to building a Web site is to build pages on your local computer's hard drive, then transfer a folder with all the site's content to a Web server to make it publicly available. Dreamweaver MX includes features to help you in this process, from structuring the files and folders to publishing static or dynamic Web content.
It all starts with defining a site. In this chapter, you tell Dreamweaver where you want to store your Web files and folders and learn to manage them using the Site panel.
Defining a Site
Defining a site gives Dreamweaver information about a project's root folder. A root folder is the outermost folder that contains all the elements of a Web site. There are two kinds of root folders, local and remote. The local root folder lives on your computer's hard drive. The remote root folder lives on a Web server — usually on a different computer — connected to the Internet or a local network. You may have more than one remote folder set up: one where you test and another for publishing.
There are two important steps to defining a static site in Dreamweaver MX. A third step is required for defining dynamic (data-driven) sites:
-
Locating the local root folder that stores all the site elements
-
Entering the Web server access information for the remote site
-
Specifying an application server model
Additionally, you may set up different testing servers used in dynamic development prior to publishing. Next we will define the site for the Habitat Alert Web site. Then in the ColdFusion portion of this book you will set up the testing server.
Local info
Habitat Alert site Copy the habitat_alert_start folder from this book's CD-ROM to your hard drive. Be sure to unlock the files. To add local information, name your site, and show Dreamweaver where the root folder is located on your computer's hard drive.
| Note | Because this book may not be used in a linear fashion you will be provided the site folder for each chapter of the Dreamweaver section where needed. You'll need to define a new site (or edit the path for the local root folder) for each chapter. |
Follow these steps to define your site:
| Tip | There are two modes you can use to set up your site, Advanced and Basic. Use Advanced if all you want to do is begin to build a site and worry about publishing later. |
-
Choose Site ® New Site from the application menus. Click the Advanced tab.
-
Click the Local Info category if it isn't already selected (blue highlight). Enter Habitat Alert for your site's name in the Site field.
-
Click the Browse for Folder icon (Figure 32-1) beside the next field. Locate the folder where your site files are contained.
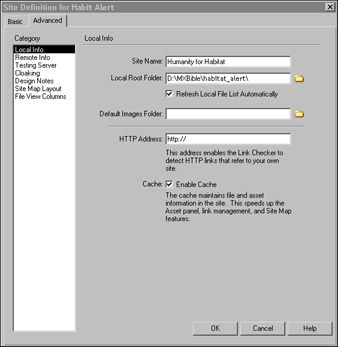
Figure 32-1: Name your site and select a root folder.Note If you are starting a site from scratch, create a new folder where you plan to place all your Web files, folders, and other assets.
-
Leave everything else default.
Dreamweaver MX features a new Site Setup Wizard that you may find helpful. Basic mode asks simple questions to elicit the right information for your site:
-
Choose Site ® New Site from the application menu.
-
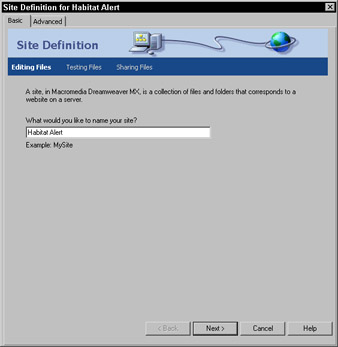
Select the Basic Tab to use the wizard.
-
Enter your site's name. This is a name you can use later to select a site from the Site panel's Site menu. Try to keep your site names short. Also, some characters are not allowed. They are /, |, \, :, ?, *, <, and >.
-
Click the Next button.
Basic Site Setup Mode -
If building a static site, select the first option in Editing Files, Part 2. A dynamic site uses the second option. Click Next.
-
Select the first, recommended option to Edit locally, then upload to a server when ready in Editing Files, Part 3.
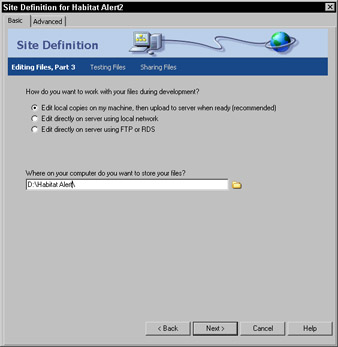
Select where you will store files locally. -
Click the Browse for Folder icon and locate and select the local root folder of your site. Click the Next button.
-
Choose None from the menu on the Sharing Files screen. This is equivalent to Server Access in Advanced mode, Remote Info. To add remote information, you choose your method of transferring files to a remote Web server or local, networked Web server. This chapter presumes you will leave this set at None. Click Next.
-
The Summary page shows you the information you supplied. Click Done.
Remote info
Building a site presumes that somewhere, somehow, someone will see the site. There are many different ways to publish a site, from uploading to a Web server connected to the Internet to burning the site to a CD for local browsing.
Click the Remote Info category in the Site Definition dialog box. Figure 32-2 shows where remote information is added. You need not add any information about how you plan to publish your site to start building it.
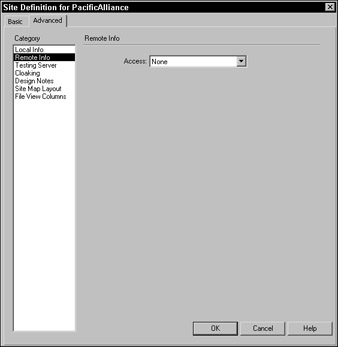
Figure 32-2: Information about the Web server is added in the Remote Info category.
| Cross-Reference | More detail about the publishing portion of Site setup can be found in Chapter 45. If you are building a dynamic site, see Chapter 46 to learn how to set up your site with server application information. |
Click OK to close the Site Definition window.
|
| < Day Day Up > |
|
EAN: 2147483647
Pages: 491