Adjusting Black and White Points
| The Levels slider under the histogram gives you two independent controls for adjusting the black and white points, which define the pixels that should be considered pure black and those that should be considered pure white. To adjust the black and white points of a photo:
What the Levels sliders doIf, when you look at a photo's histogram, you see a blank space between the end of the mountain ranges and the black or white points (Figure 4.53), it's often safe to move those sliders toward the middle of the histogram, which is conceptually the same as grabbing the edges of the mountain ranges and pulling them out to the edges of the histogram. In Figure 4.54, I've moved the black point to the right to deepen the shadows; it's redefining what was a dark gray as total black. In Figure 4.55, I've moved the white point to the left to set a new value for what should be considered white, thus making the water glow a bit. Figure 4.53. All the pixels in this image are huddled together in the middle of the histogram.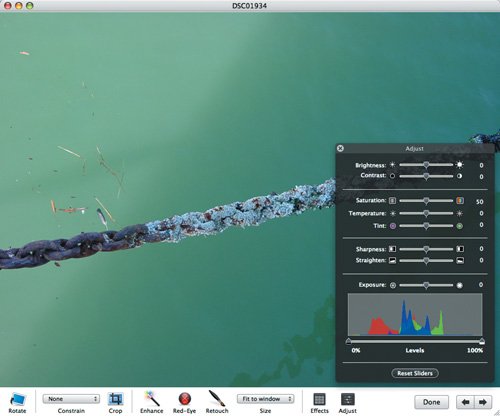 Figure 4.54. By redefining the black point, I give the picture a little more depth and darkness.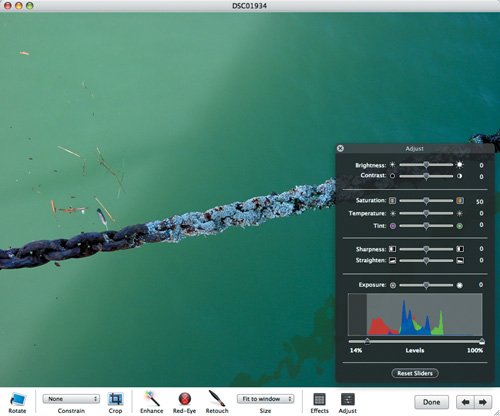 Figure 4.55. Then, resetting the white point brings up the luminosity a bit.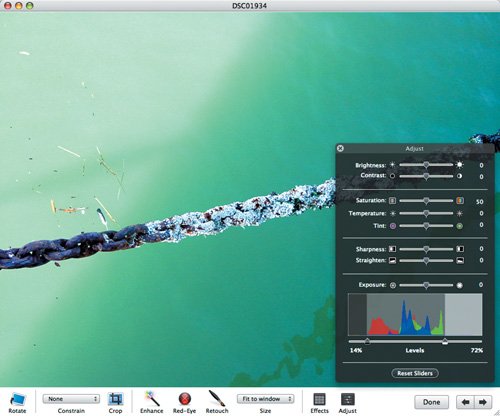 Tip
|